Skip to content

Import any XML or CSV File (Free WP All Import Compatibility)

Bring your listings into MyHome from any XML or CSV file with the free WP All Import plugin: upload the file, drag your data onto the right listing fields, run the import, and connect parent–child taxonomies once it finishes.

3 minute read

If you wish to import listings from your XML or CSV file, you can use the free version of the WP All Import Plugin.

This article shows how it works. Please bear in mind that each XML / CSV file can be a little different. If you have any problem with the import, you can always contact our developers here.

Upload your file

  1. 1 Install WP All Import

    Install the free WP All Import plugin. You can find it here.

  2. 2 Open the plugin

    Once activated, the plugin adds an All Import entry at the bottom of the WordPress admin sidebar.
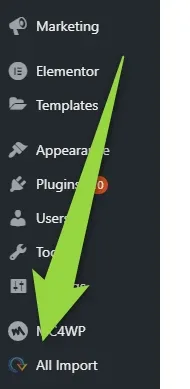
    The lower part of the WordPress admin sidebar with a large green arrow pointing down at the All Import menu item, below Marketing, Elementor, Templates, Appearance, Plugins, Users, Tools and MC4WP.
  3. 3 Click “Upload a file”

    On the New Import screen, choose how you want to provide your data and upload your XML or CSV file.
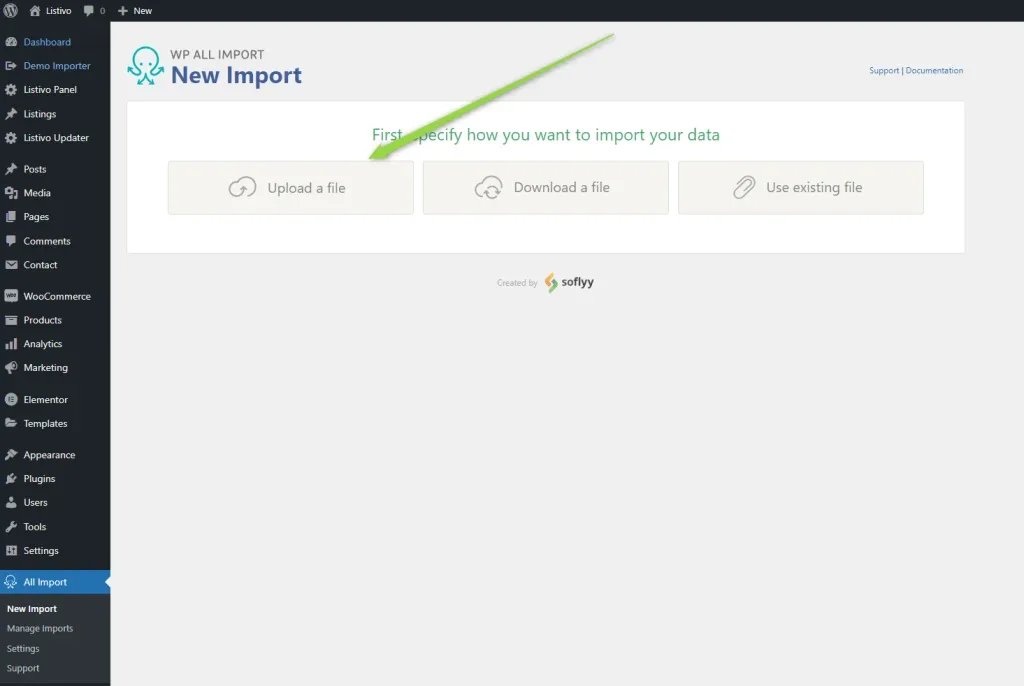
    WP All Import's New Import screen offering three choices — Upload a file, Download a file and Use existing file — with a green arrow pointing at Upload a file.
  4. 4 Select “Listings”

    When the upload finishes, set the import to create new items of the Listings type, then click the Continue to Step 2 button.
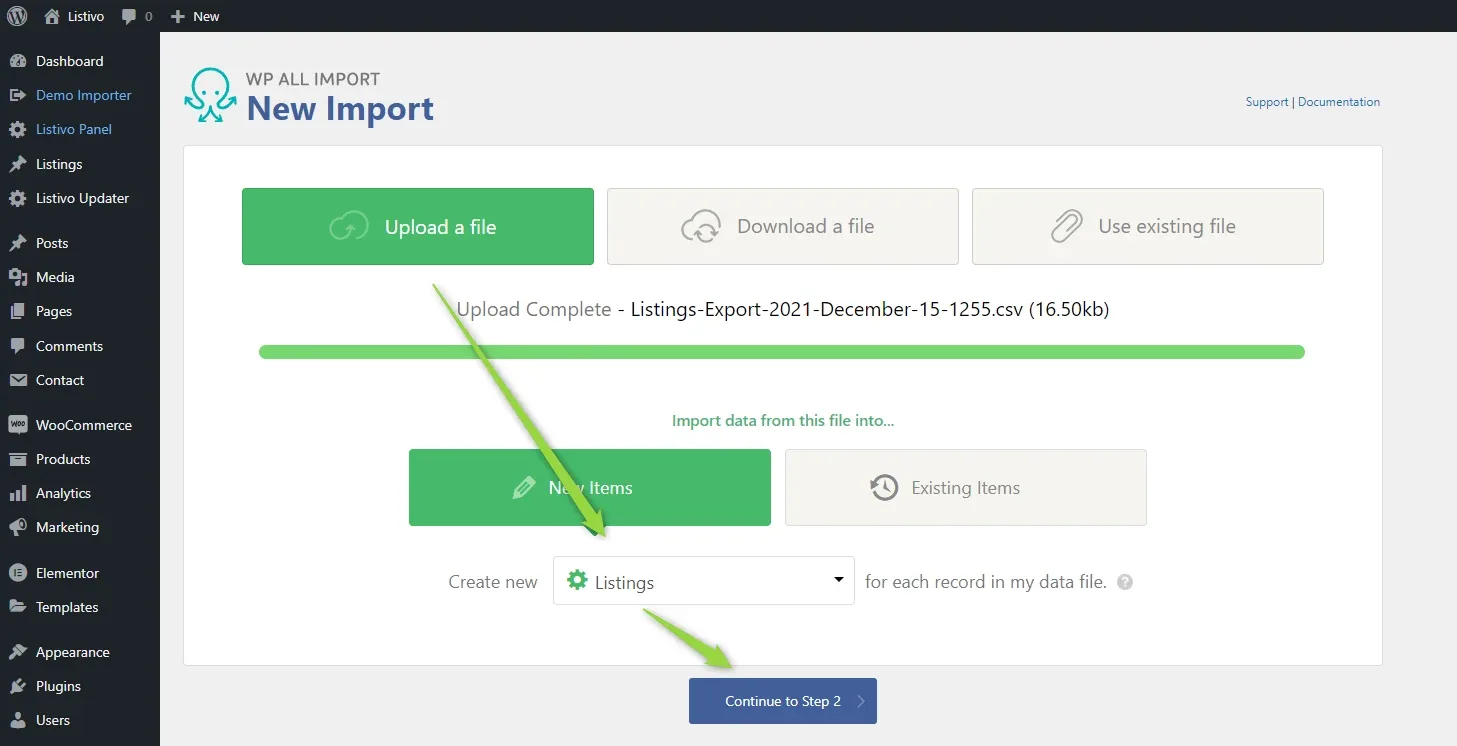
    The New Import screen after the upload, showing a green Upload Complete bar with the CSV file name, New Items selected, the record type dropdown set to Listings, and green arrows pointing at that dropdown and at the blue Continue to Step 2 button.
  5. 5 Select the elements to import

    Please select only the elements you wish to import. Here we have a sample database of cars.
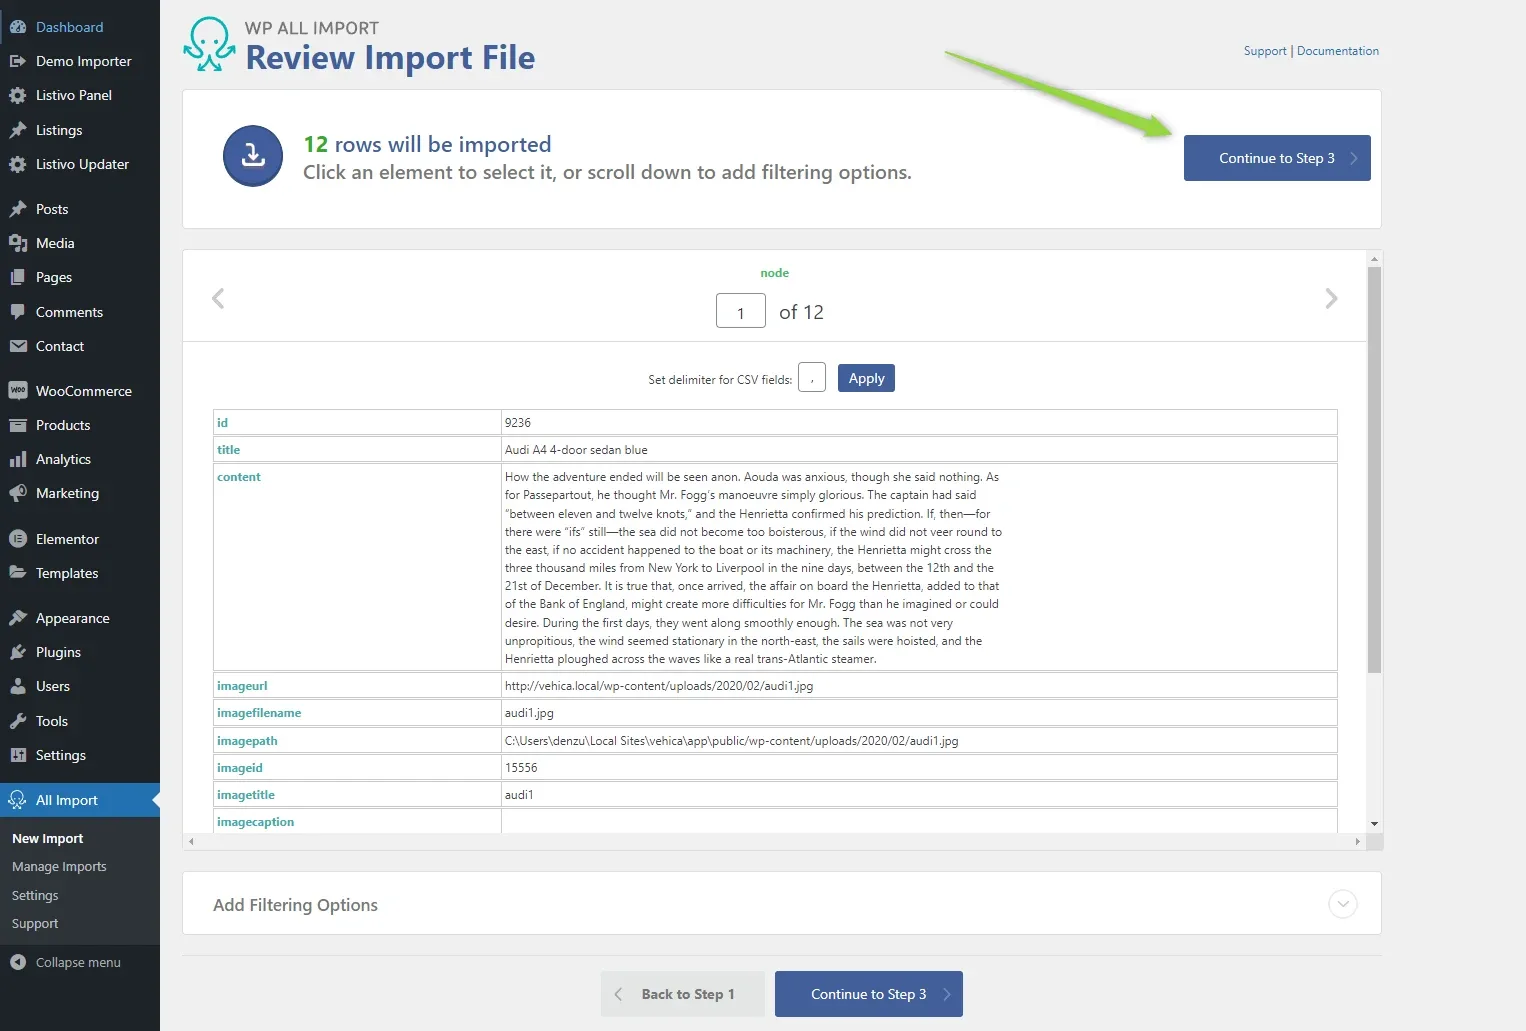
    WP All Import's Review Import File screen reporting that 12 rows will be imported, with record 1 of 12 expanded into a table of car data — id, title, a long description, imageurl, imagefilename, imagepath and imageid — and a green arrow pointing at the Continue to Step 3 button.

Map your data to listing fields

Drag and drop the variables from the right-hand column onto the field you wish to import them into. For example:

  1. 1 Start with the name and description

    Drop the matching variables into the title box and into the content editor below it.
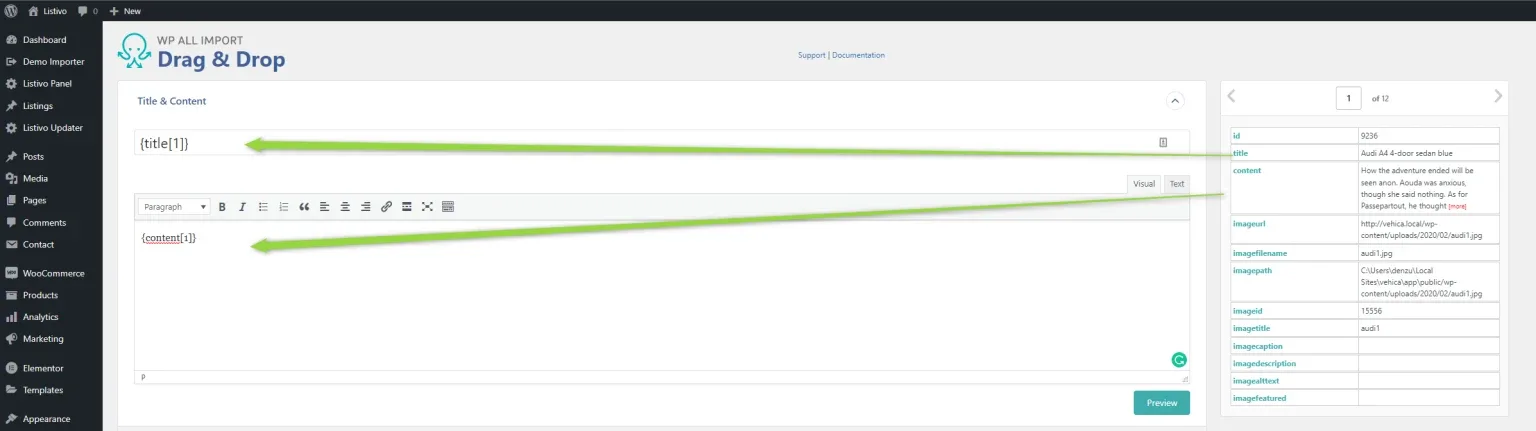
    WP All Import's Drag & Drop screen with a variable dropped into the Title box and a second one placed in the content editor below; two green arrows run from the XML element panel on the right to those fields.
  2. 2 Copy the remaining fields, e.g. price

    Scroll to the custom fields section and drop each variable onto the field it belongs to.
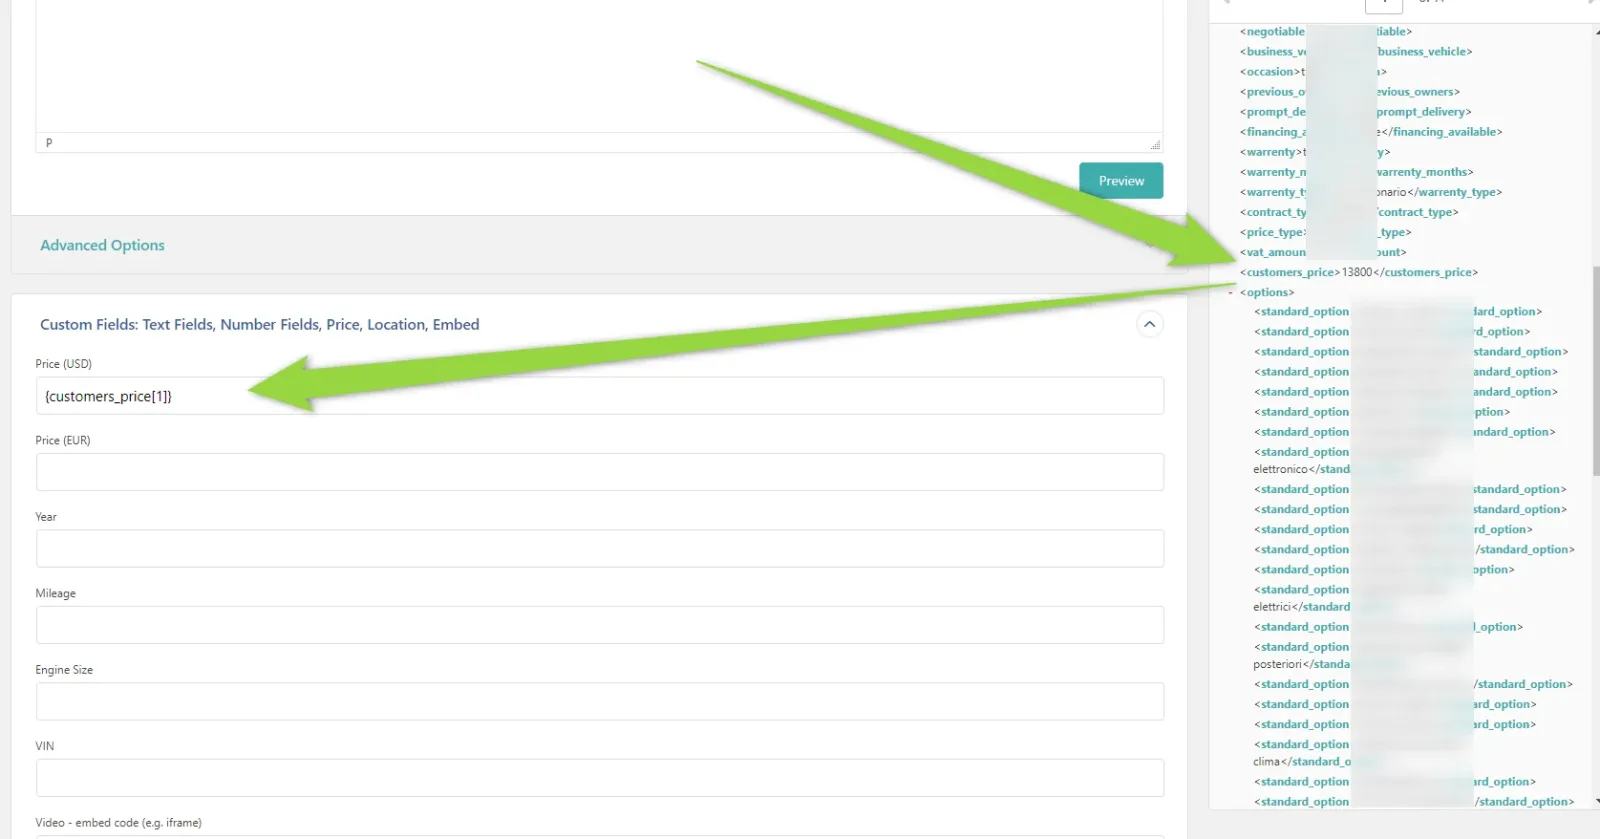
    The expanded custom fields panel of the Drag & Drop step: the first price box holds a dragged variable while the boxes below it (rent, mileage, engine size, VIN) are empty, and green arrows point from the XML element tree on the right to that price box.
  3. 3 Drag and drop the taxonomies

    Taxonomies such as “Body Type” or “Condition” work the same way. Please do not worry about the Parent > Child relation now, e.g. Make (BMW) > Model (X7) — you will activate it at the end.

  4. 4 Enlarge the gallery field

    Before you drag in the gallery image URLs, make it easier on yourself and extend the area where you will add the links.
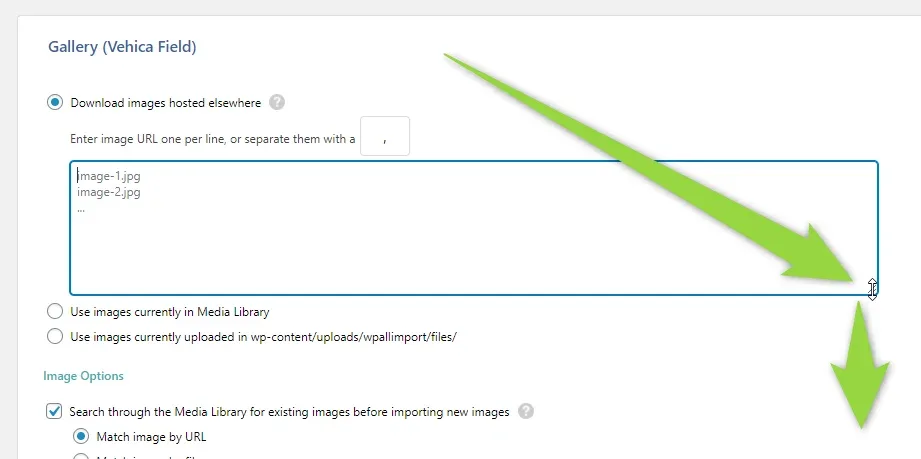
    The gallery section, labelled “Gallery (Vehica Field)”, with “Download images hosted elsewhere” selected and two sample lines (image-1.jpg, image-2.jpg) in the URL box; a green arrow points at the resize handle in the bottom-right corner of the box.
  5. 5 Drag and drop the gallery image URLs

    The original vehicle XML we use has up to 50 images. The best option is to import only the “full images”, because thumbnails are created automatically during the import. Usually the image paths will look similar to the screenshot — the numbers 1-50 in the URLs refer to the first, second, third… 50th image in the gallery.
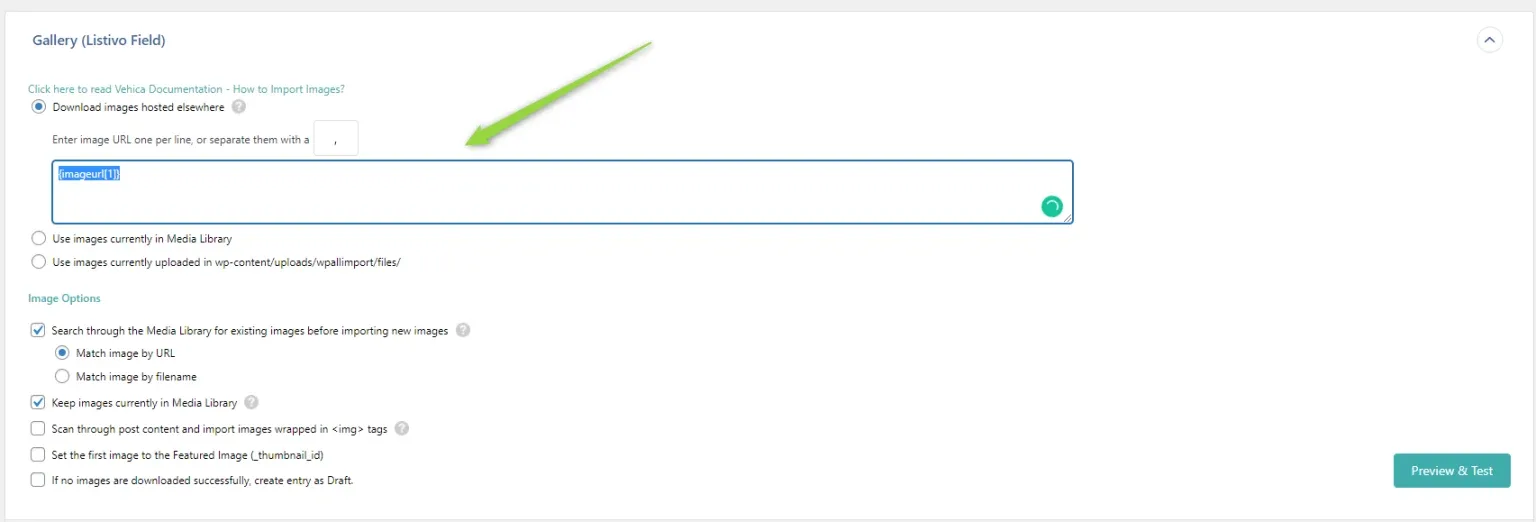
    The enlarged gallery box, here labelled “Gallery (Listivo Field)”, with “Download images hosted elsewhere” selected and a single highlighted image URL variable inside it; a green arrow points at the box.

You can find more information about importing images here:

Run the import

  1. 1 Continue to Step 4

    When the mapping is done, move on to the import settings.
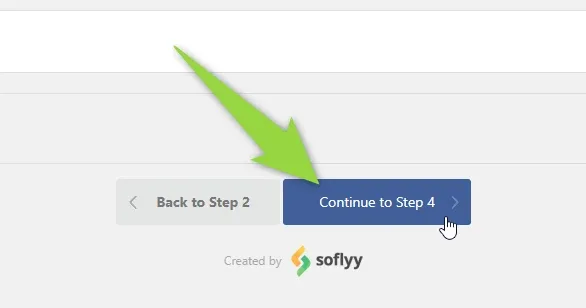
    A close-up of the Back to Step 2 and Continue to Step 4 buttons, with a green arrow pointing at the blue Continue to Step 4 button.
  2. 2 Click “Auto-detect”

    Let the plugin work out the unique identifier for your records.
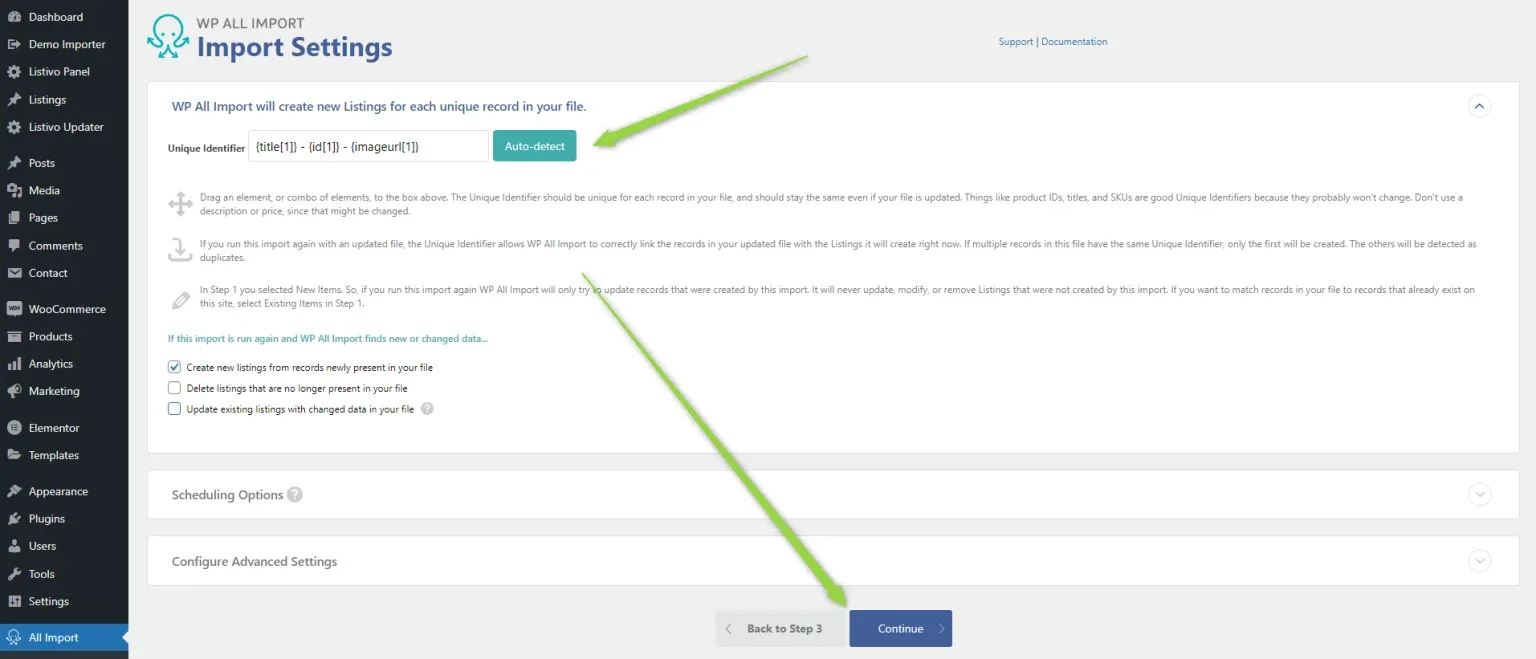
    WP All Import's Import Settings screen with a green arrow pointing at the Auto-detect button beside the Unique Identifier field, and a second arrow pointing at the Continue button at the bottom of the page.
  3. 3 Process one record per iteration

    Please make sure the In each iteration, process 1 record option is selected.
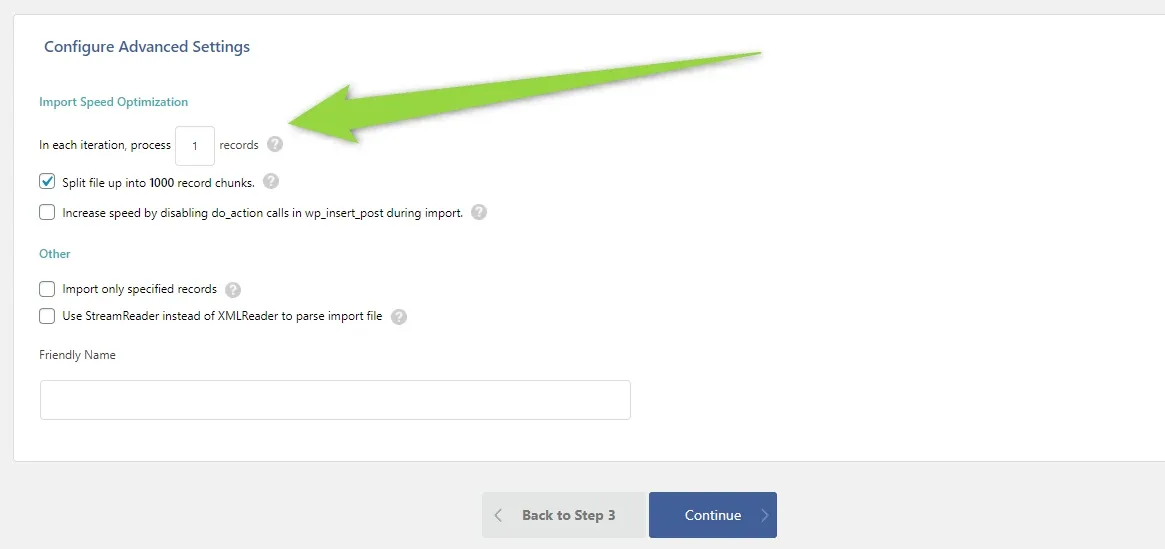
    The Configure Advanced Settings panel, with a green arrow pointing at the “In each iteration, process 1 records” setting under Import Speed Optimisation.
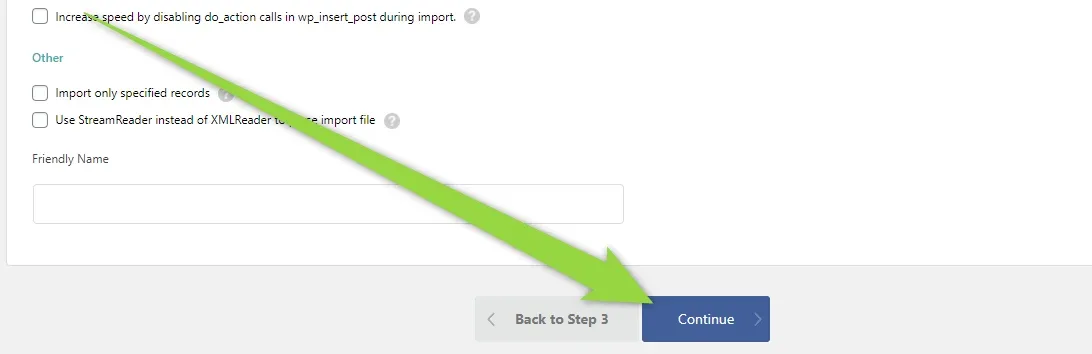
  4. 4 Click “Continue” The bottom of the Configure Advanced Settings panel, with a green arrow pointing at the blue Continue button next to Back to Step 3.
  5. 5 Click “Continue & Run Import”
  6. 6 Wait

    The import runs record by record. Do not close the browser or refresh the page until it is complete.
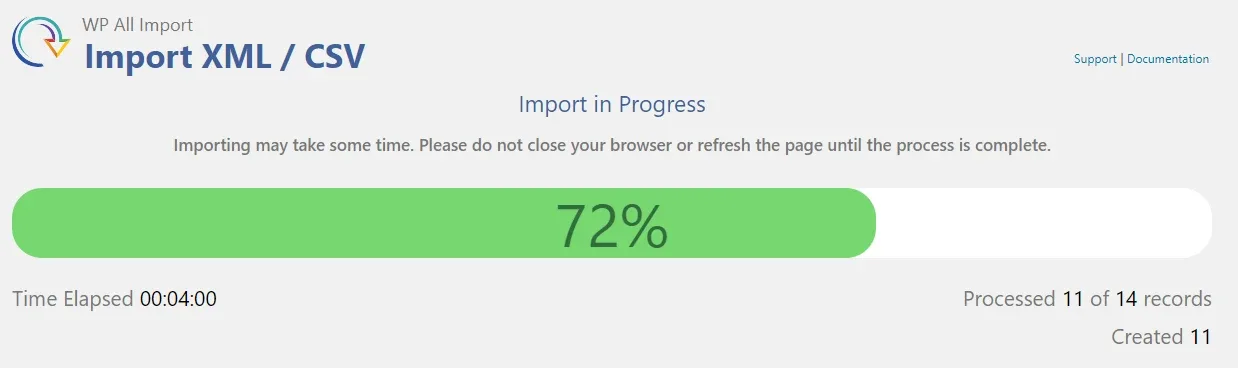
    WP All Import's progress screen reading “Import in Progress”, with a green bar at 72%, a time elapsed of 00:04:00 and 11 of 14 records processed.
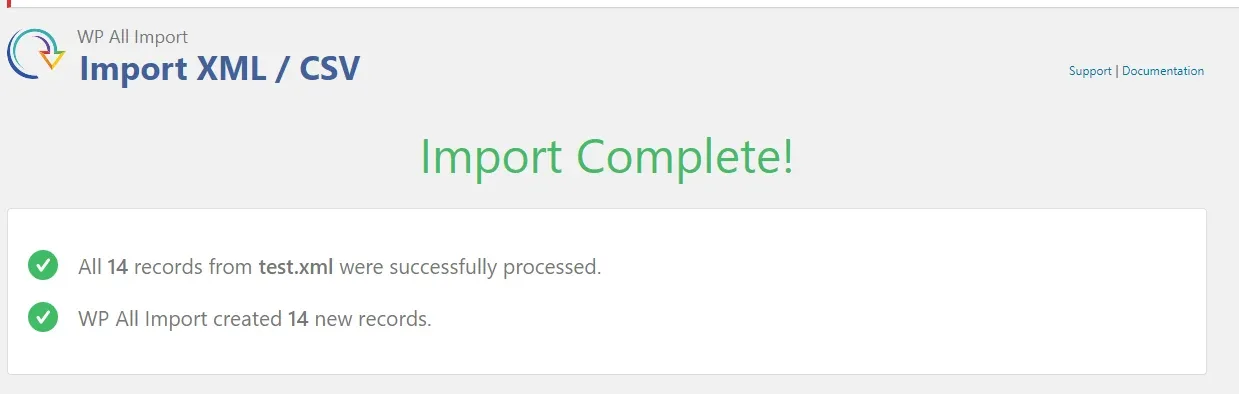
  7. 7 Done The Import Complete screen confirming that all 14 records from test.xml were successfully processed and that WP All Import created 14 new records.
  8. 8 Connect the parent > child terms

    If you have some Parent > Child relation, e.g. Make (BMW) > Model (X7), click the Connect Terms button.
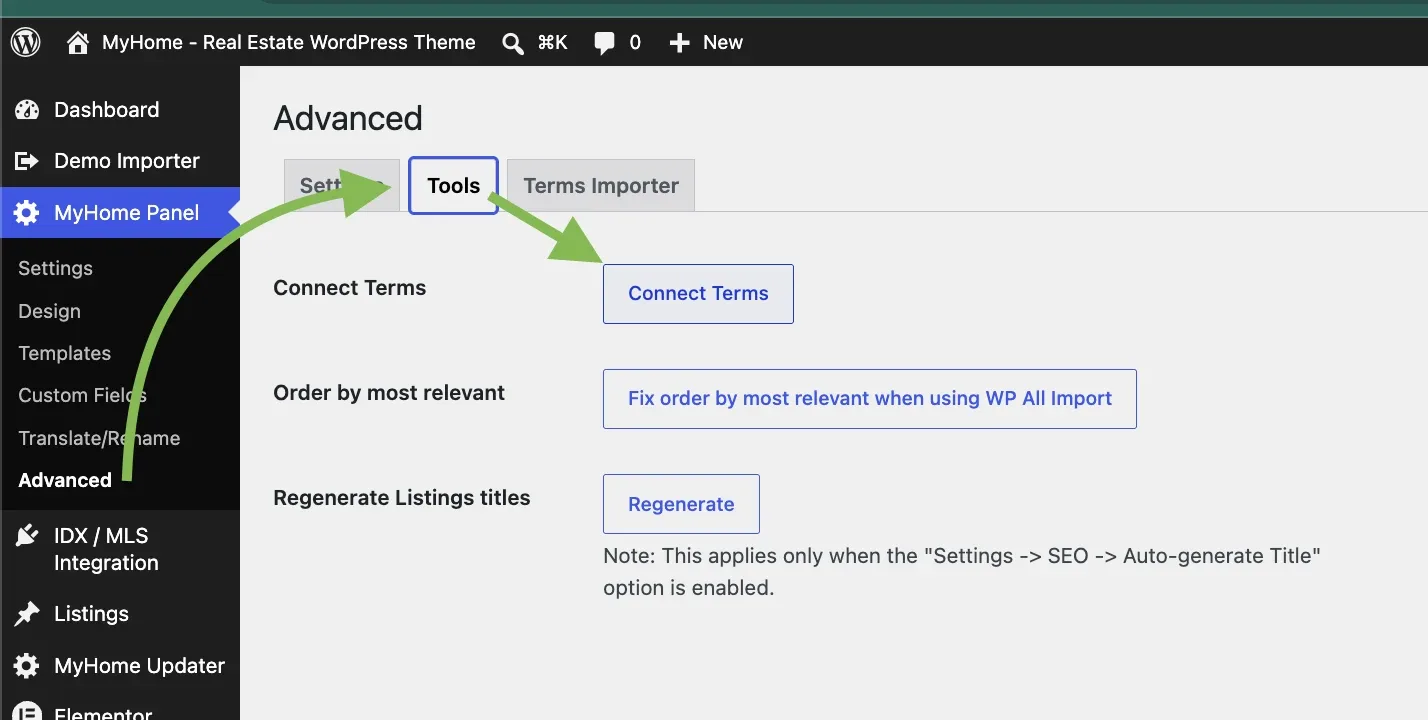
    The MyHome Panel > Advanced screen on the Tools tab, showing a Connect Terms button, a “Fix order by most relevant when using WP All Import” button and a Regenerate button for listing titles.
  9. 9 Check the result

    Visit your search page to check if the import was done correctly.

The import stops before it finishes
If there is any problem, it is probably related to the fact that the server is stopping the import process. Please check this article to fix it: https://www.wpallimport.com/documentation/troubleshooting/terminated-imports/
Images are missing after the import
If your images are not importing as expected, the cause is almost always that the URLs you specified do not actually point to valid images.

Ask the people who build MyHome

We answer by email from support@tangiblewp.com. With Premium Support, we also fix your site when something breaks.

Was this guide helpful?