Google Sign-In (OAuth) Authentication – how to configure?
Set up Google Sign-In so visitors can register and log in to your Vehica site with their Google account — from creating the OAuth client in the Google API Console to pasting the client ID and secret into the Vehica Panel.
2 minute read
You can let your visitors log in and register with their Google account, like this:
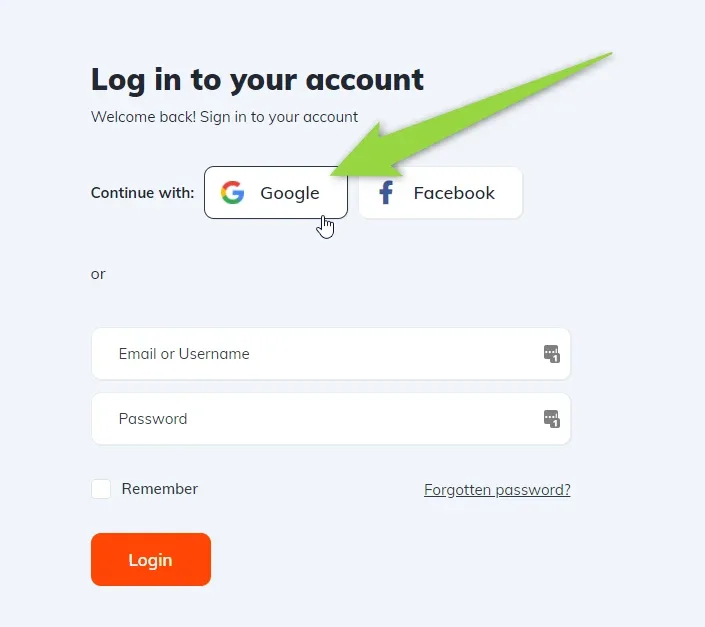
Below is the full configuration, step by step.
Create a project in the Google API Console
-
1
Open the Google API Console
Go to https://console.developers.google.com/ and sign in with the Google account that should own the app.
-
2
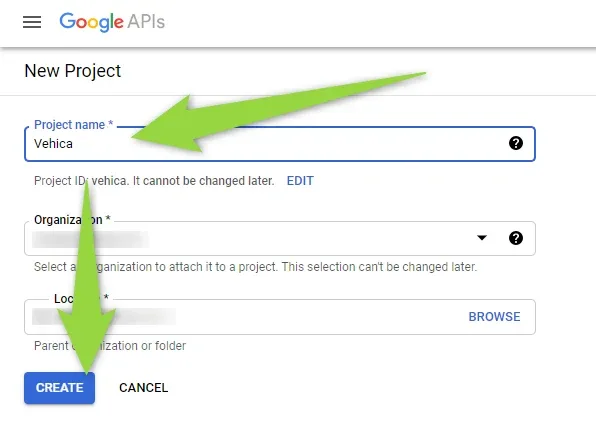
Create a new project
If this is your first Google API key, Google asks you to create a New Project before anything else.
-
3
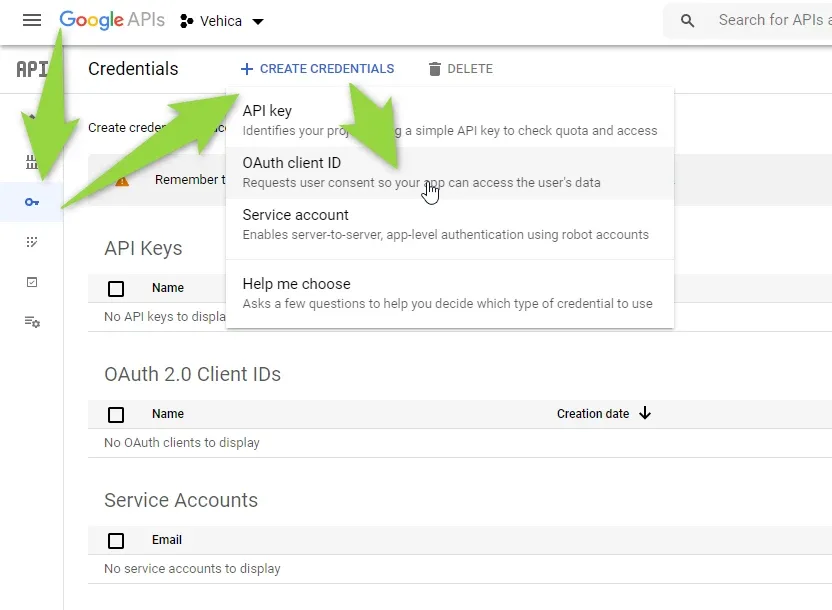
Create credentials
In the console, click Create Credentials and choose OAuth client ID.
Configure the OAuth consent screen
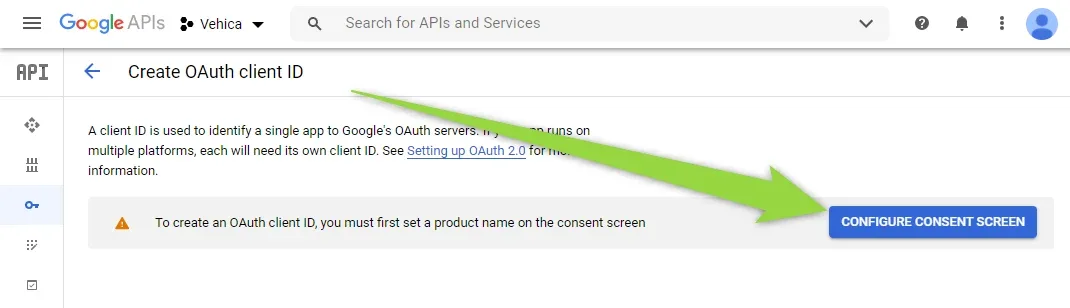
If the project does not have a product name yet, Google will not create the client ID until you click Configure Consent Screen.
-
1
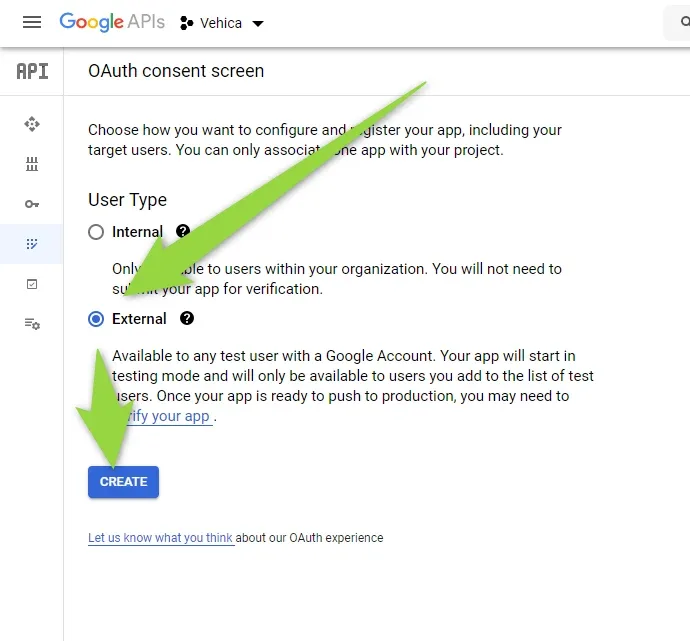
Select the External user type
Choose External so any Google account can use the app, then click Create.
-
2
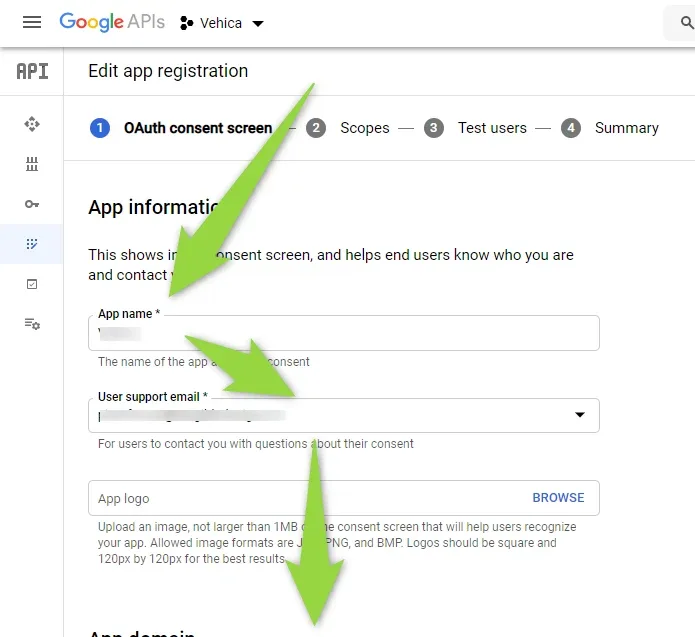
Add an app name and support email
Fill in App name and User support email.
-
3
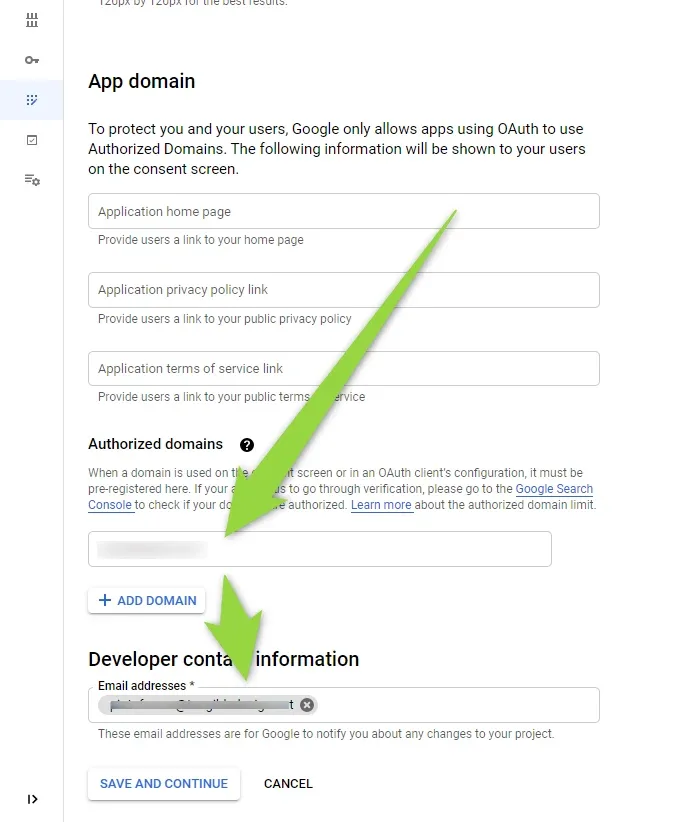
Add the authorized domain and contact information
Add your authorized domain and developer contact information, then click Save and Continue.
-
4
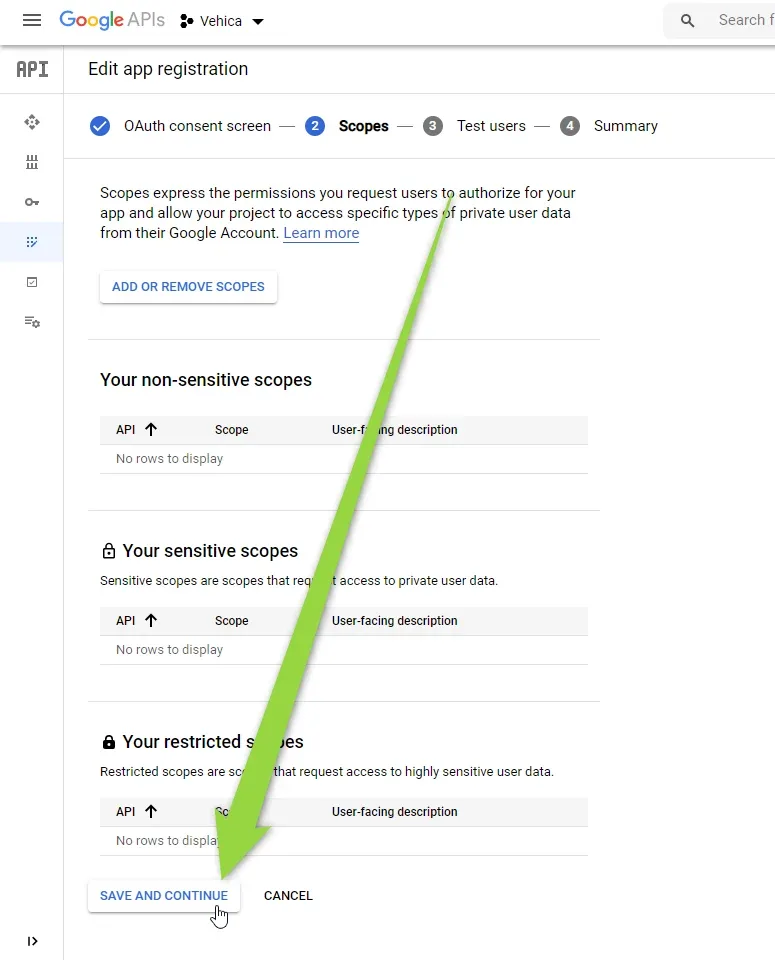
Skip the scopes step
Nothing to change here — click Save and Continue.
-
5
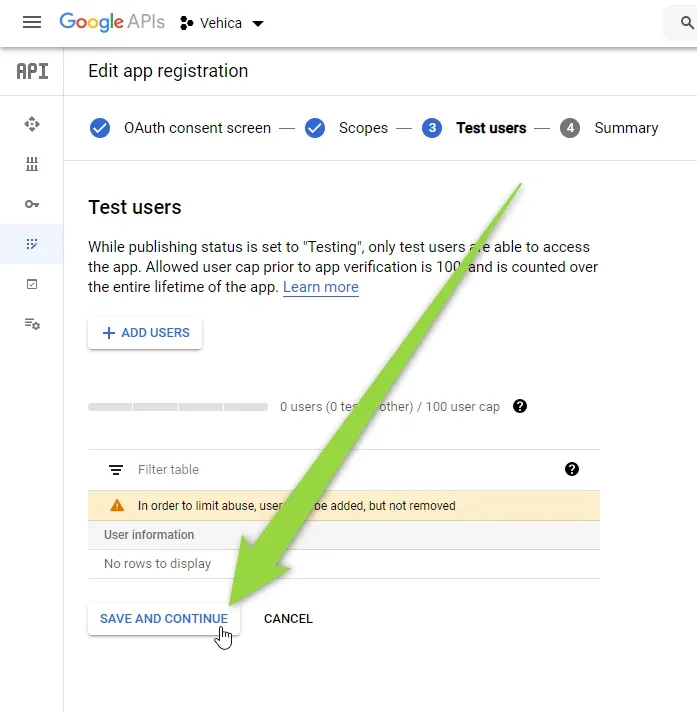
Skip the test users step
Again, just click Save and Continue.
-
6
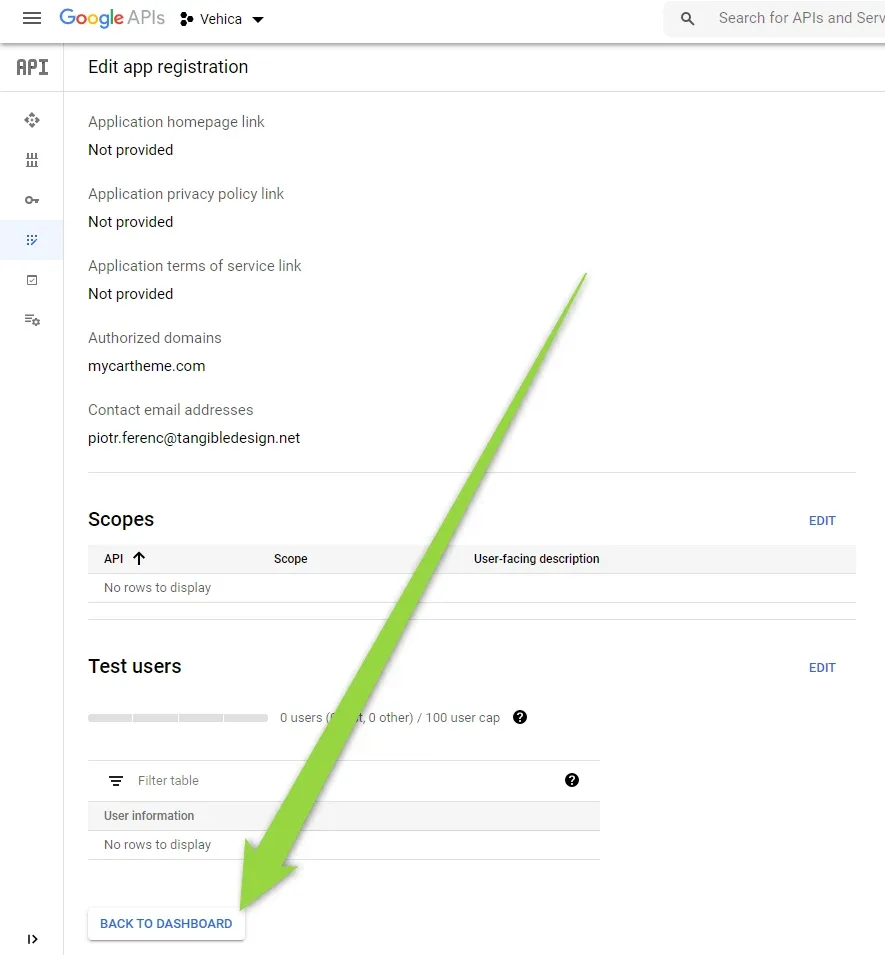
Return to the dashboard
On the summary step, click Back to Dashboard.
Create the OAuth client ID
-
1
Create the credentials
Back at https://console.developers.google.com/, click Create Credentials and choose OAuth client ID.
-
2
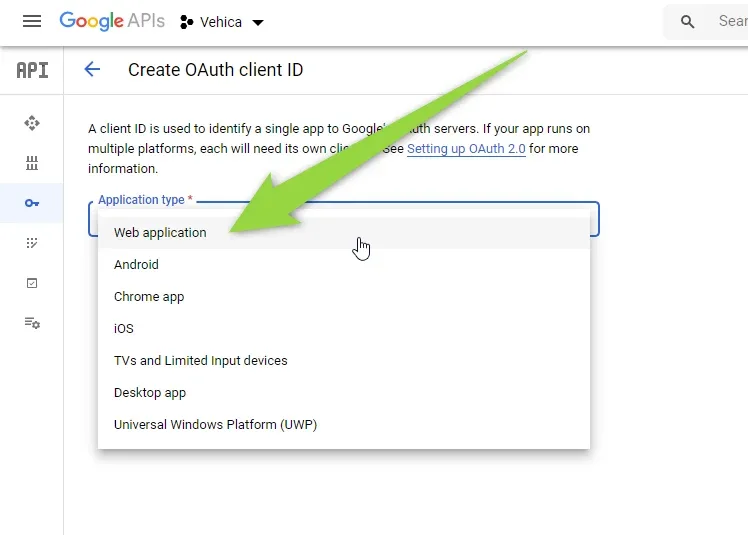
Select Web application
Pick Web application as the application type.
-
3
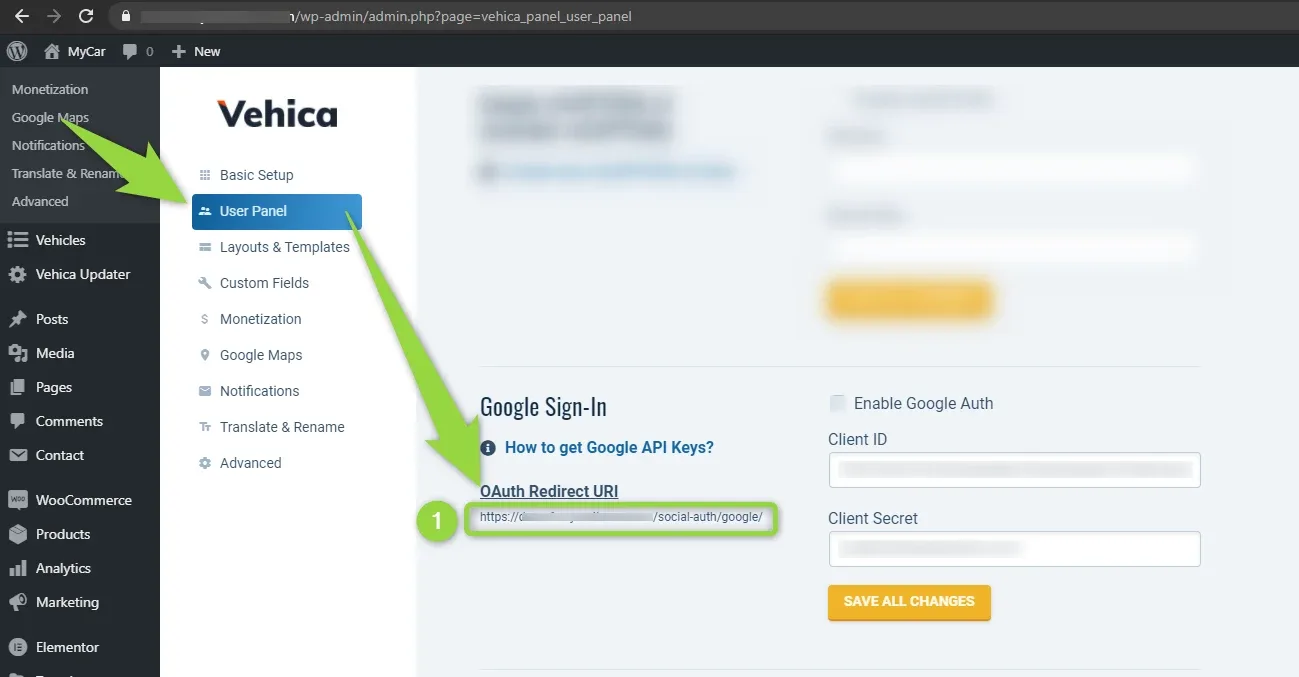
Copy the callback URL from Vehica
This is the most important part of the configuration. Your callback URL is in Vehica Panel > User Panel, under Google Sign-In — copy the OAuth Redirect URI shown there.
-
4
Paste it into Authorized redirect URIs
Add the copied URL under Authorized redirect URIs.
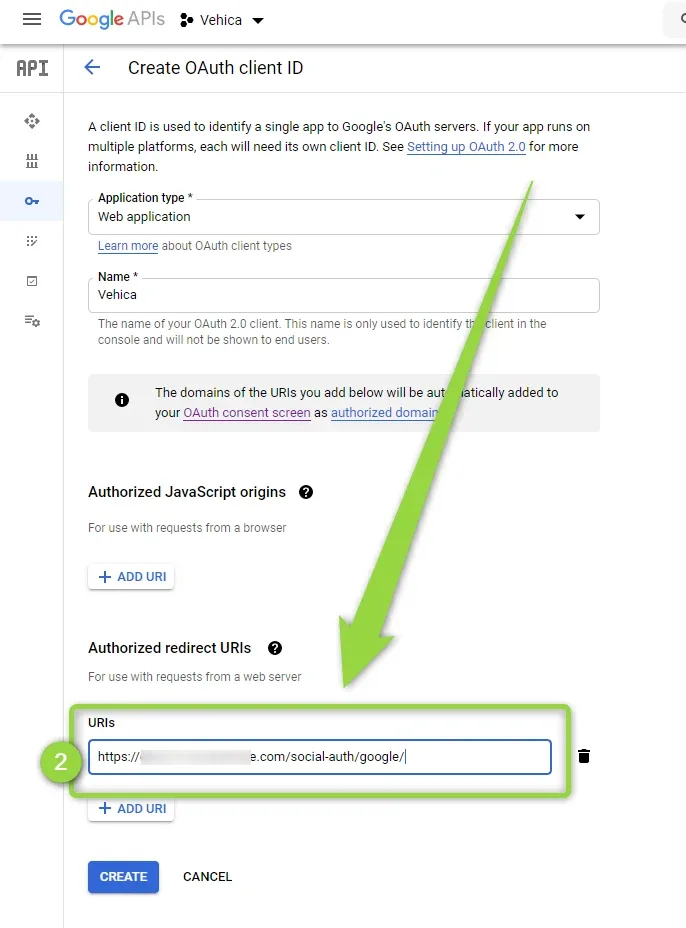
https://domain.com/social-auth/google/.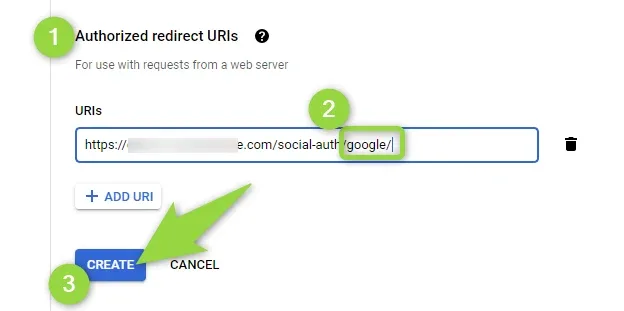
Add the keys to the Vehica Panel
-
1
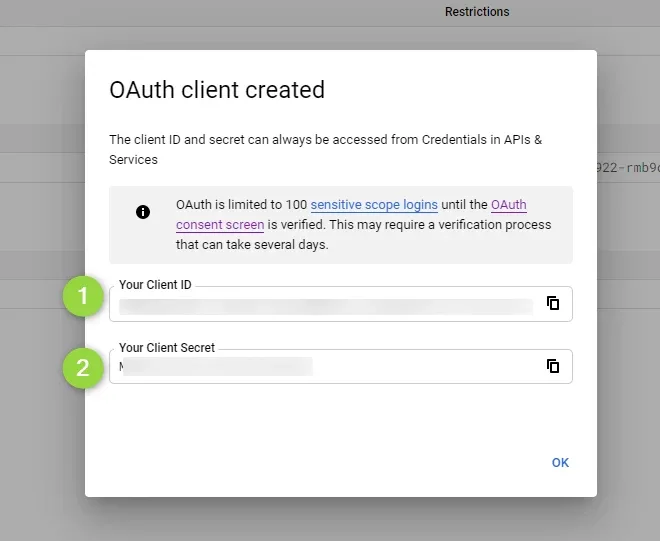
Copy your client ID and client secret
Google shows both as soon as the client is created.
-
2
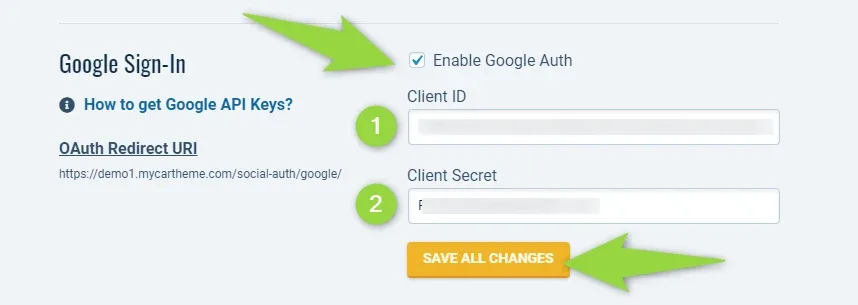
Paste them into the Vehica Panel
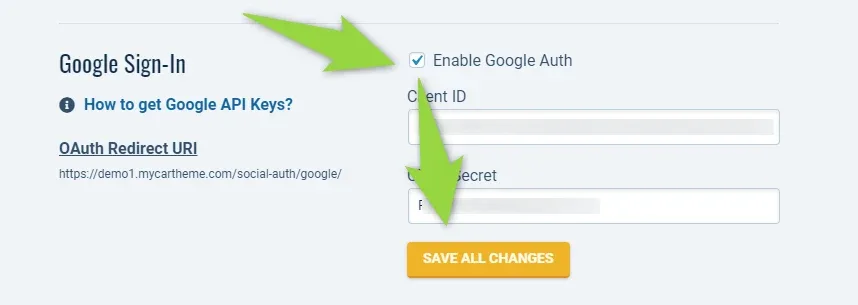
Put them in the Client ID and Client Secret fields of the Google Sign-In section.
-
3
Tick Enable Google Auth
Make sure the Enable Google Auth checkbox is ticked, then click Save all changes.
Done. Your users can now sign in with their Google account this way:
Ask the people who build Vehica
We answer by email from support@tangiblewp.com. With Premium Support, we also fix your site when something breaks.
We can also run your site for you, or build a new one.
Was this guide helpful?