Email Confirmation Guide for User Registration
Make new Listivo users verify their email address before their account works, then control the wording of the confirmation email, the slug in its link, and where that link sends them.
2 minute read
Turn email confirmation on
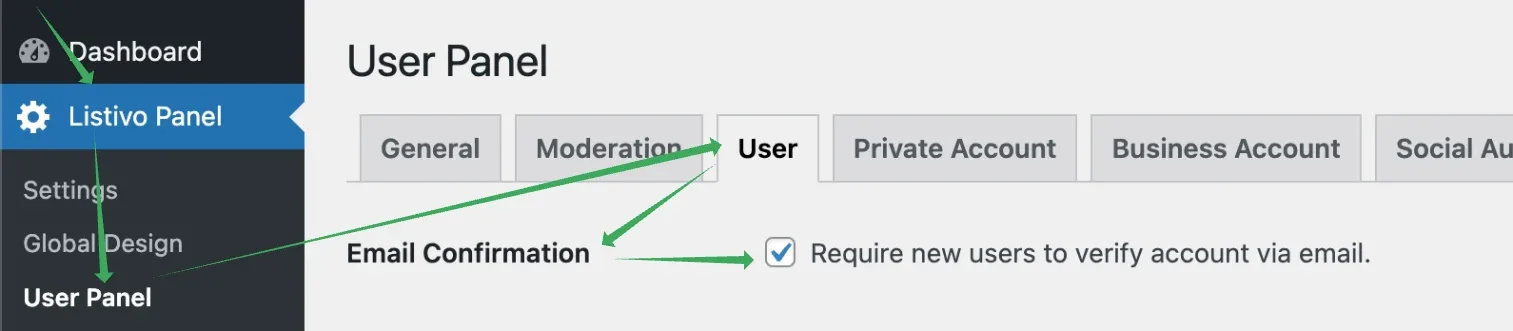
You can turn on email confirmation in the Listivo Panel > User Panel > User > Email Confirmation by enabling the checkbox as shown below.
What your users see
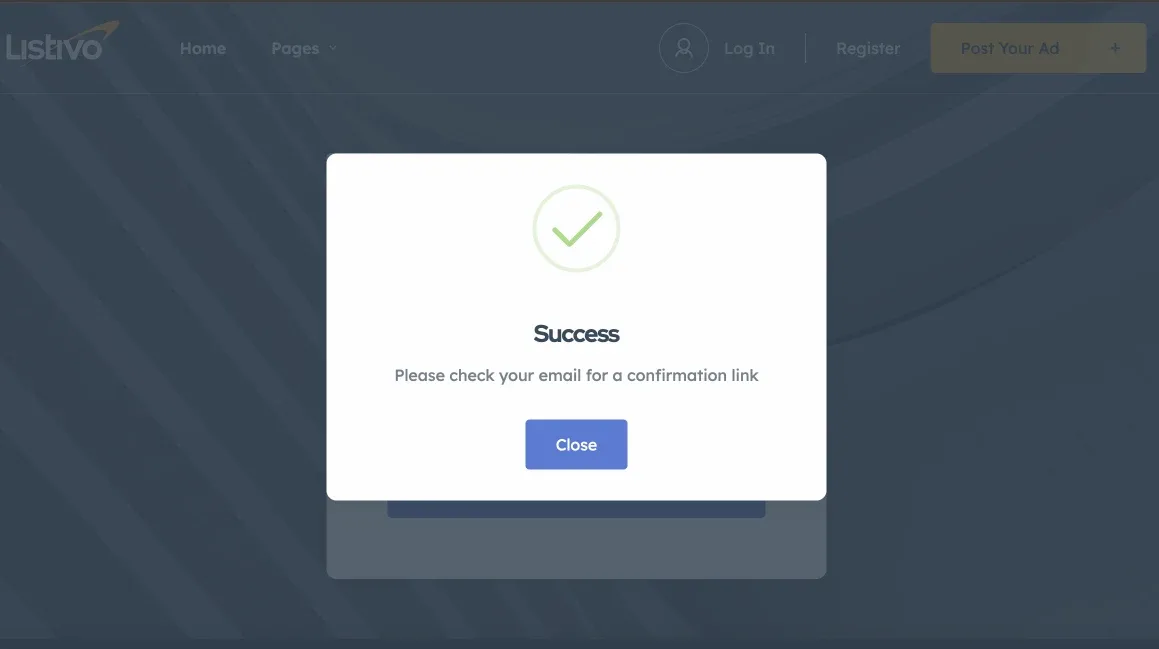
Now, when your users register, they will see the following popup after they provide their account details.
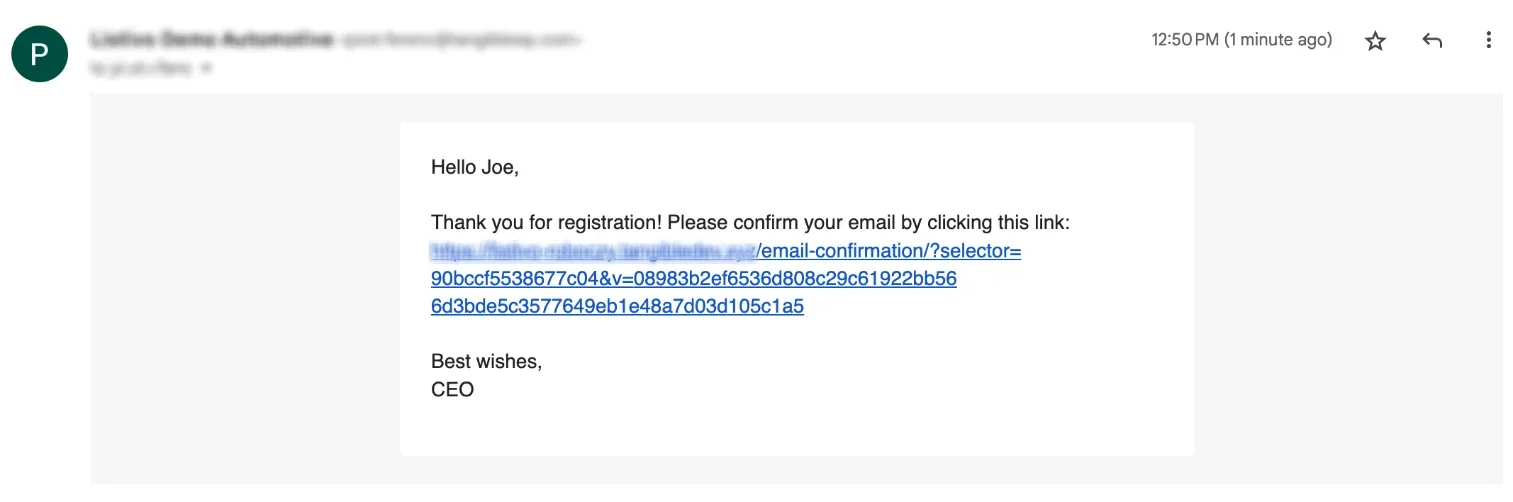
They will also receive this kind of email.
Customize the confirmation email
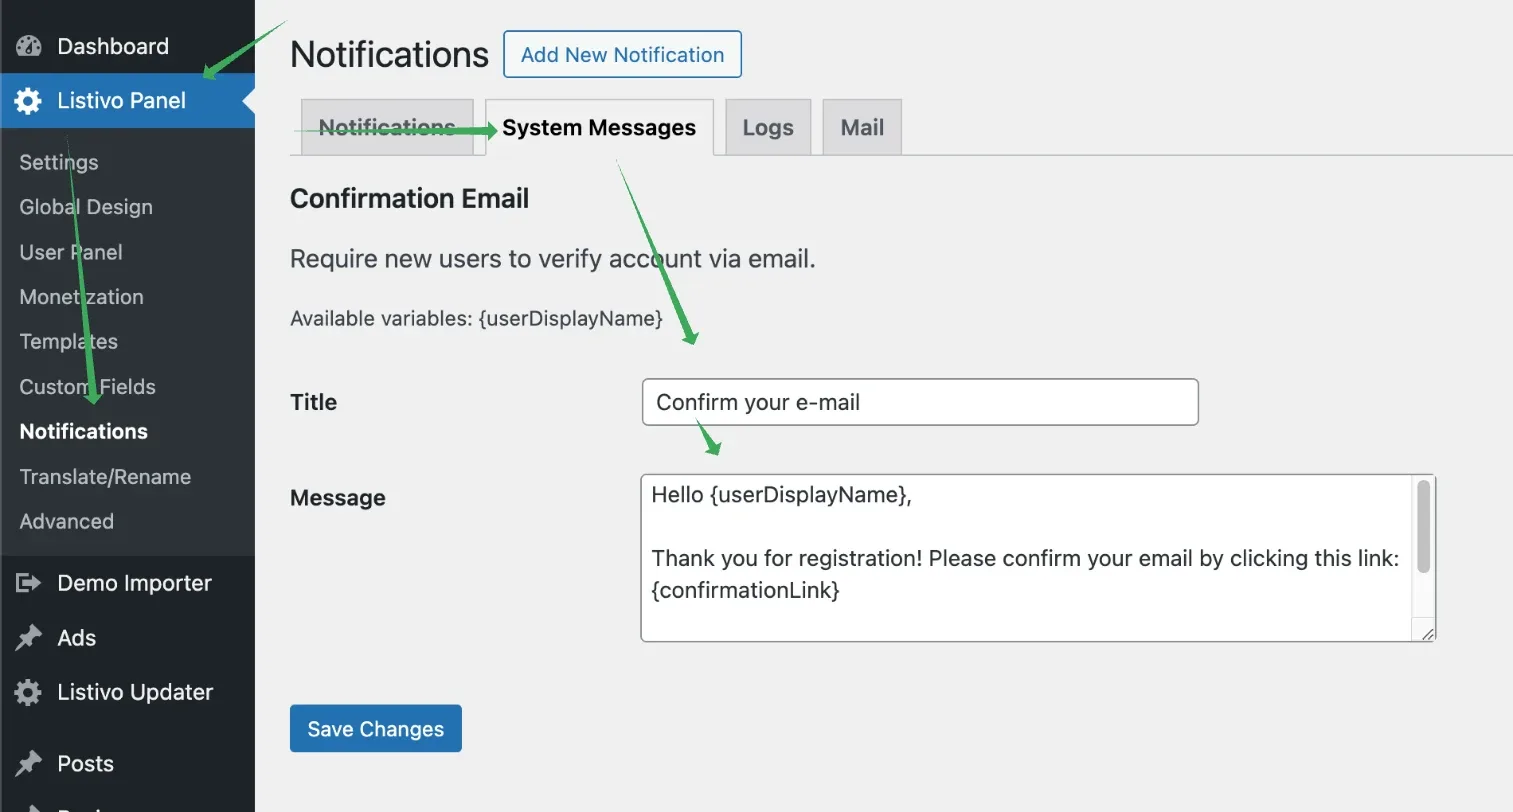
You can customize the email your users will get in the Listivo Panel > Notifications > System Messages.
Change the /email-confirmation/ slug
You can customize the /email-confirmation/ part of the link in the Listivo Panel > Translate/Rename > Slugs.
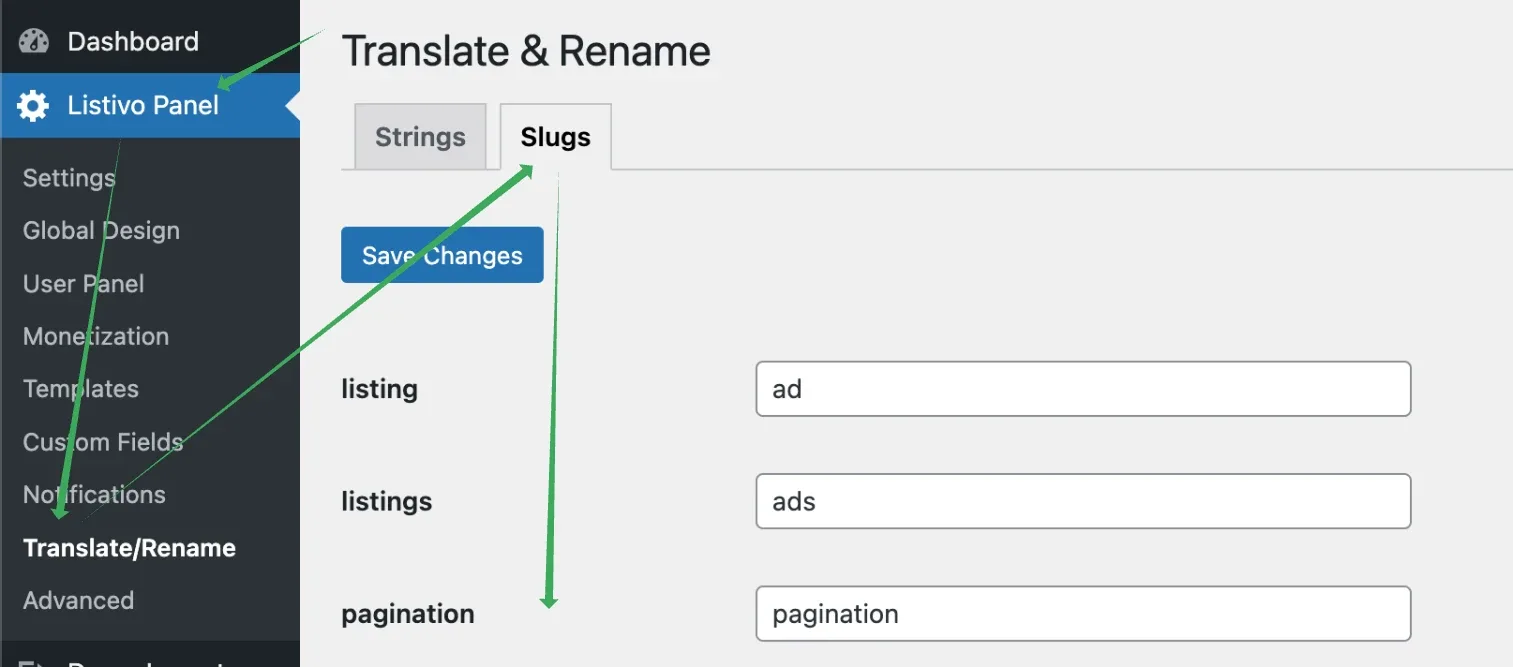
Then scroll down.
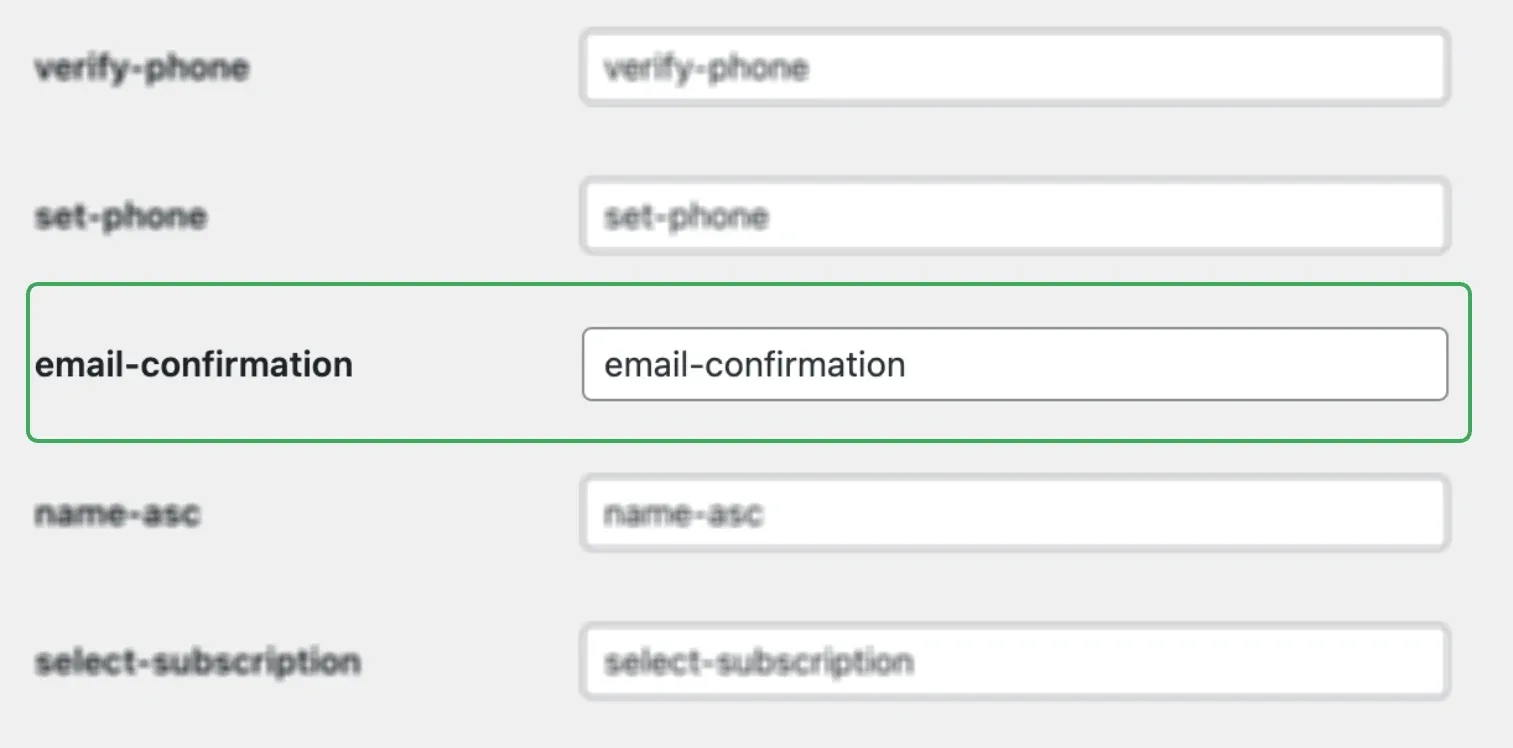
Choose where the link sends users
When your users click the link, they will be redirected to the panel. You can change the redirect location in the Listivo Panel > User Panel > Redirects.
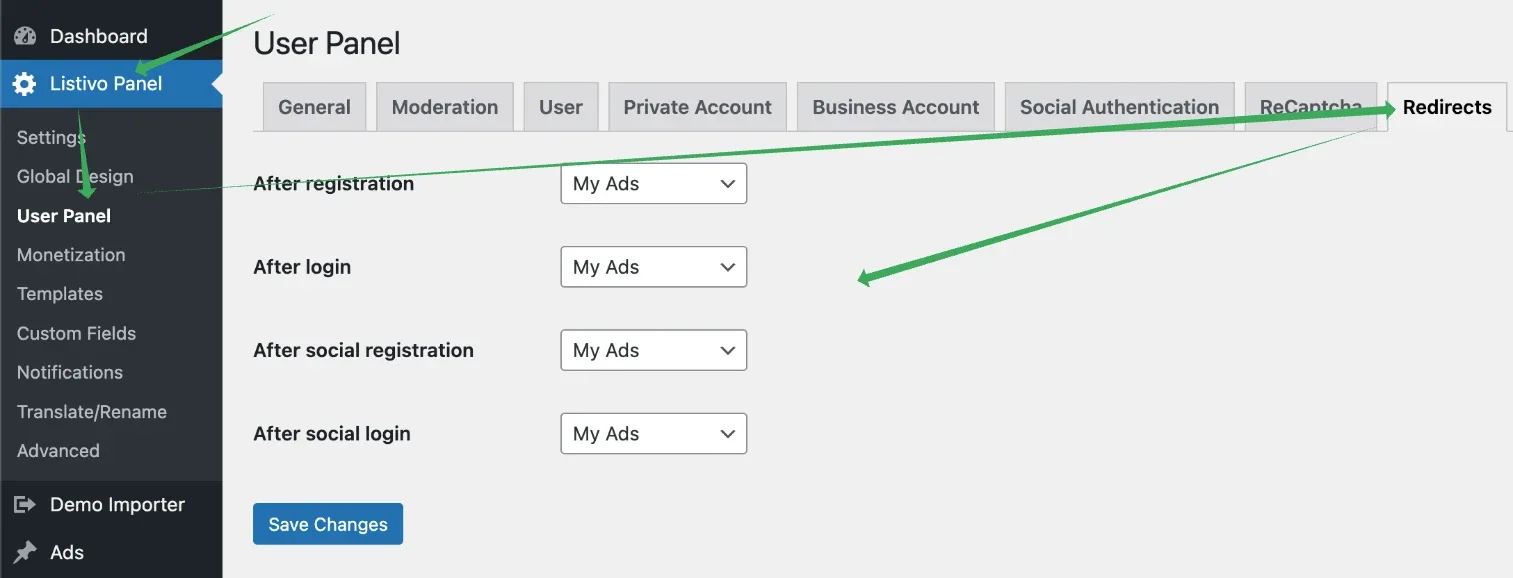
Important information
email-confirmation part of it can be changed.- If you do not receive the email or the email goes to spam, you have a general hosting problem related to sending emails by WordPress (not just Listivo). Please check this article on how to solve it: How to prevent emails go to SPAM folder? How to use SMTP?
- If you need to edit the email template, you will need to rebuild the HTML file: /wp-content/themes/listivo/templates/mail/base.php. Add your own HTML/CSS code there and move this file to the child theme: Utilizing a child theme: modifying PHP, CSS, JS files while maintaining future update compatibility
Ask the people who build Listivo
We answer by email from support@tangiblewp.com. With Premium Support, we also fix your site when something breaks.
We can also run your site for you, or build a new one.
Was this guide helpful?