Featured option – how to move featured listings to the top of the inventory and display in the special sections
The Featured switch promotes chosen listings to the top of your inventory. Turn it on for a listing, then set the search results template to sort by relevance so featured ads stay first.
1 minute read
The Featured option was designed to move some of the listings to the top of the Inventory list. You can select which listing is featured when you visit it and check this box.
-
1
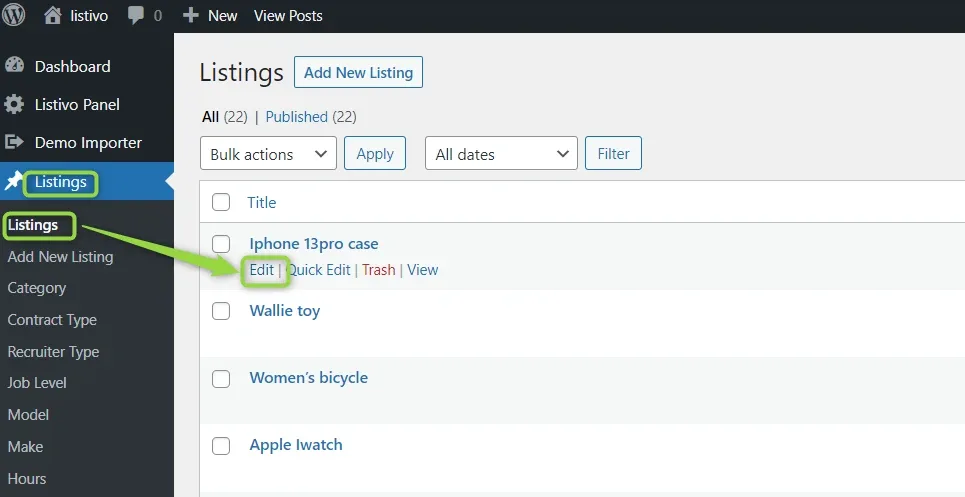
Open the listing
In WordPress, go to Listings and edit the listing you want to promote.
-
2
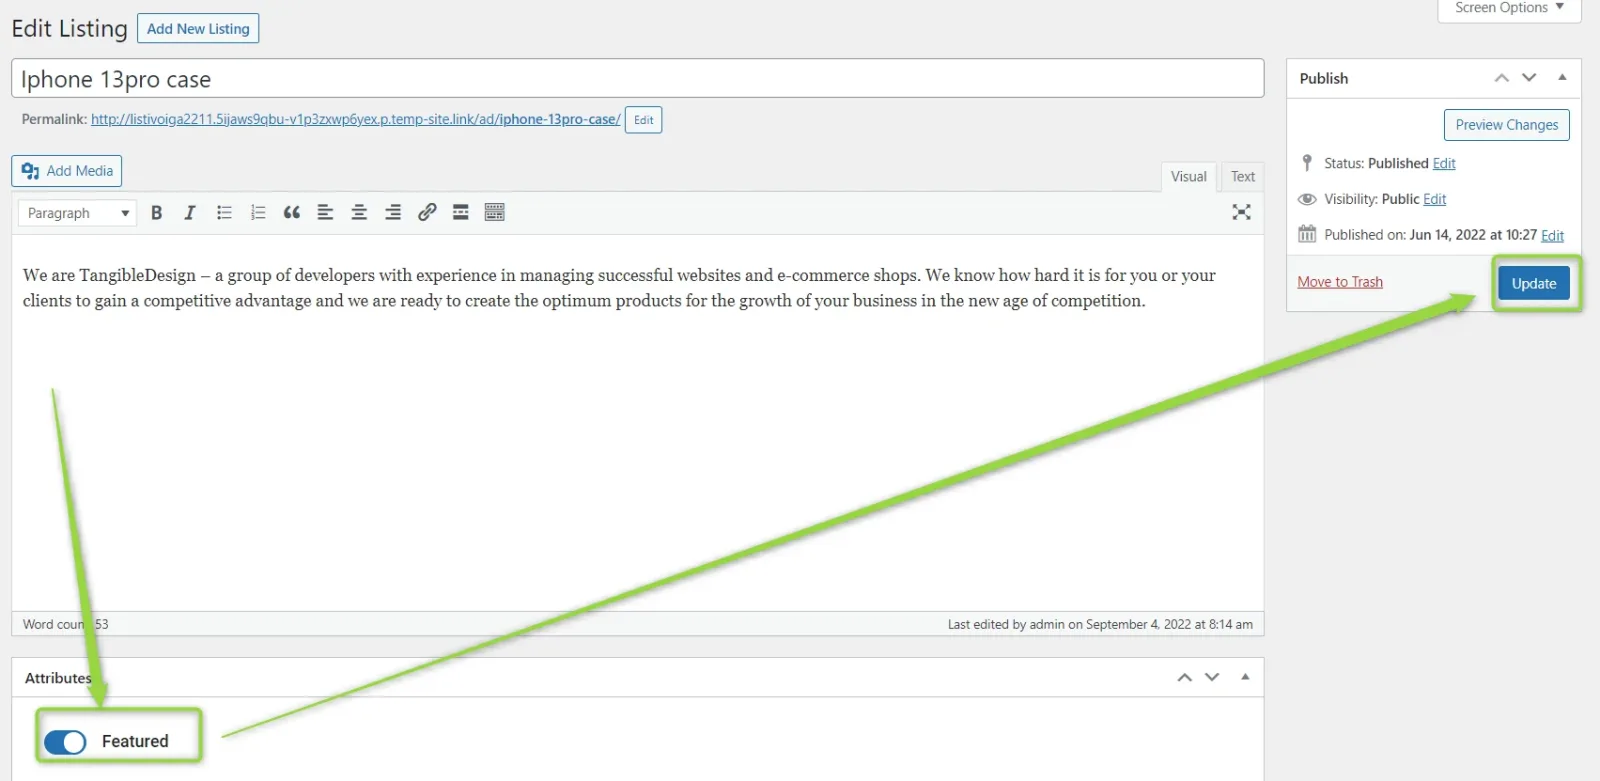
Switch Featured on
Turn on Featured in the Attributes box, then update the listing.
-
3
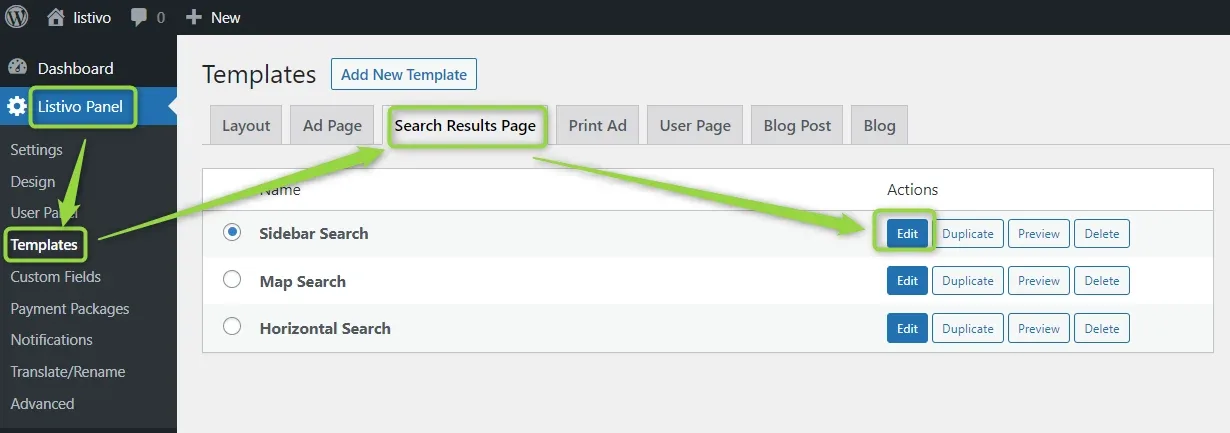
Open the inventory template
Edit the Inventory page: go to Listivo Panel -> Templates -> Search Results Page and edit the template you use.
-
4
Set the initial sorting
In the search widget, open Sort By and set Initial Sort By to “Relevant”. It will force featured listings to be always on top.
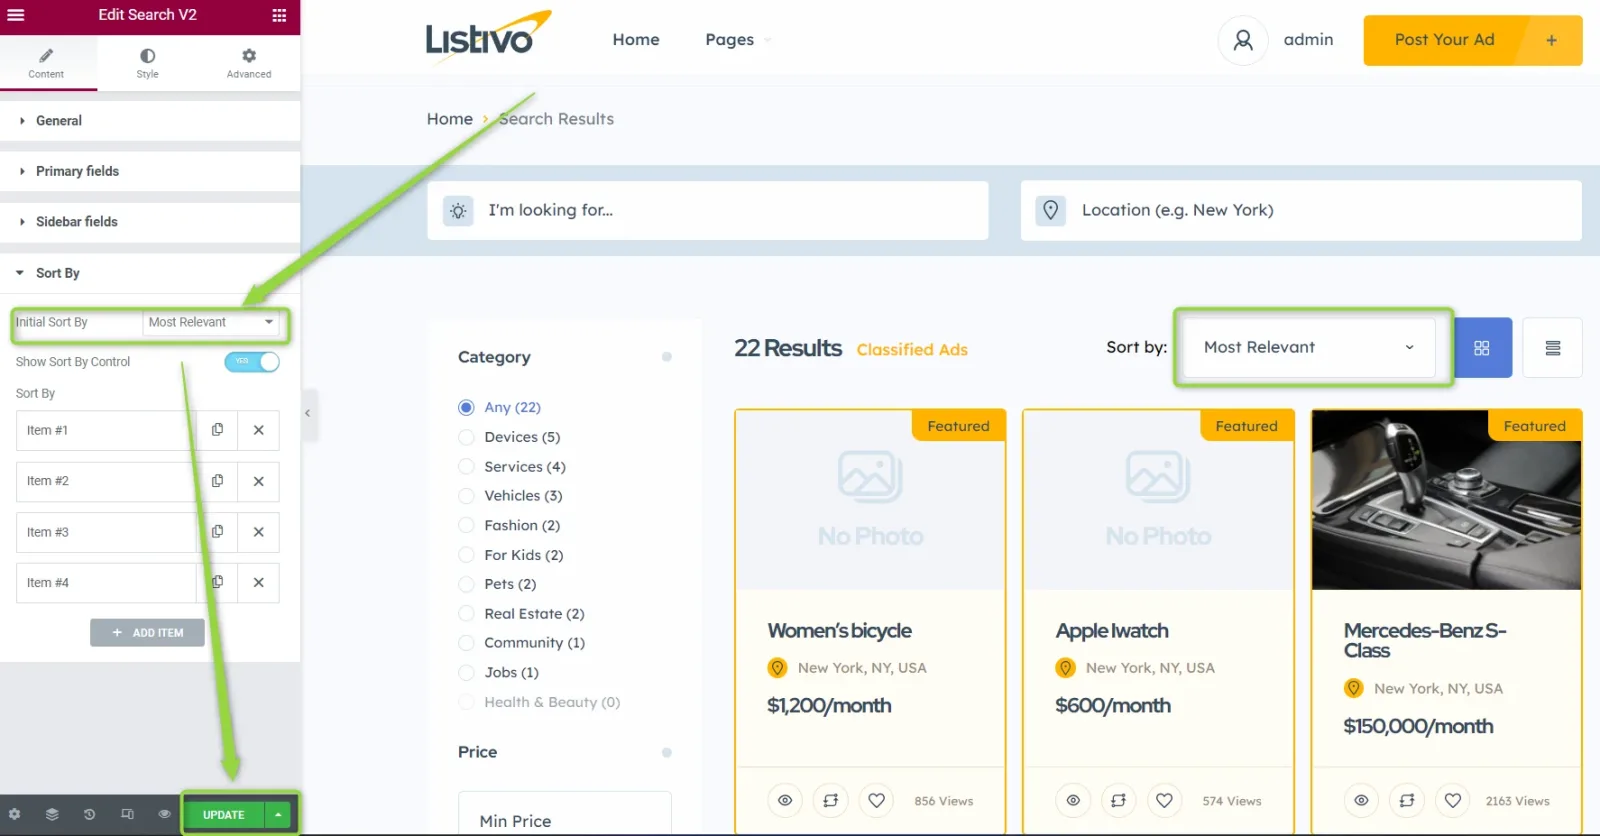
This way featured listings will always be on top.
Ask the people who build Listivo
We answer by email from support@tangiblewp.com. With Premium Support, we also fix your site when something breaks.
We can also run your site for you, or build a new one.
Was this guide helpful?