
Social login: Facebook, Twitter, Linkedin, Google (Gmail)
3 minute read
There are 4 social logins available
In this article we will explain how to configure Social Login for our domain: https://myhometheme.net/ . If you install your WordPress in the subfolder e.g. https://myhometheme.net/invest/ there is no difference in the process
1. Facebook
- 1 We visit https://developers.facebook.com/
-
2
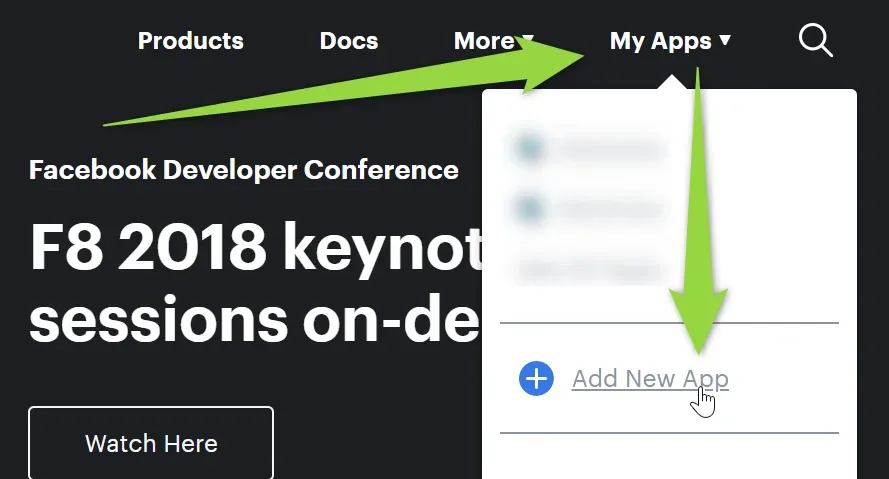
Hover My Apps and click "Add New App"
-
3
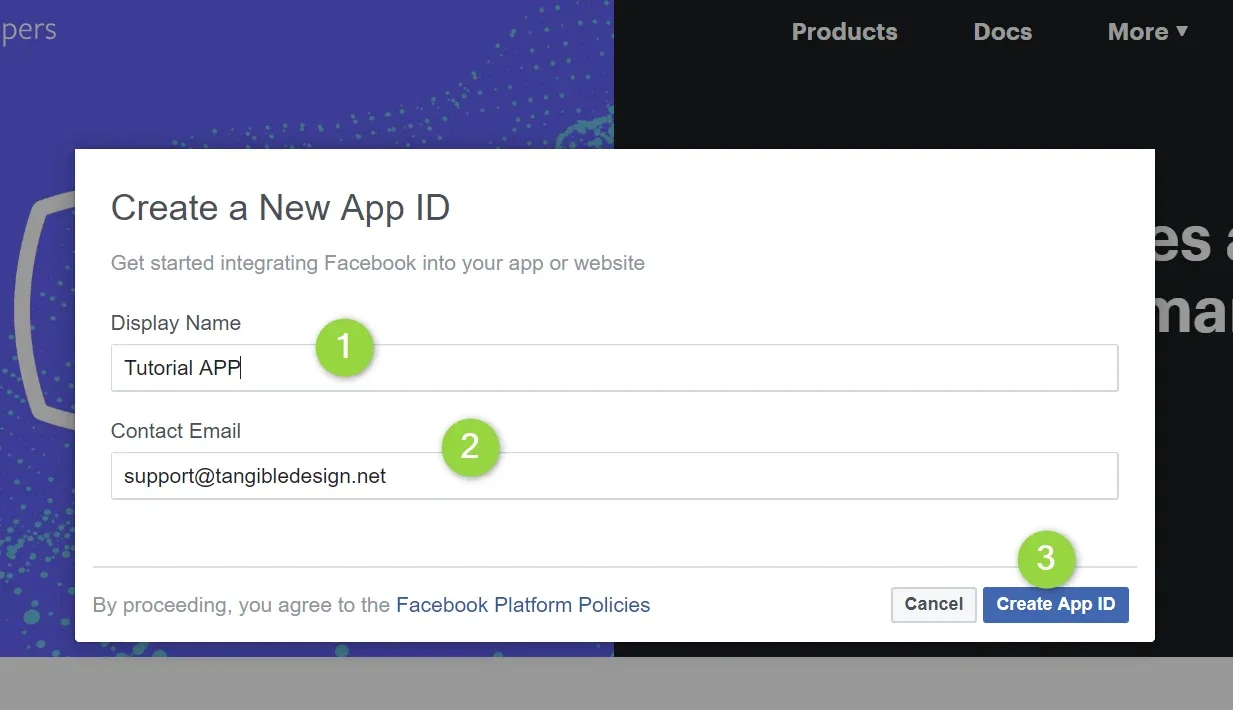
Choose (1) Display Name, (2) type your email and (3) Create APP ID
-
4
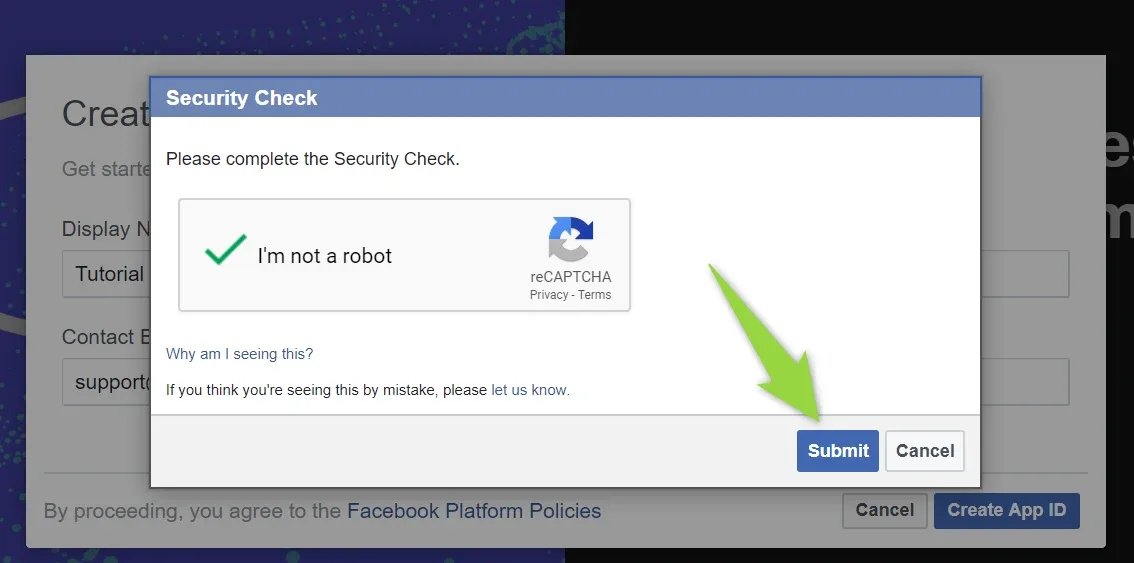
If there will be security check, please complete it:
-
5
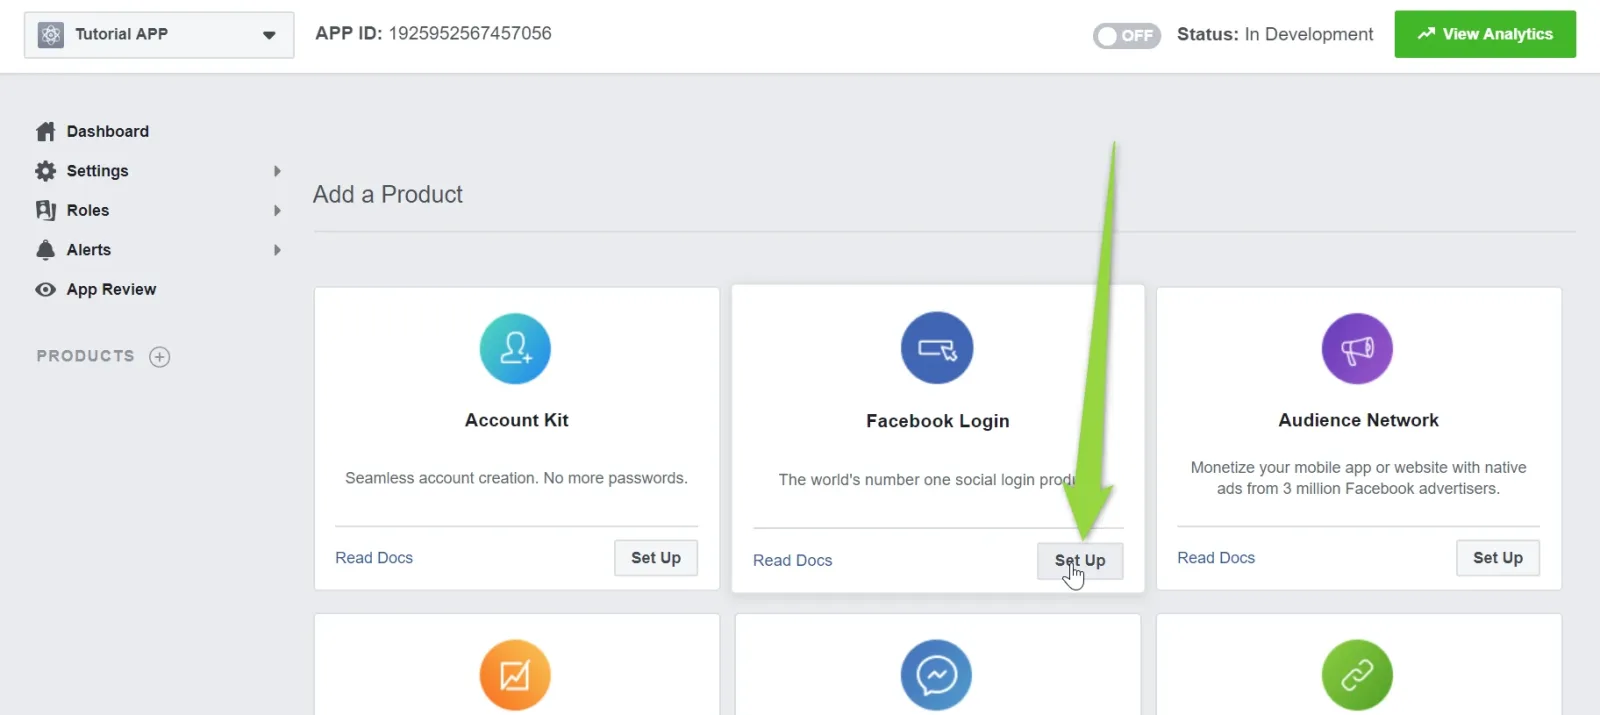
Setup Facebook Login
-
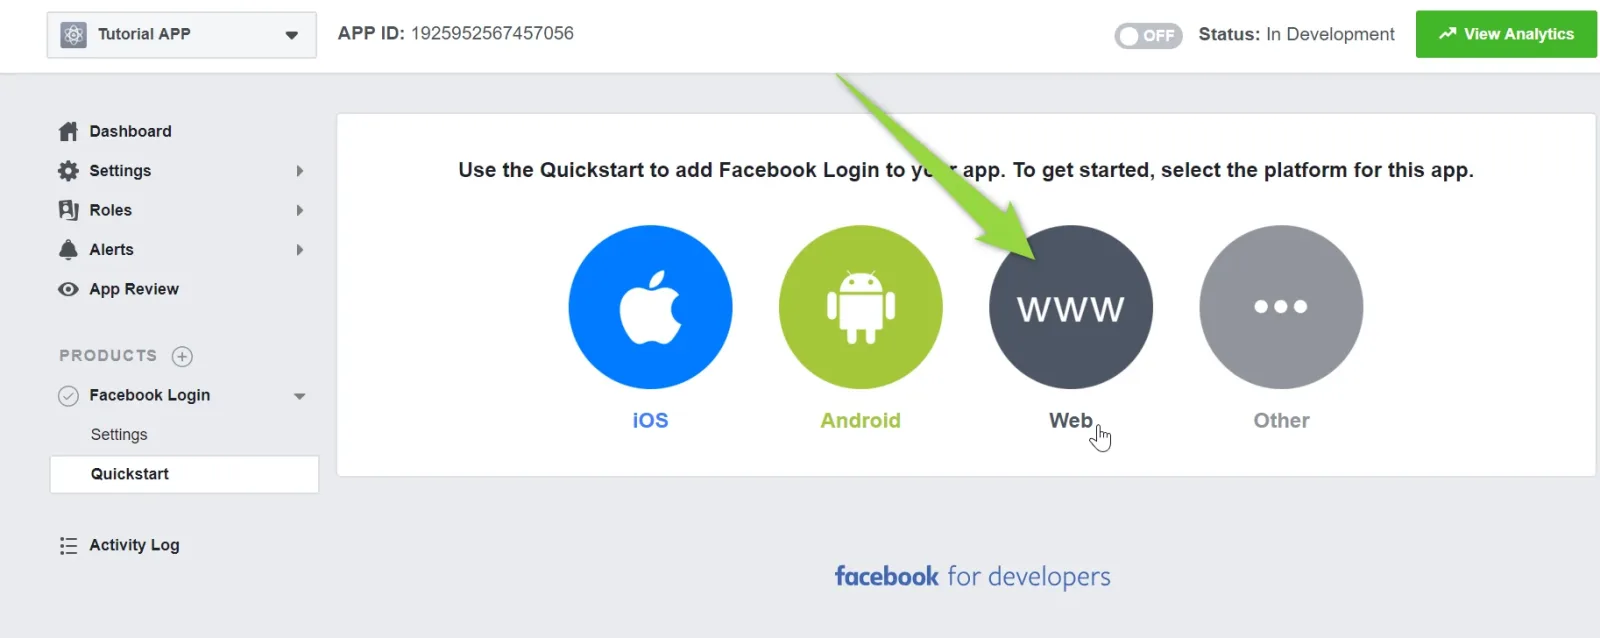
6
Choose WEB
-
7
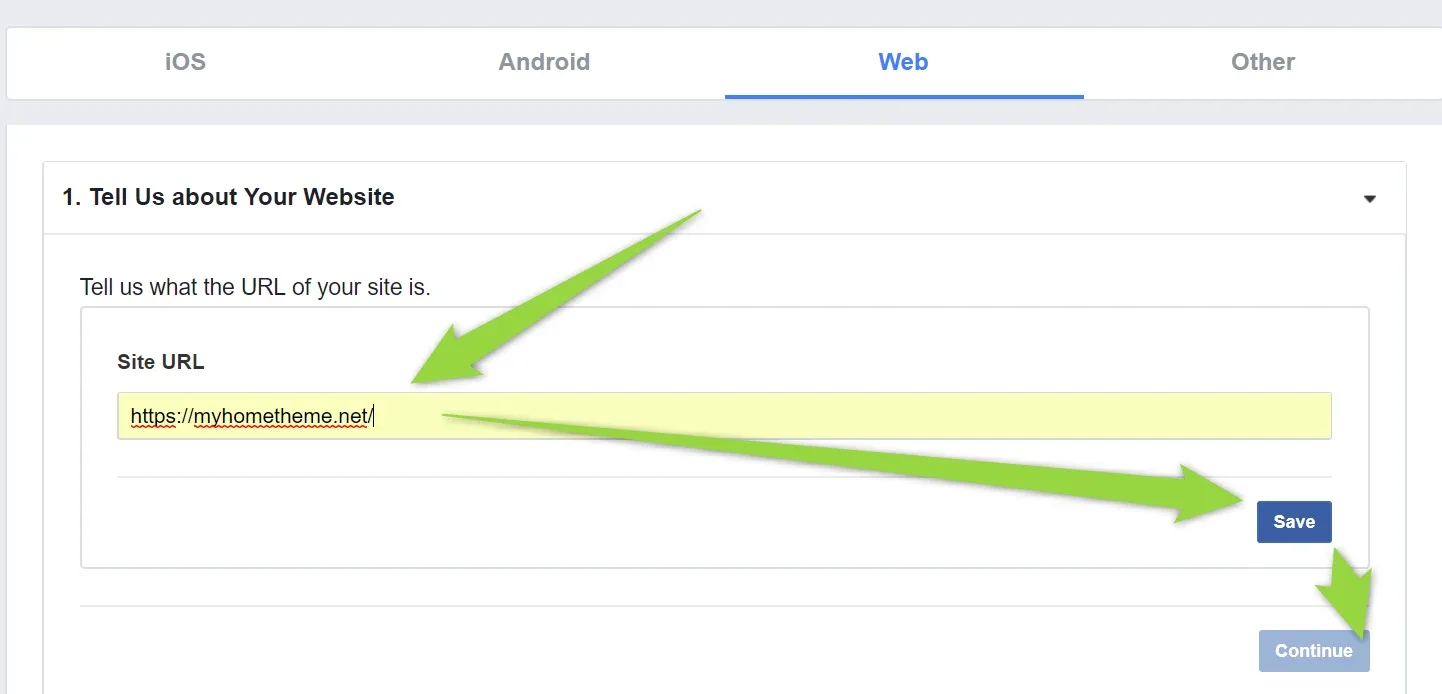
Type Your Site URL (please domain only, do not type sub-folder or page link)
-
8
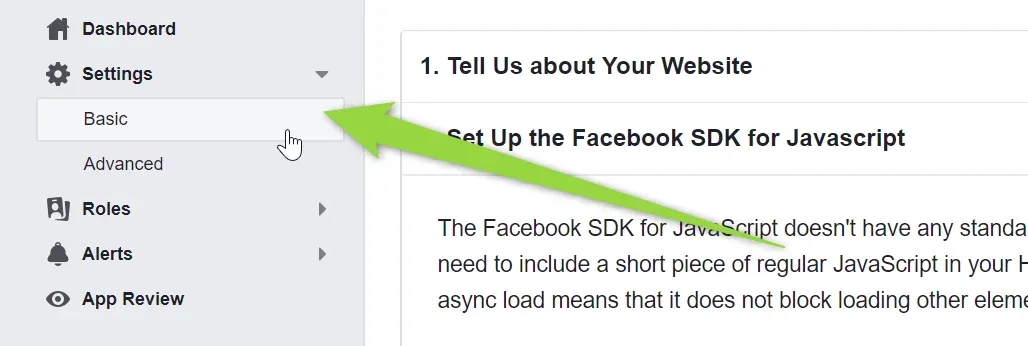
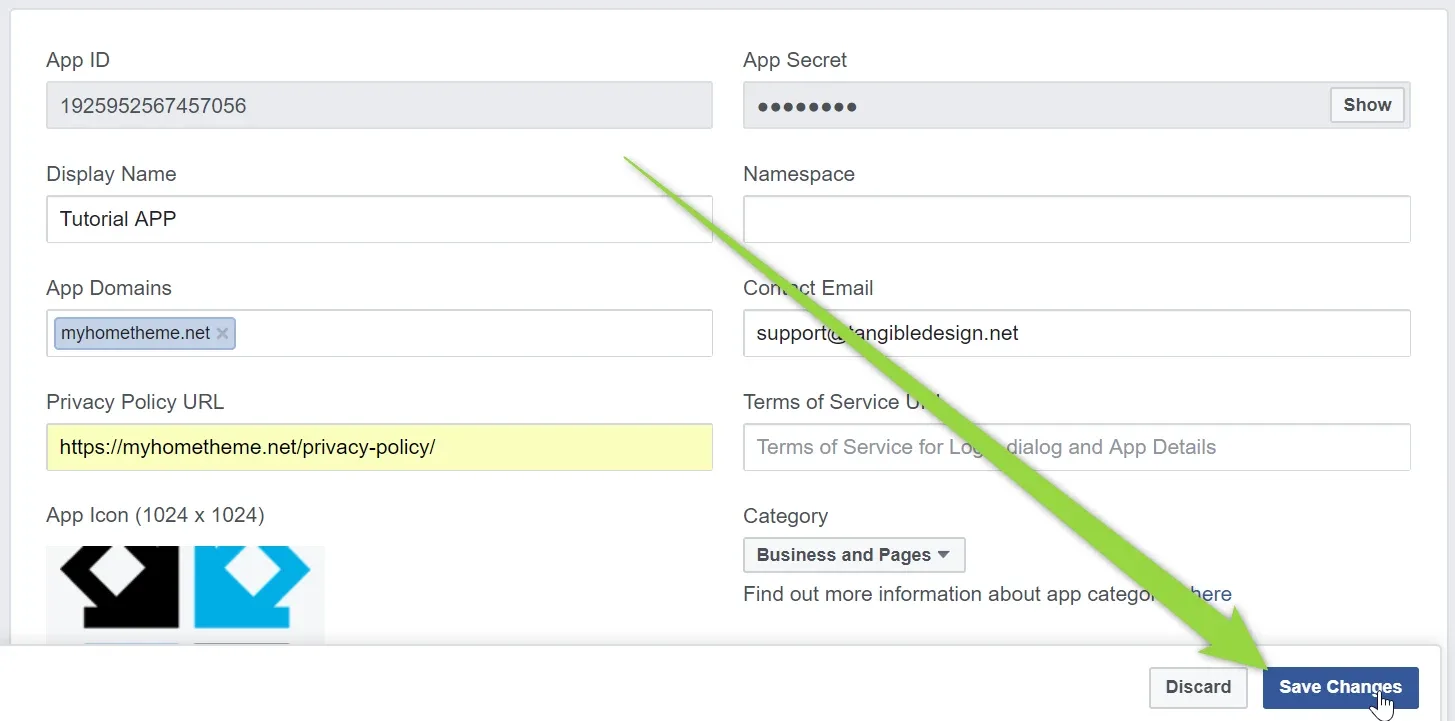
Go to Settings > Basic
-
9
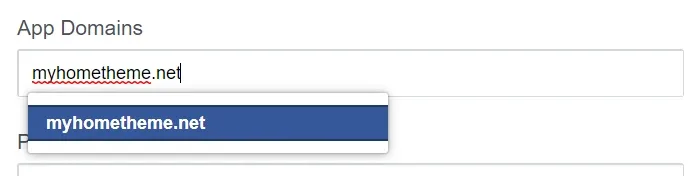
Add domain
-
10
Provide Private Policy URL (it is required by Facebook to make APP Status Live) - in our case it is this page:

-
11
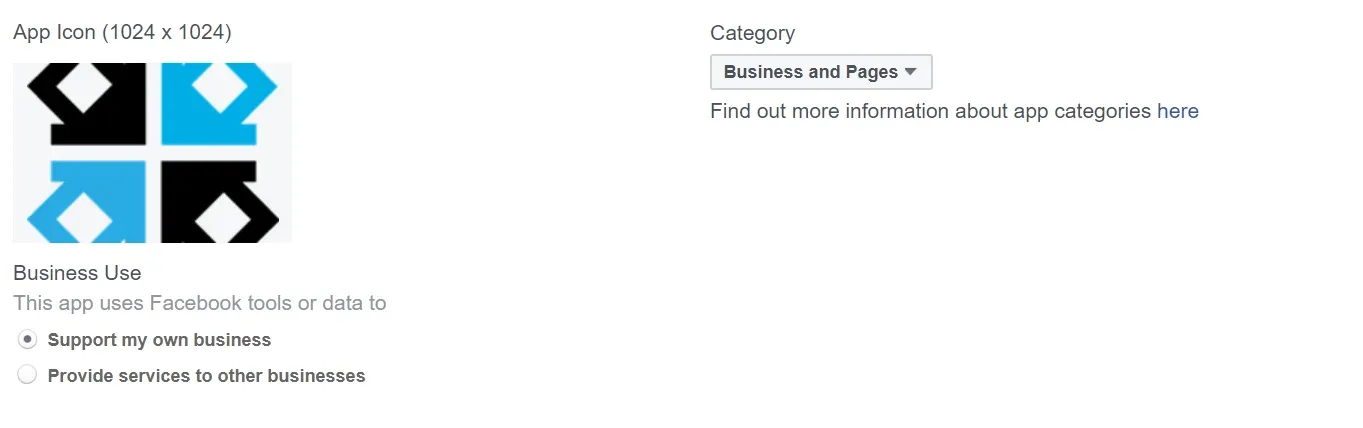
Add more information: App Icon (not required), Business use and category
-
12
Click Save Changes when you are done
-
13
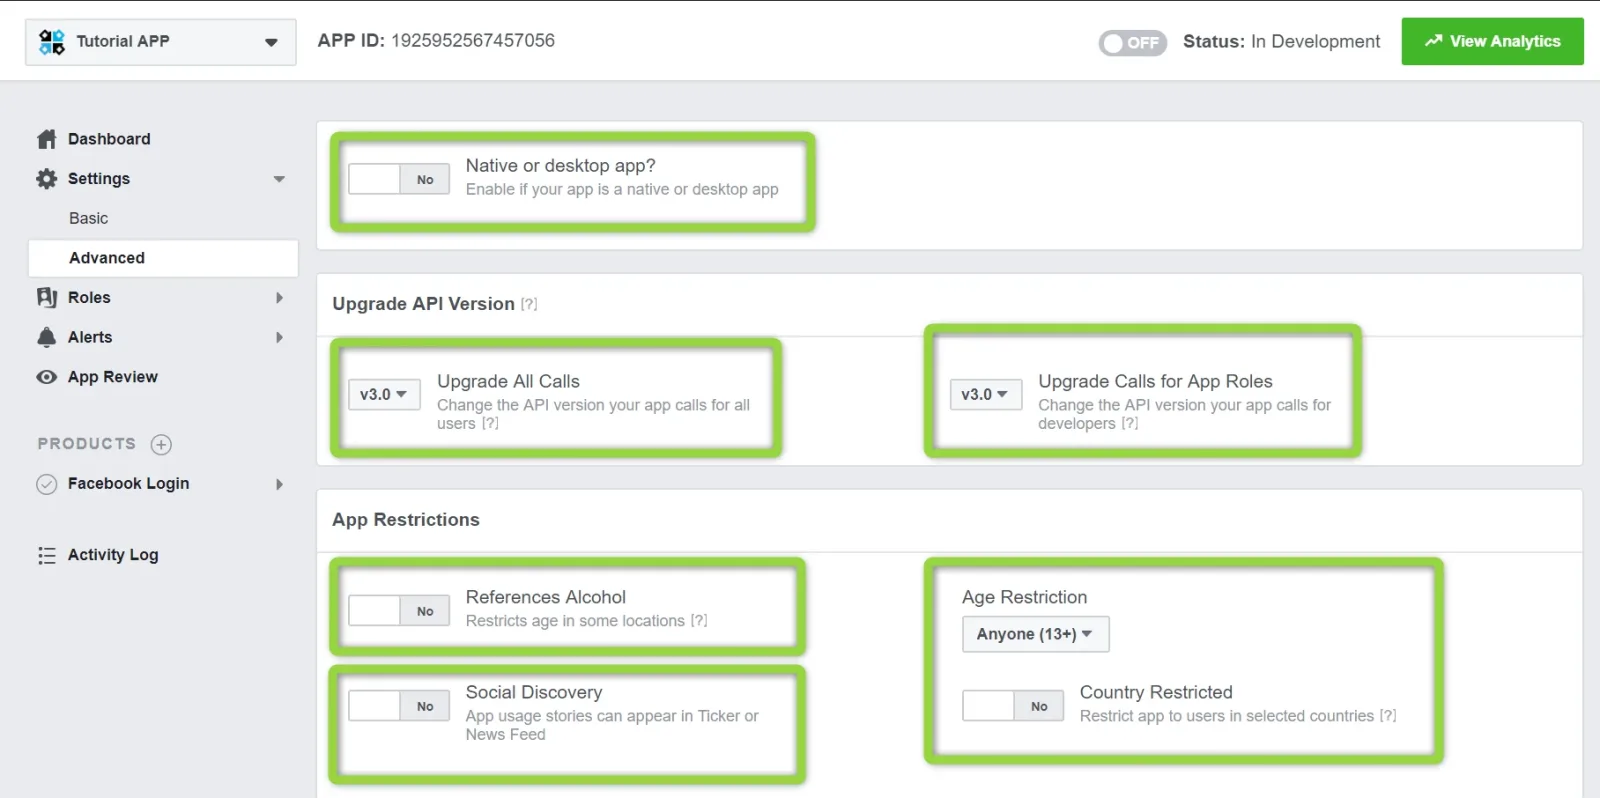
Visit Advanced and set options same as demo example - it is very important to choose "Social Discovery" OFF
-
14
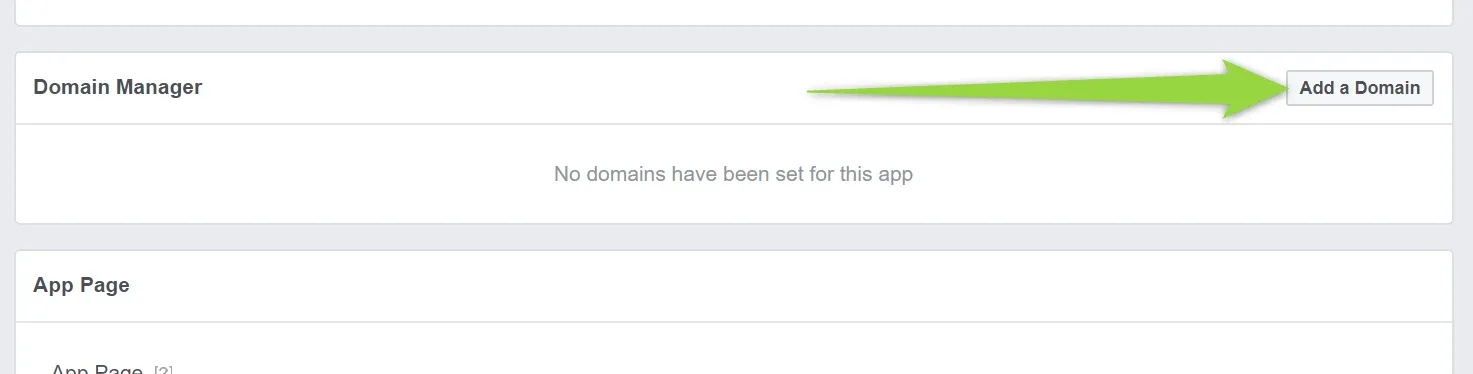
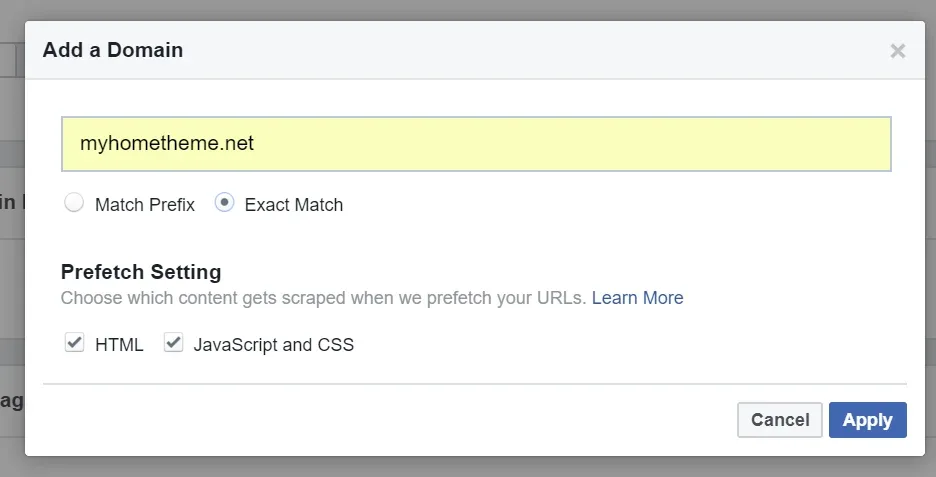
Scroll down and add domain to your domain manager
-
15
Type domain and set "Exact Match" + Apply
-
16
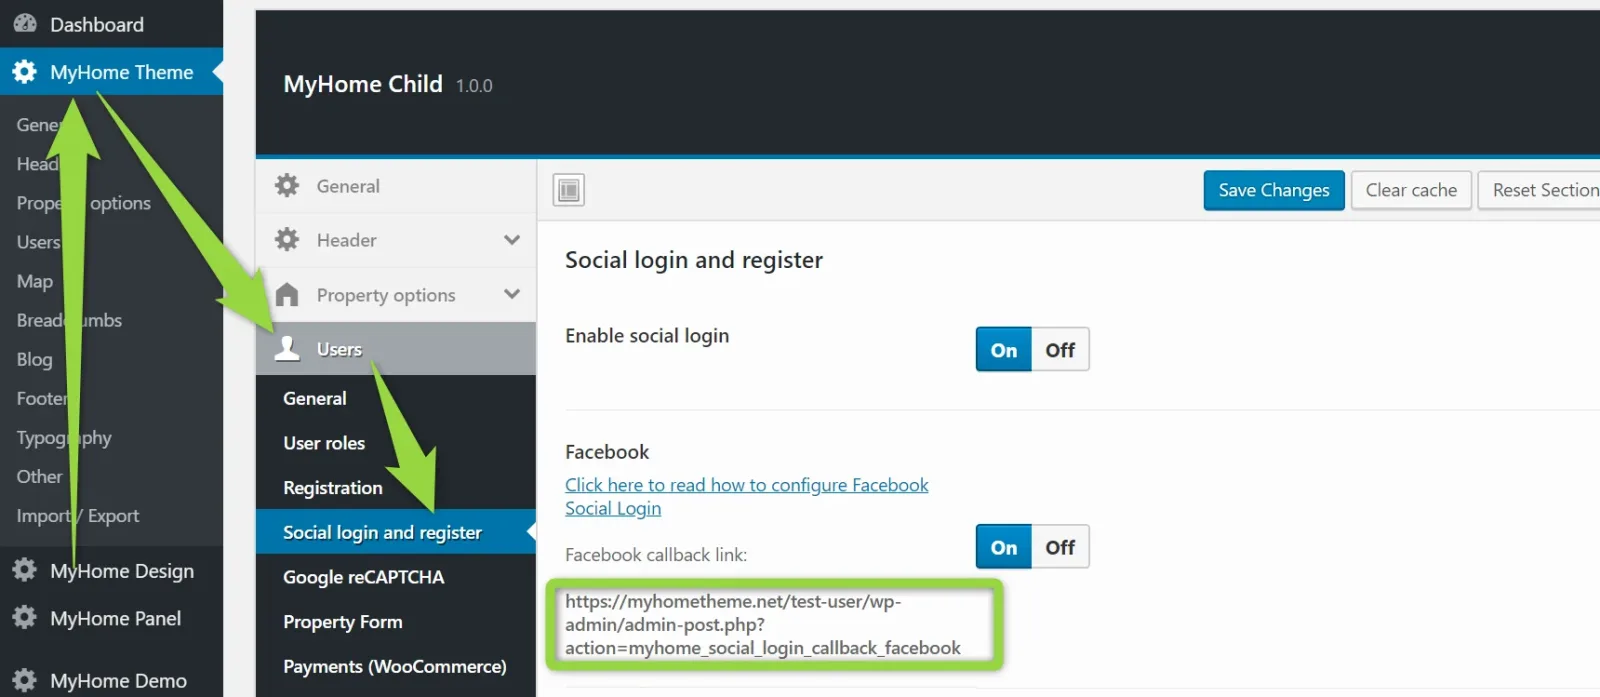
Visit Your Theme Options to obtain your Facebook callback link and copy it
-
17
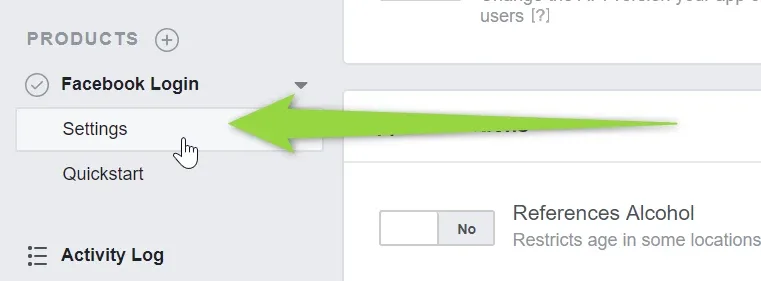
Visit Facebook Login > Settings
-
18
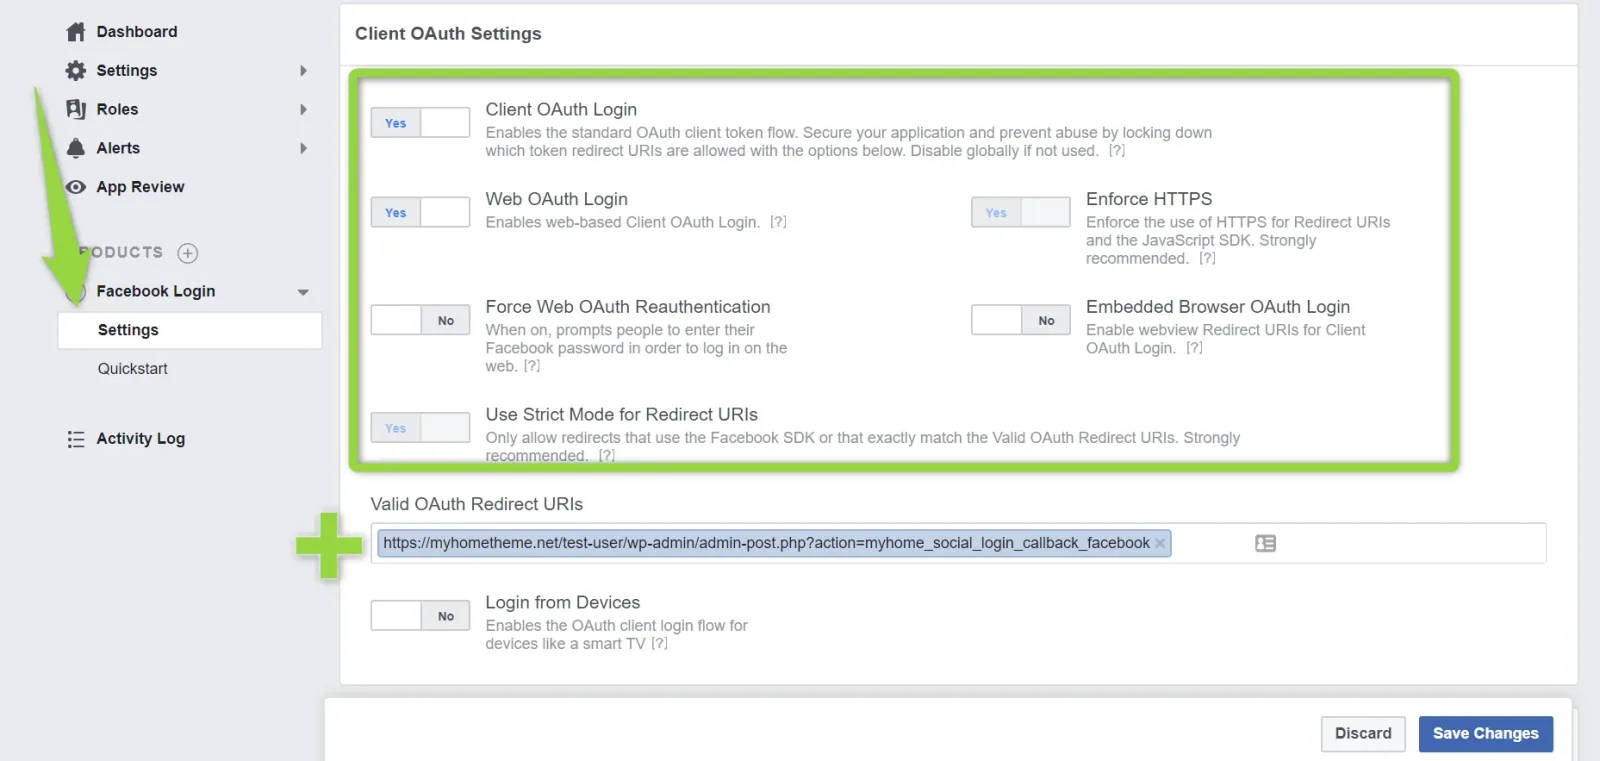
Paste this link into: "Valid OAuth Redirect URIs" and set other field same way as image below
- 19 Save Changes
-
20
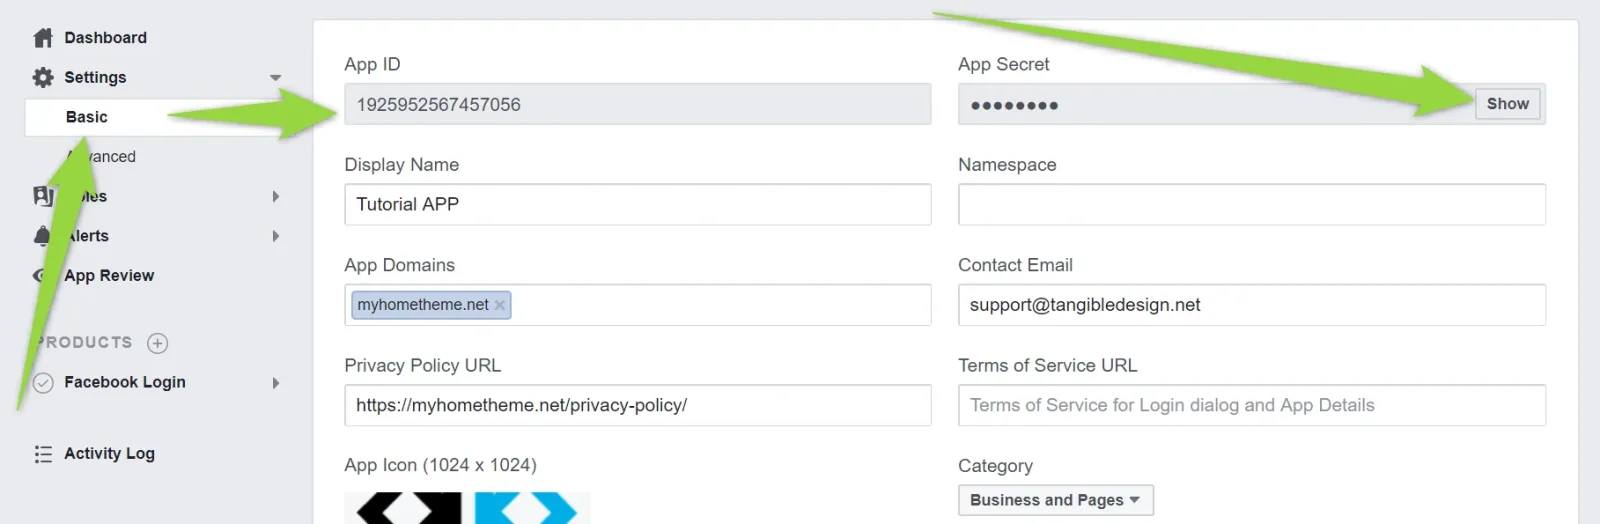
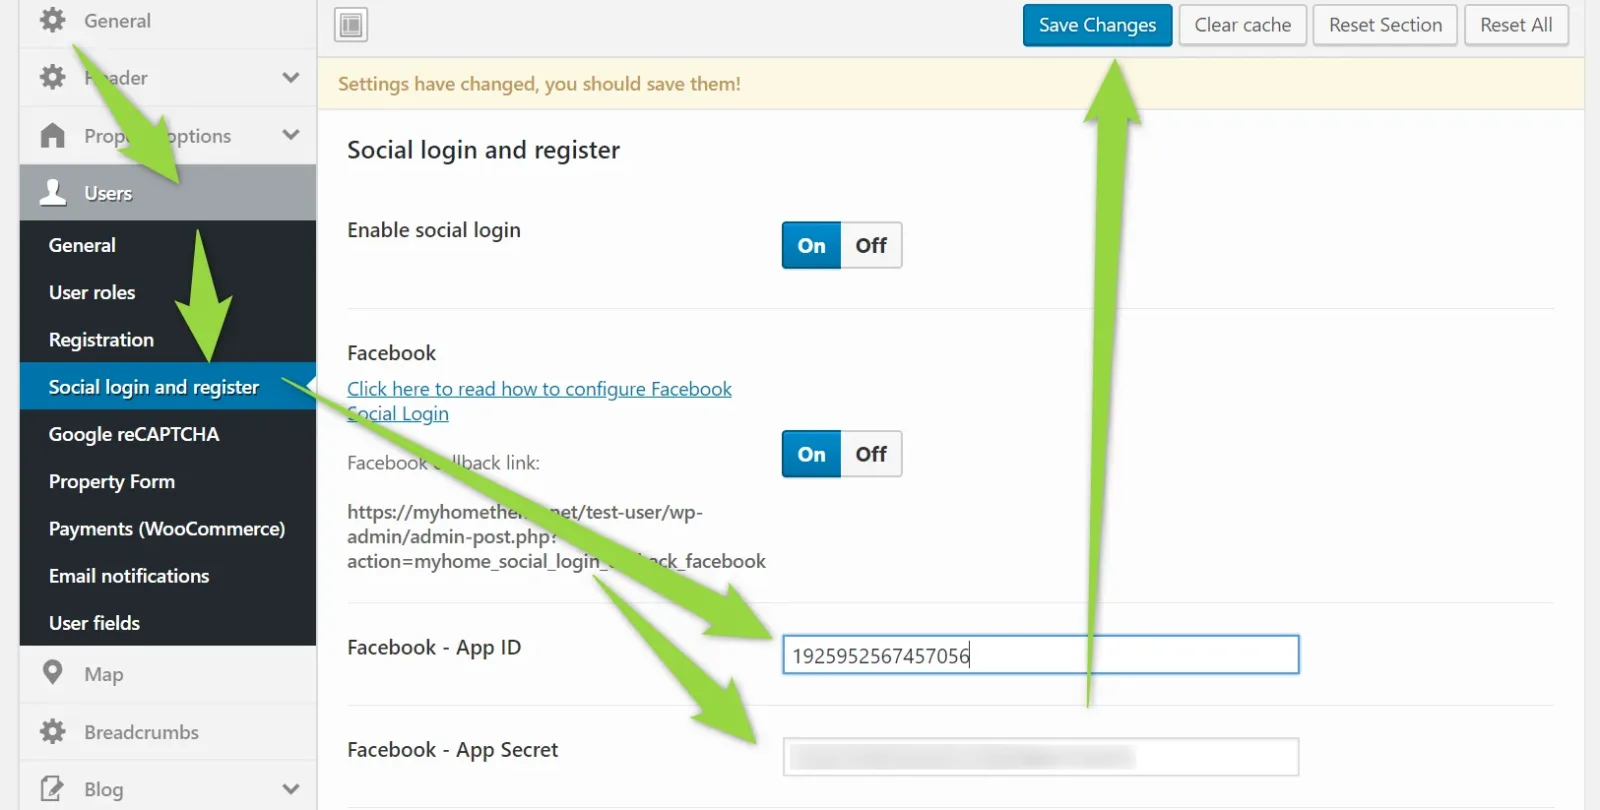
Copy Your APP ID and Secret Key Into MyHome Theme:
-
1
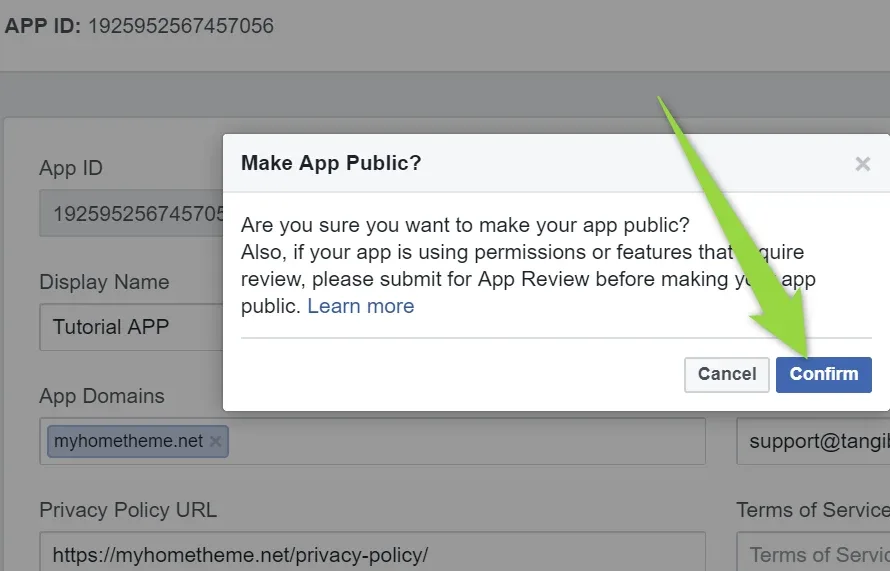
Change APP status

-
2
Confirm
Done!
2. Twitter
- 1 Please visit https://apps.twitter.com/
-
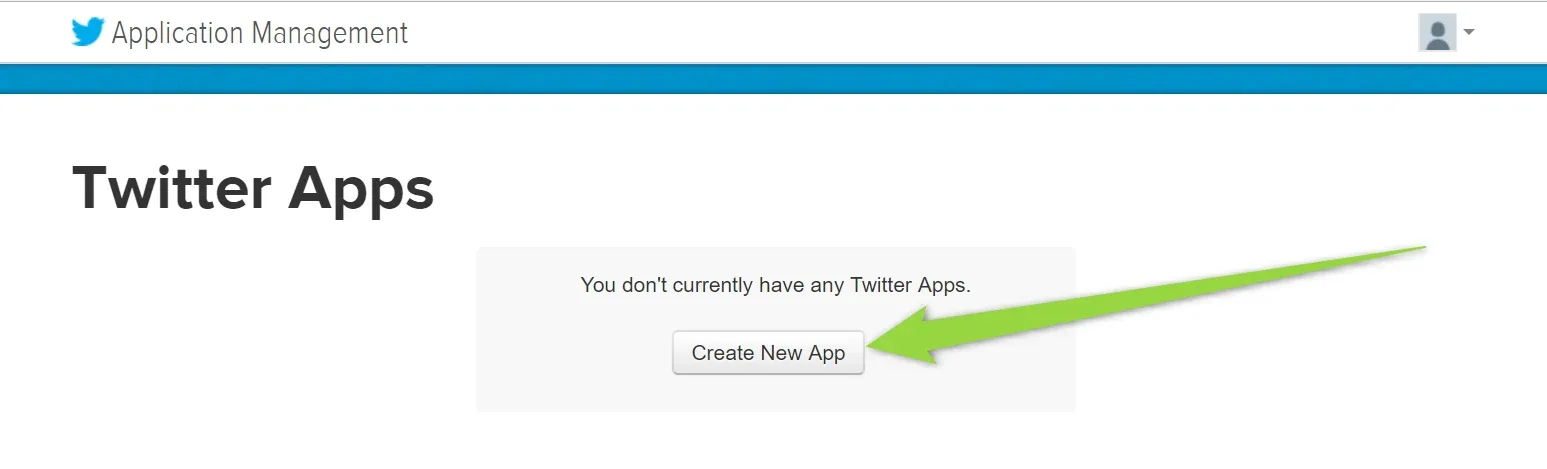
2
Click "Create New APP"
-
3
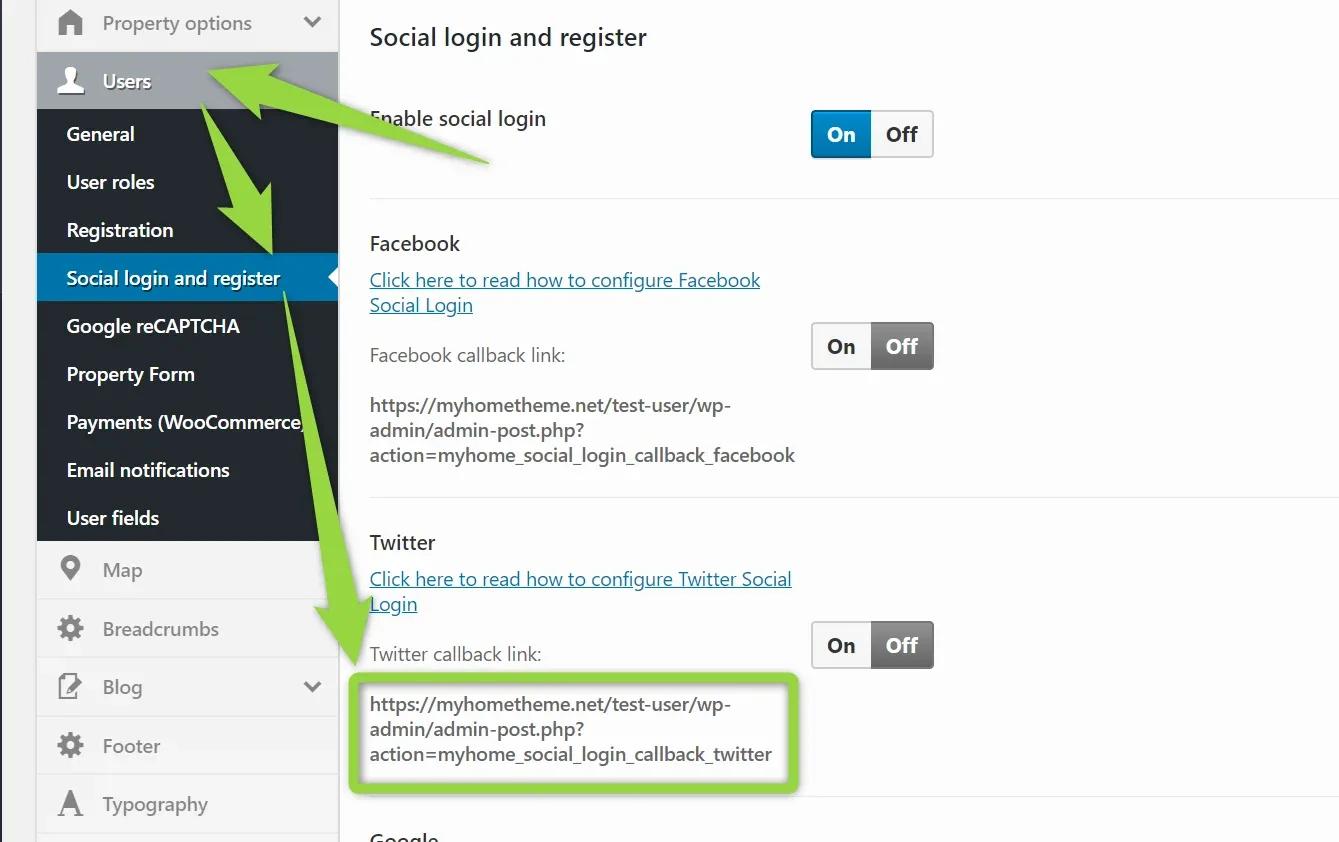
Visit your MyHome Theme > Users > Social Login and Register and copy the Twitter callback link
-
4
Fill the form
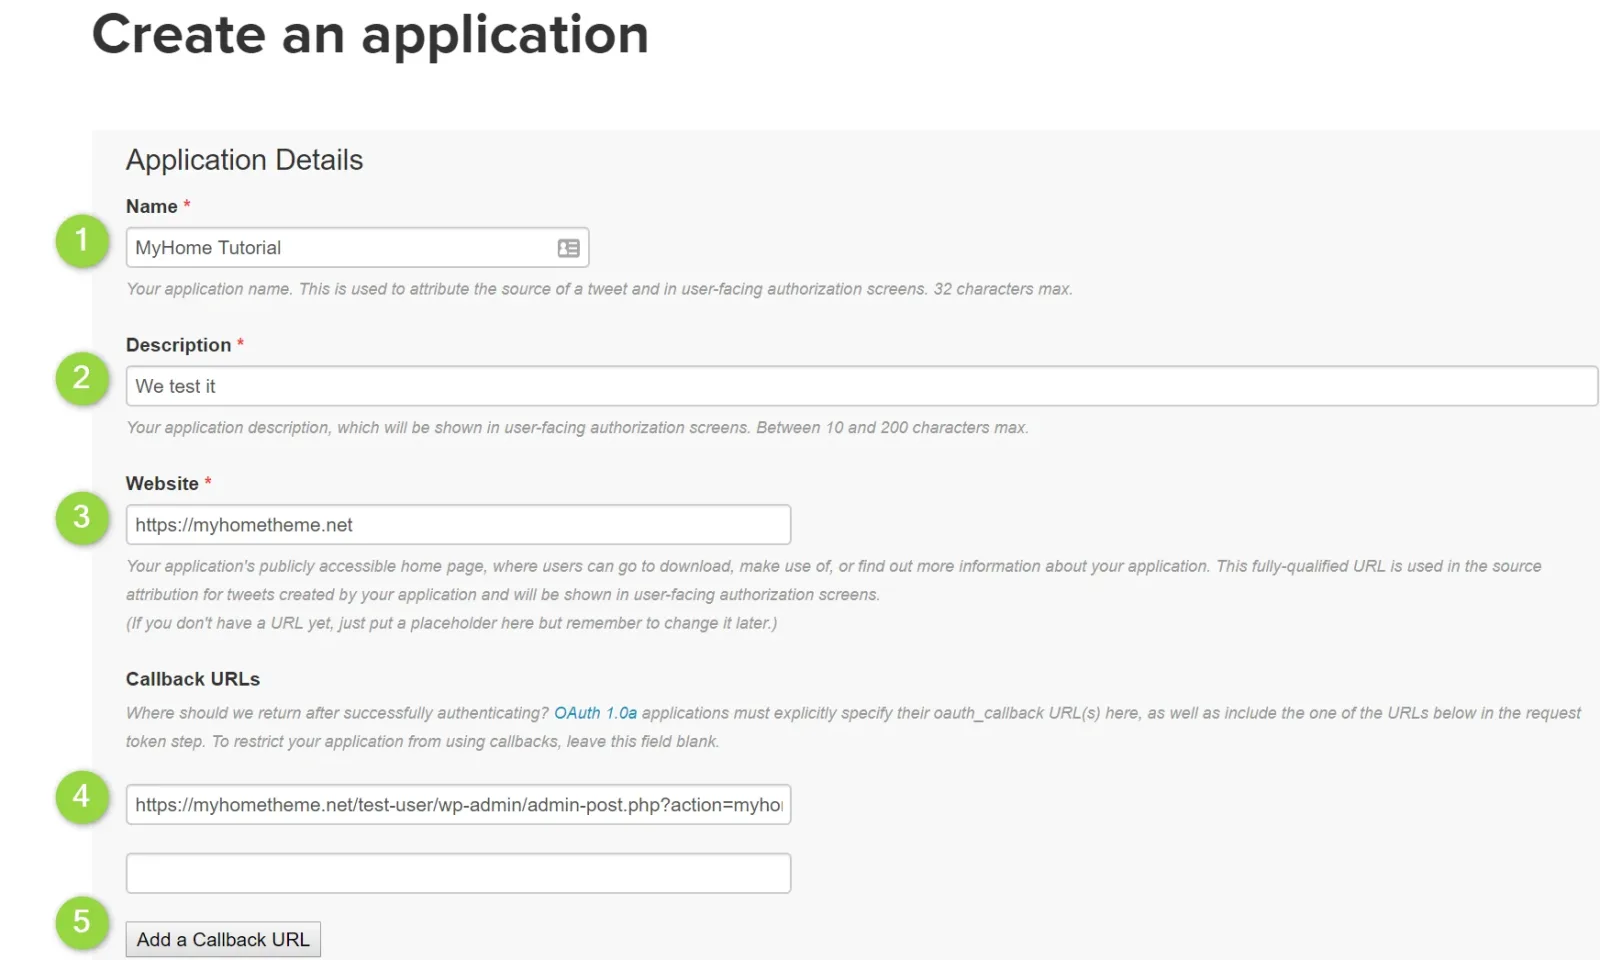
Remember to add a callback URL because it is required to make Twitter login works correctly.
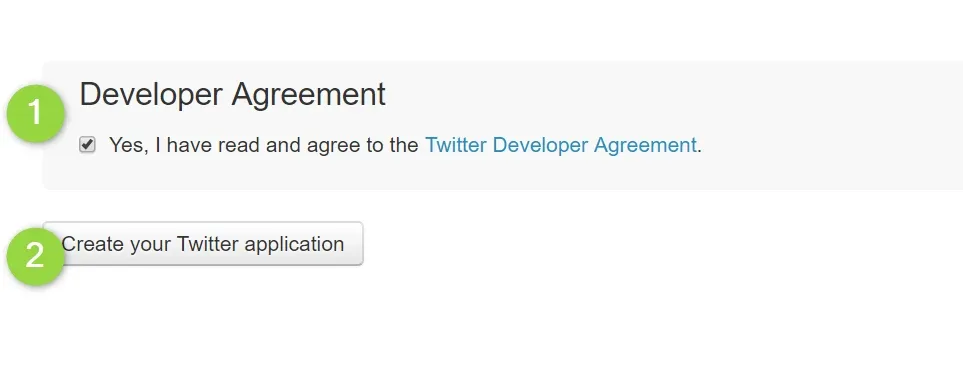
5. Check developer agreements and "Create your Twitter Application"
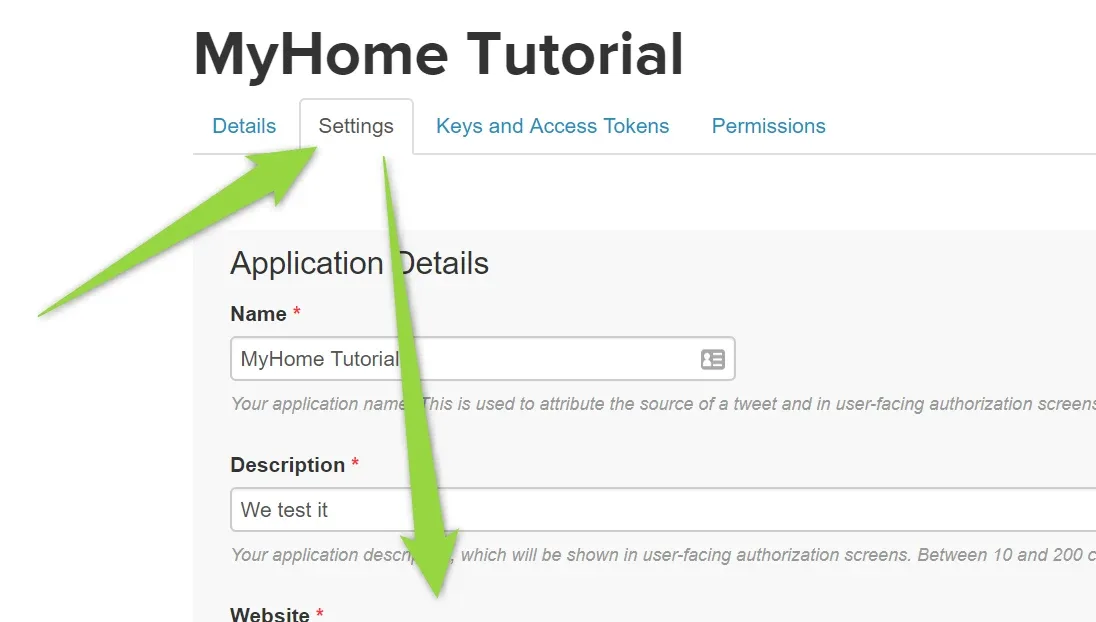
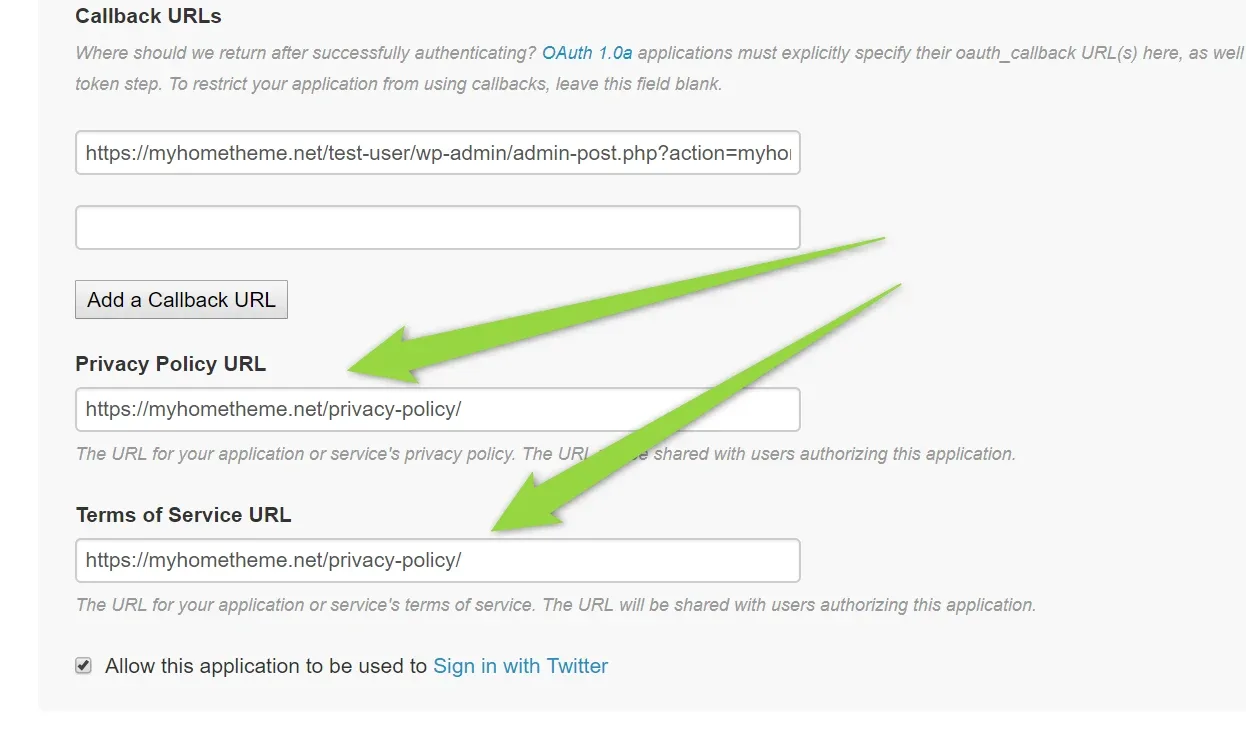
6. Add link to you privacy policy and terms of service in your app
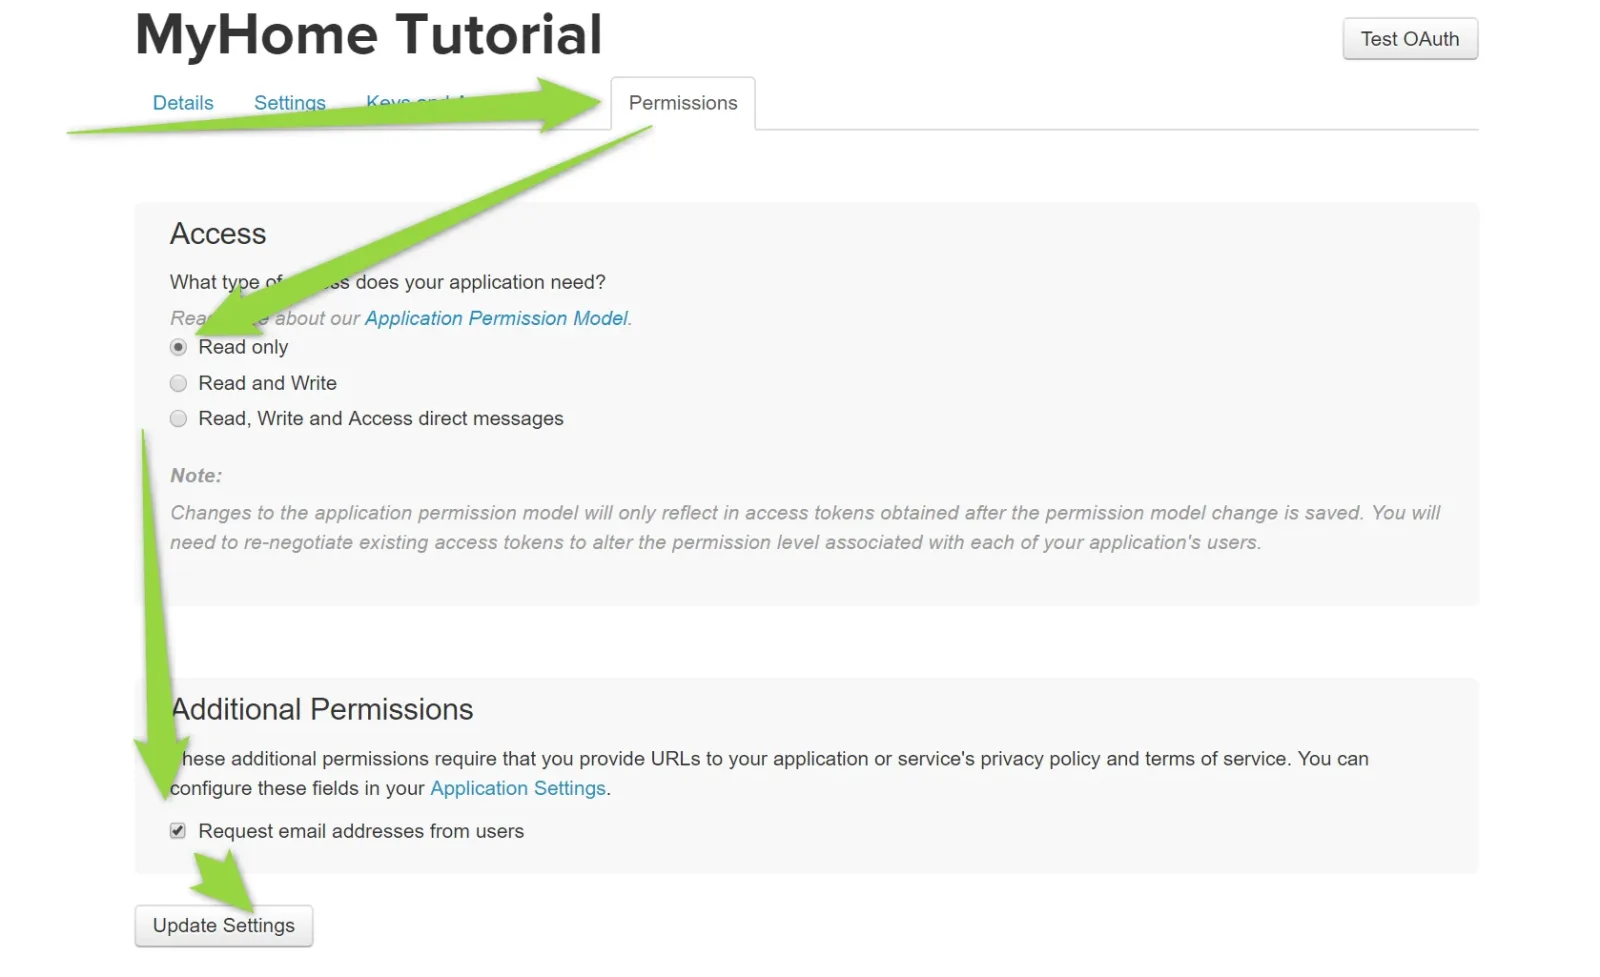
7. Visit Permissions, set to "Read Only" and check "Request email addresses from users" and click update settings
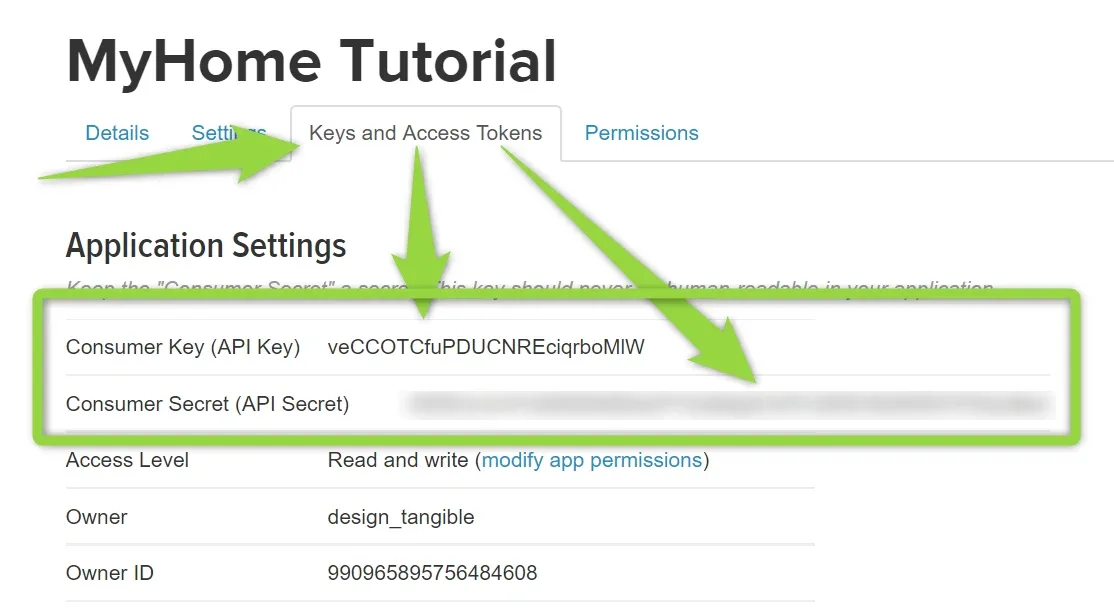
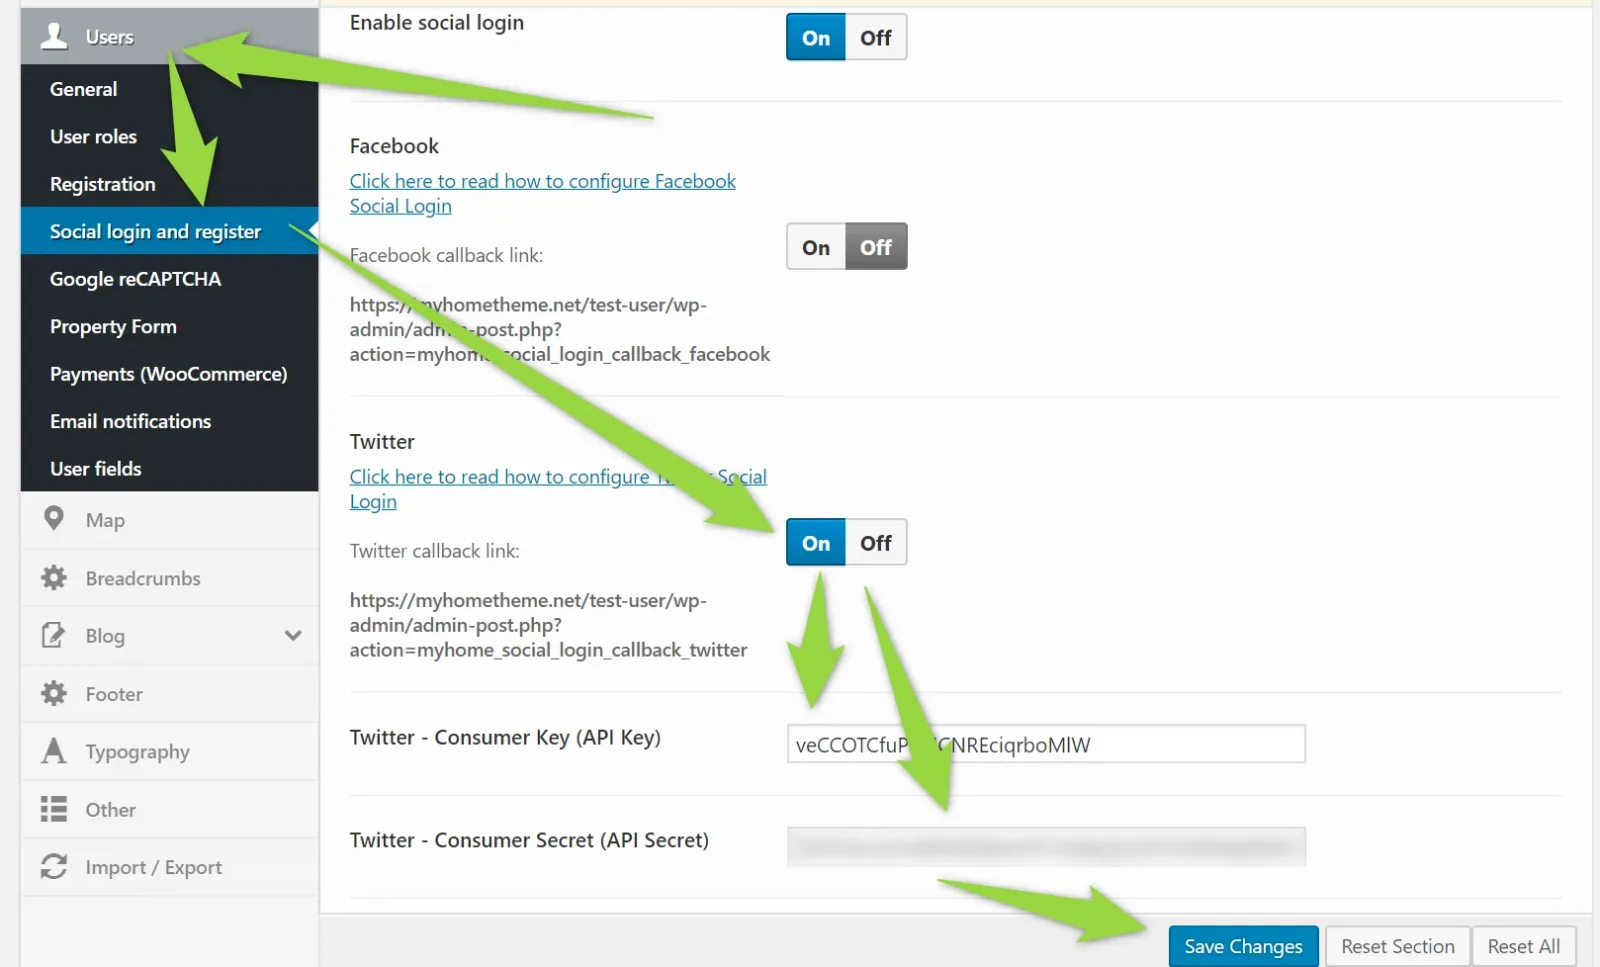
8. Visit Keys and Access Tokens and copy it into Your MyHome
Done!
3. Google Account (Gmail)
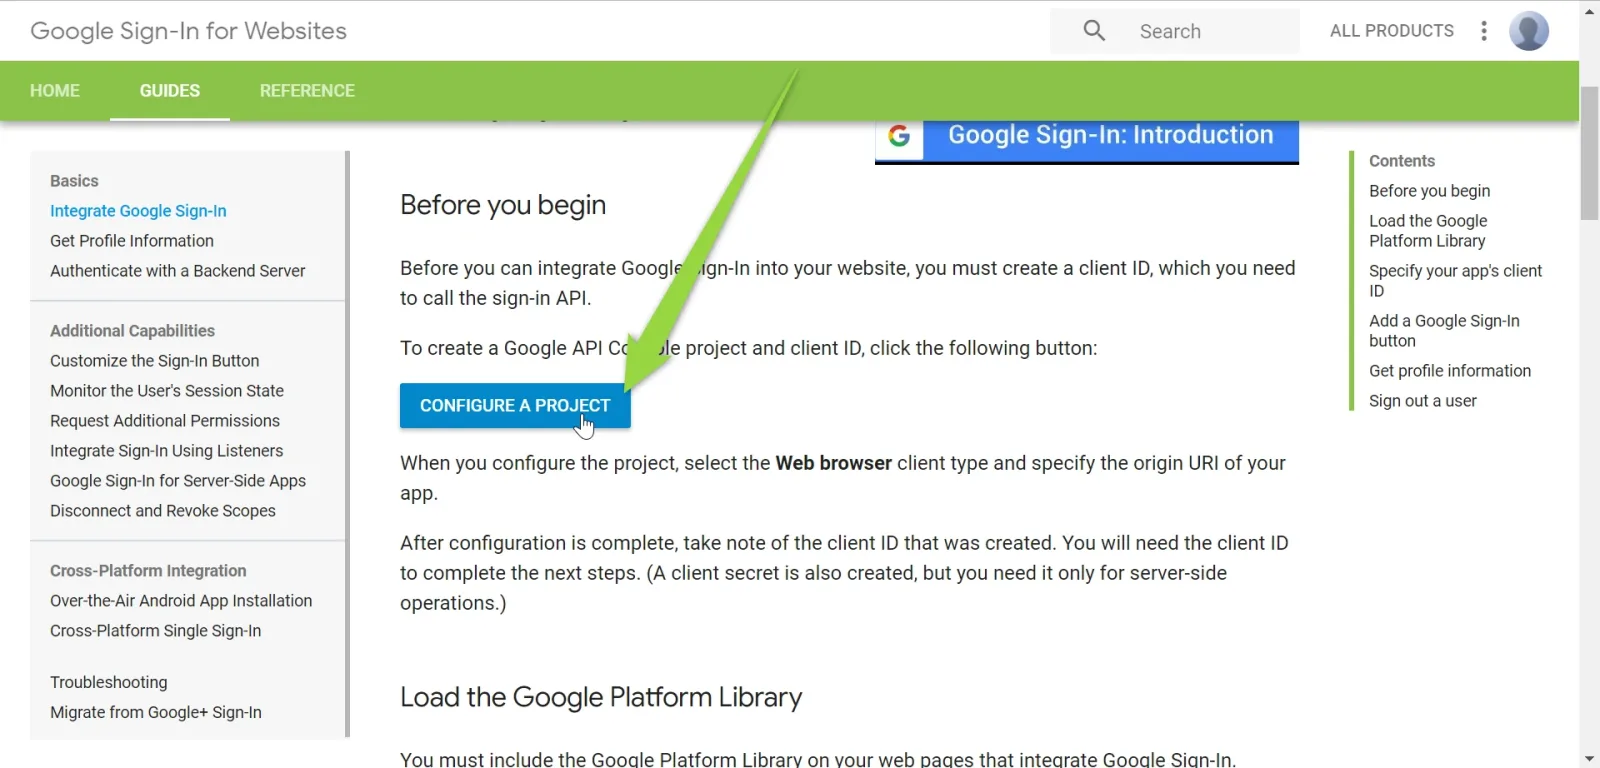
- 1 Visit: https://developers.google.com/identity/sign-in/web/sign-in
-
2
Click "Configure a project" button
-
3
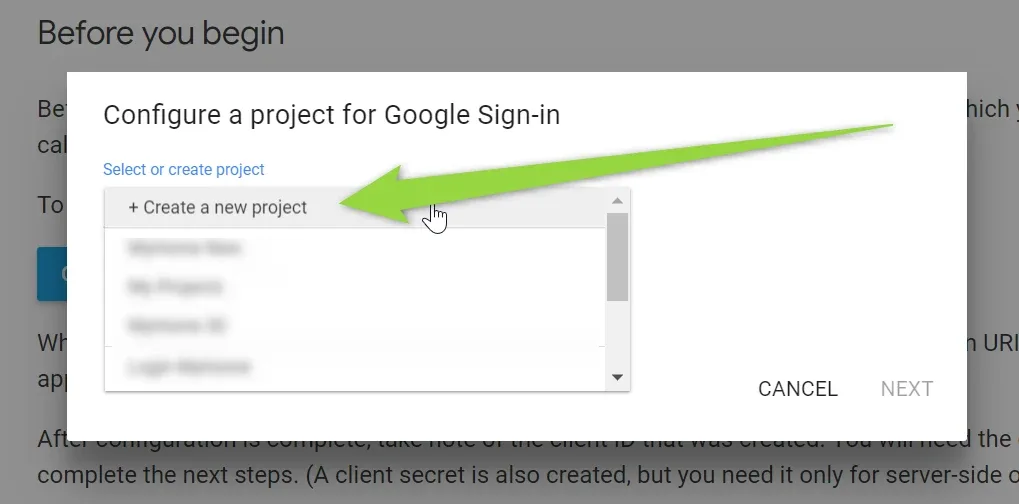
Click Create a new Project
-
4
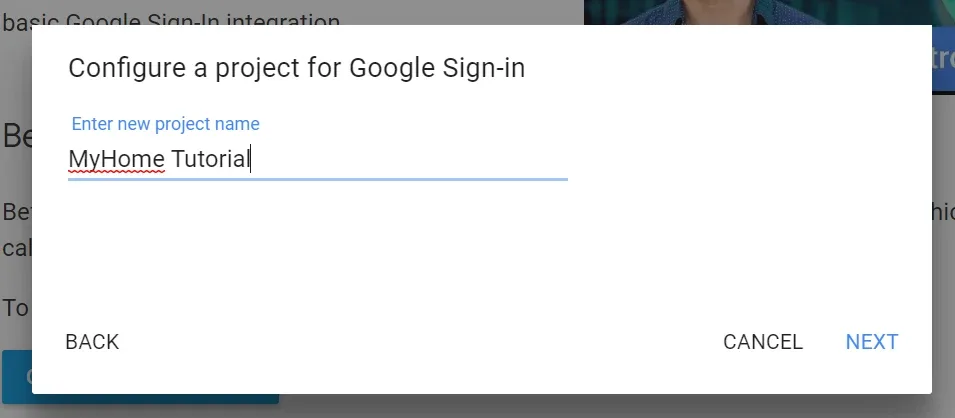
Enter a new project name
-
5
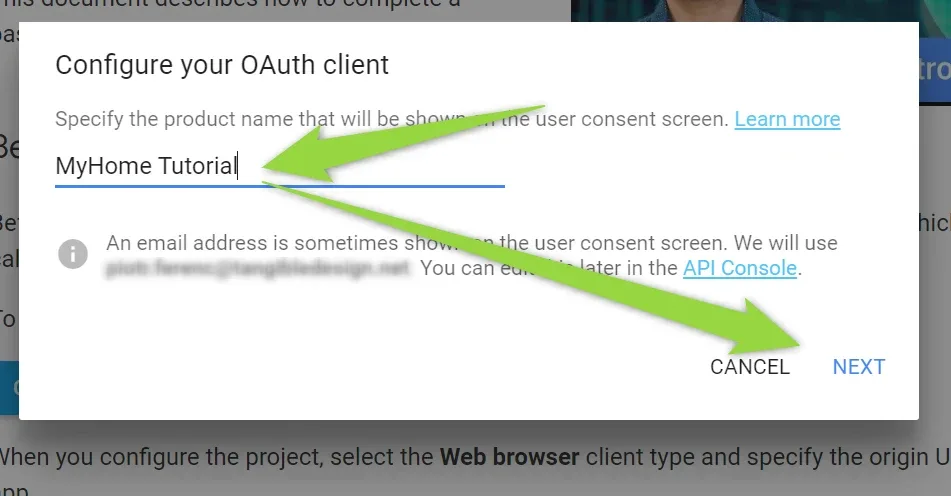
Enter the name visible for your visitors and click next
-
6
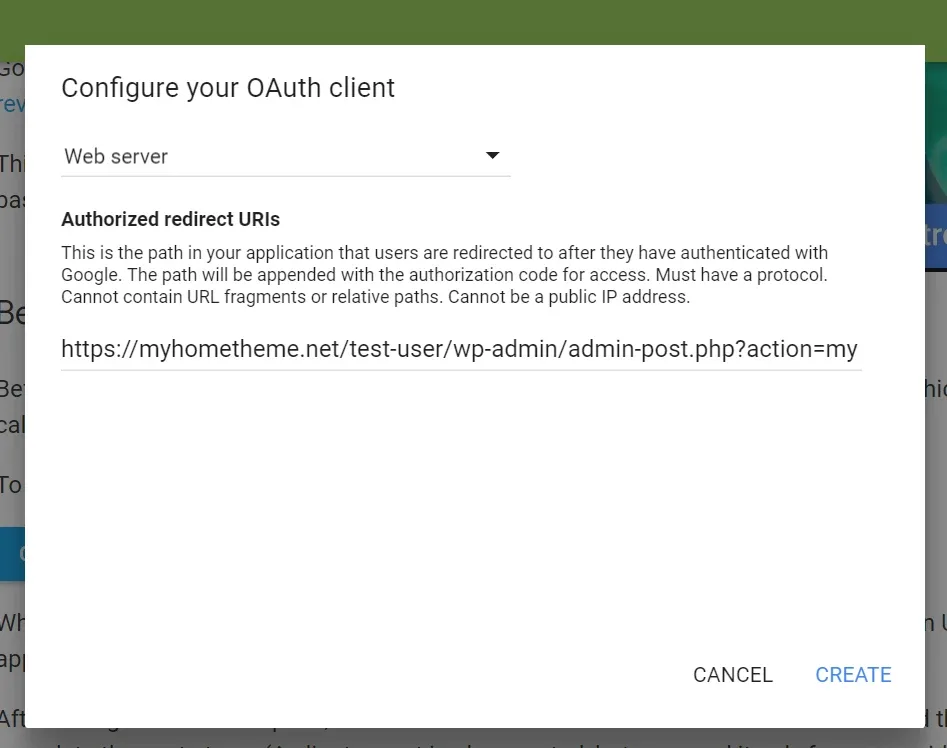
Set "Web server" (not "Web browsers") and type your callback URL. You can find this link in the /wp-admin/ > MyHome Theme > Users > Social login and register > Google callback link
-
7
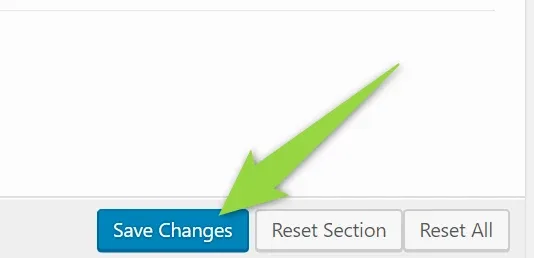
Copy Client ID and Client Secret into your MyHome
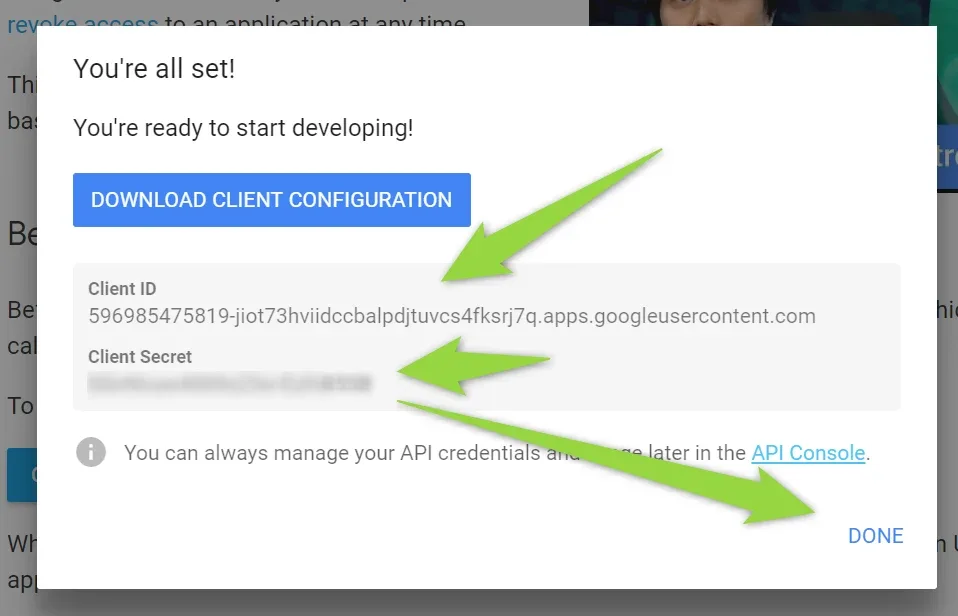
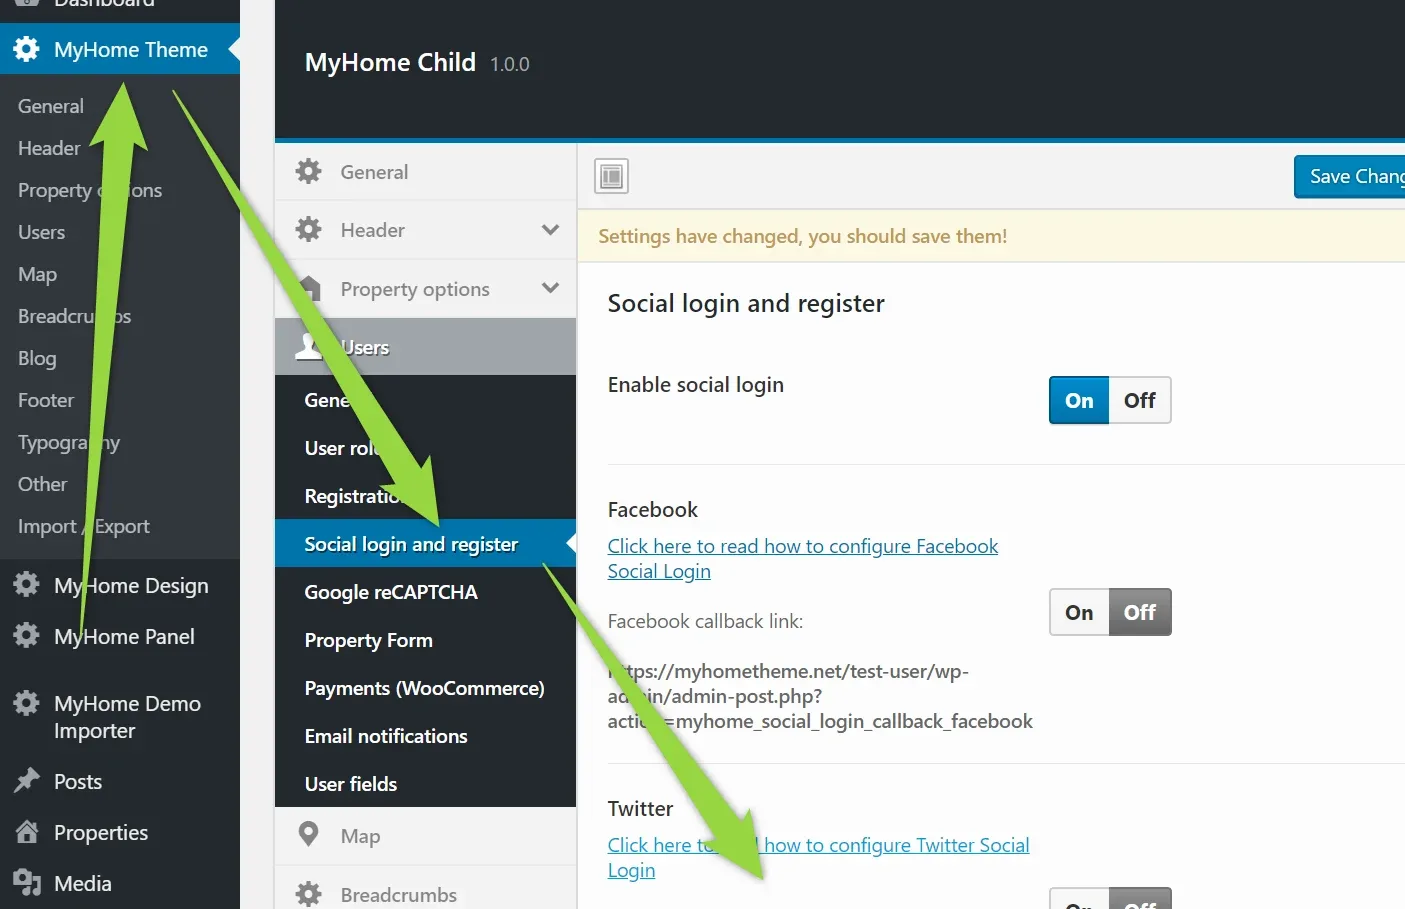
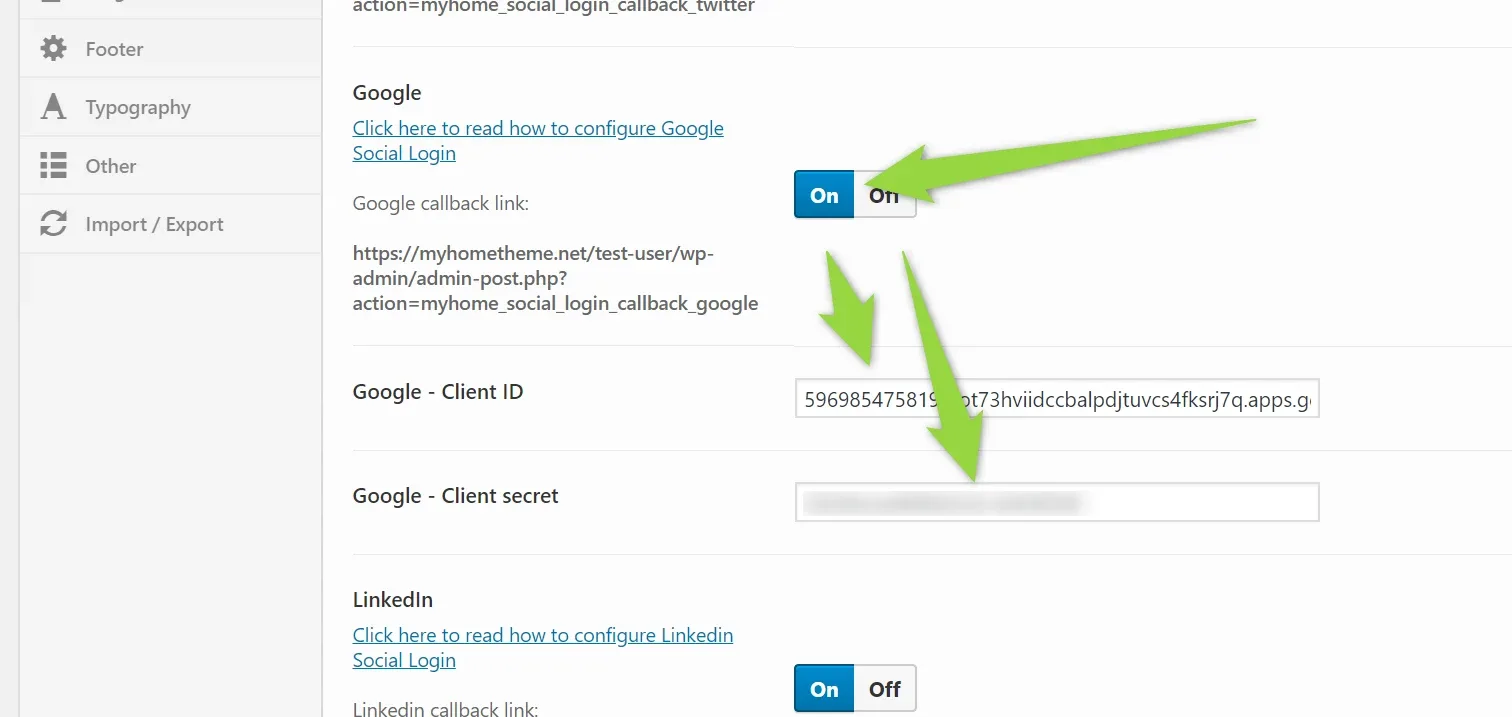
and save changes
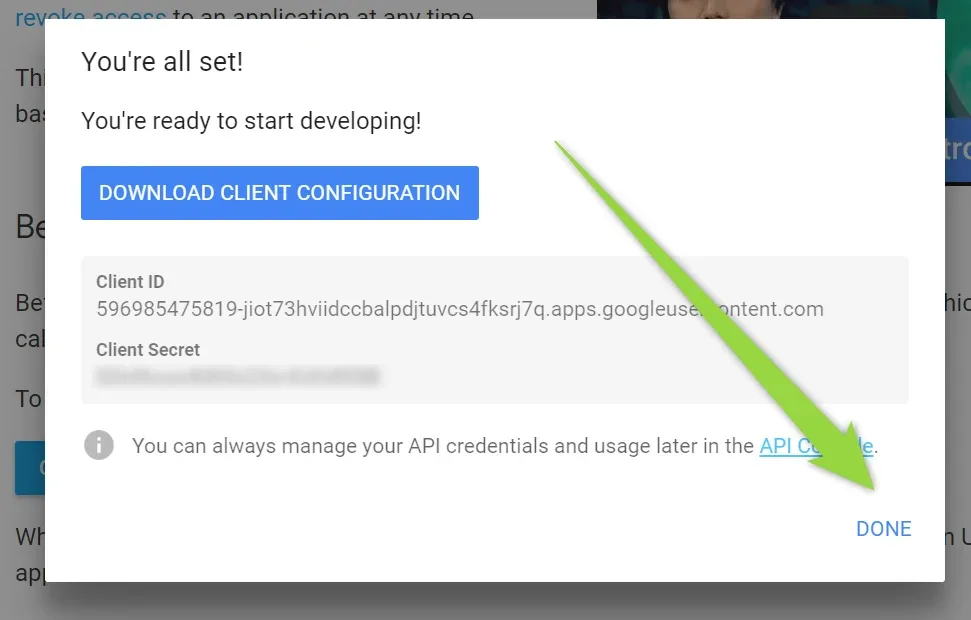
8. Go back to your App configuration and click "Done"
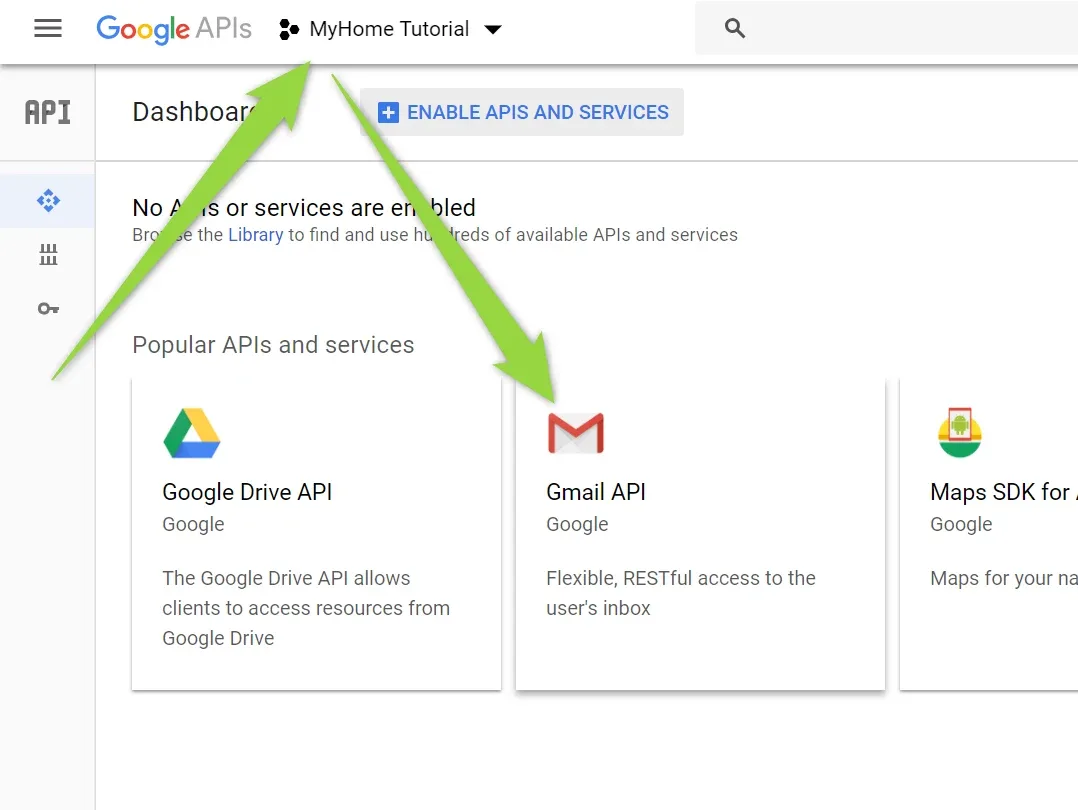
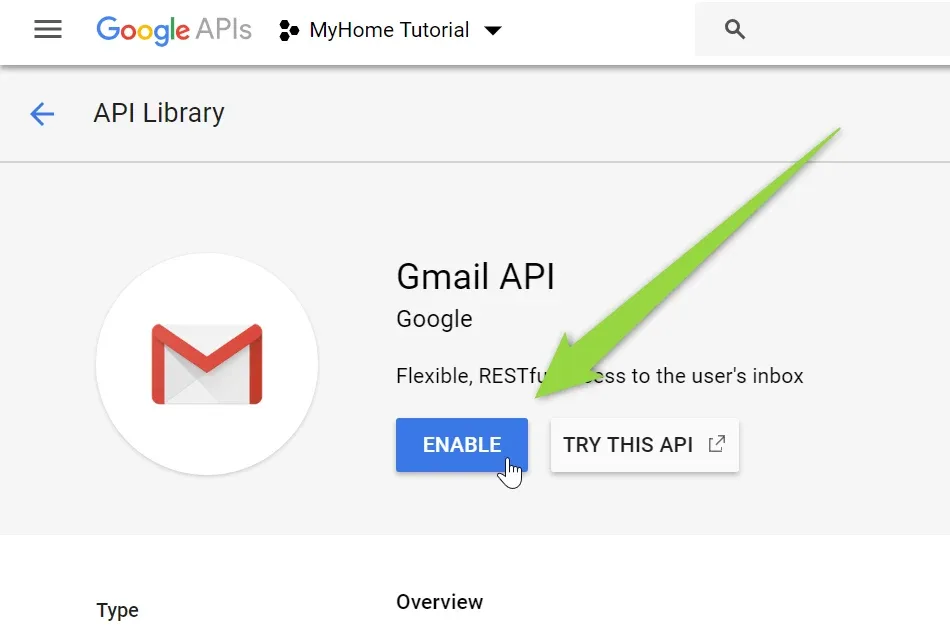
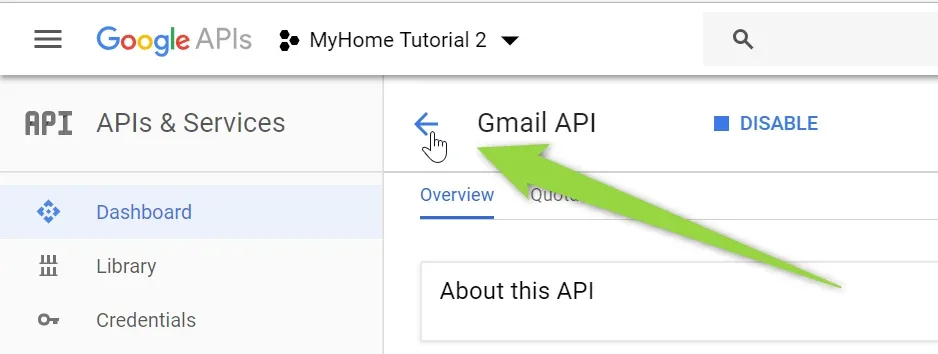
10. Choose your project end enable Gmail API
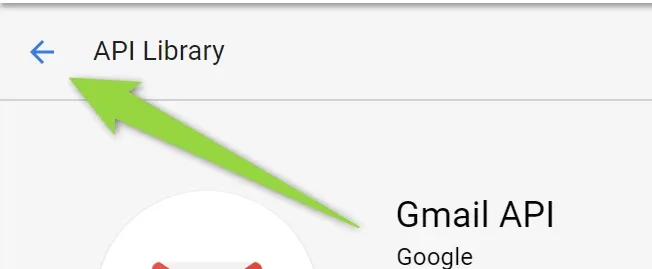
11. Back
12. Back
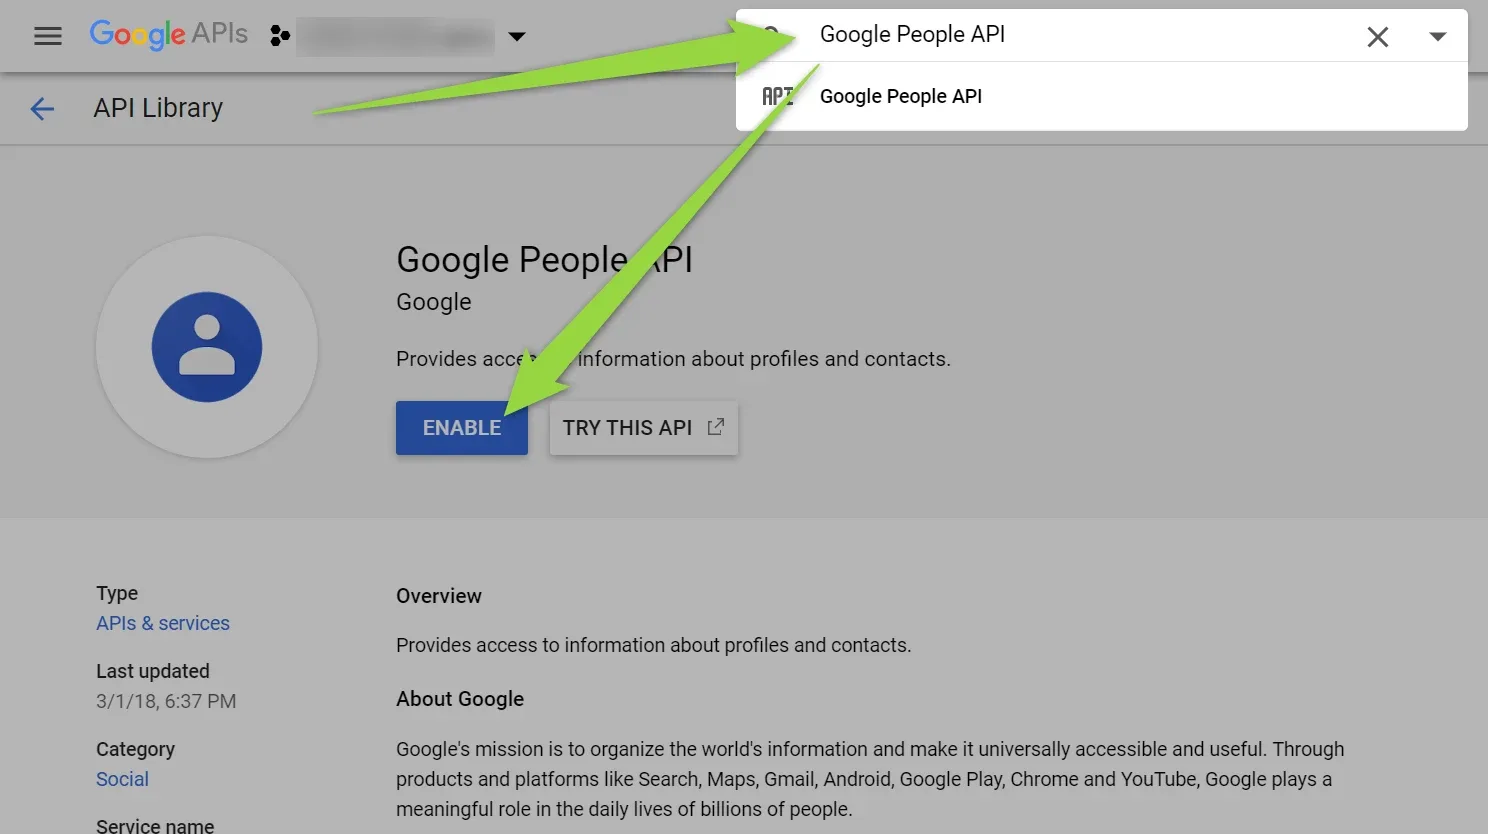
13. Enable "Google People API"
Done!
4. Linkedin
- 1 Please visit https://developer.linkedin.com/
-
2
Click My Apps

-
3
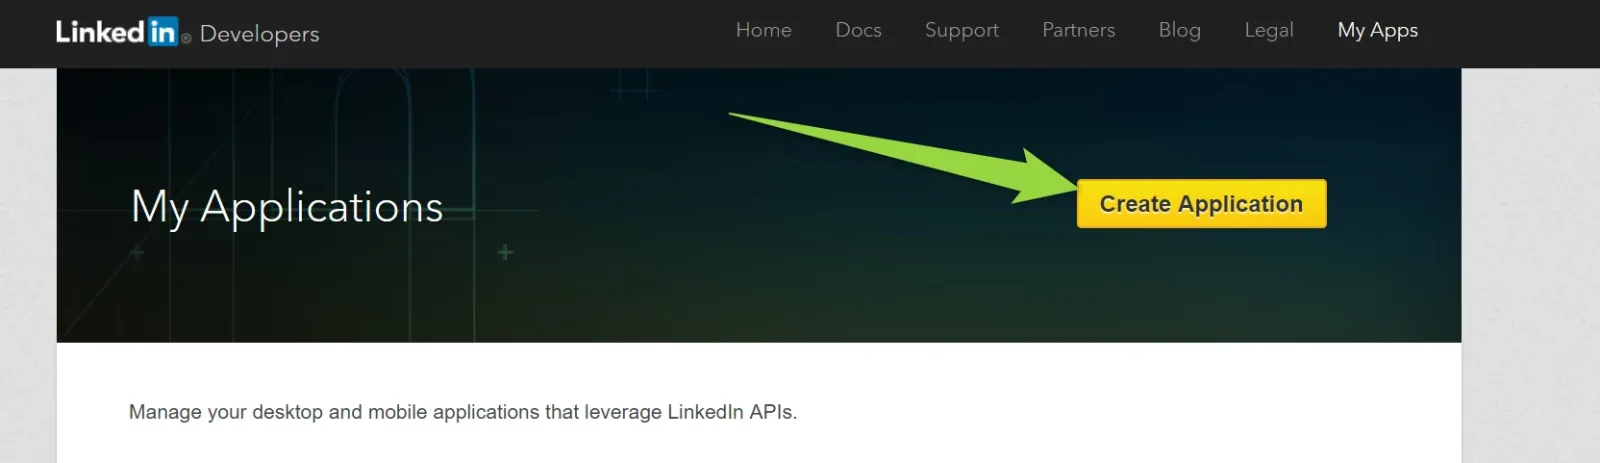
Click "Create application"
-
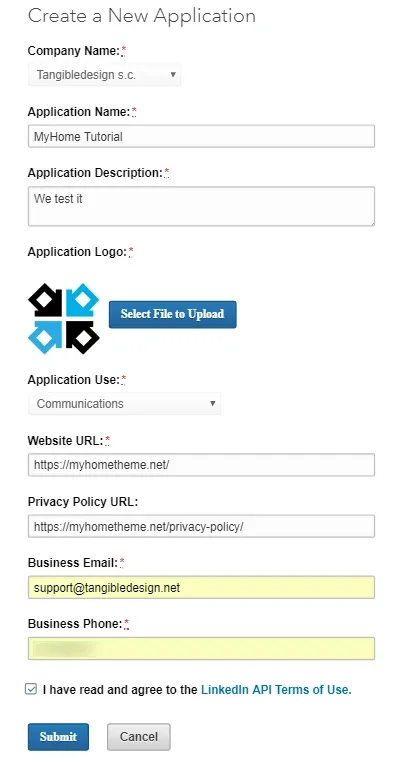
4
Fill all required fields and submit form e.g.
-
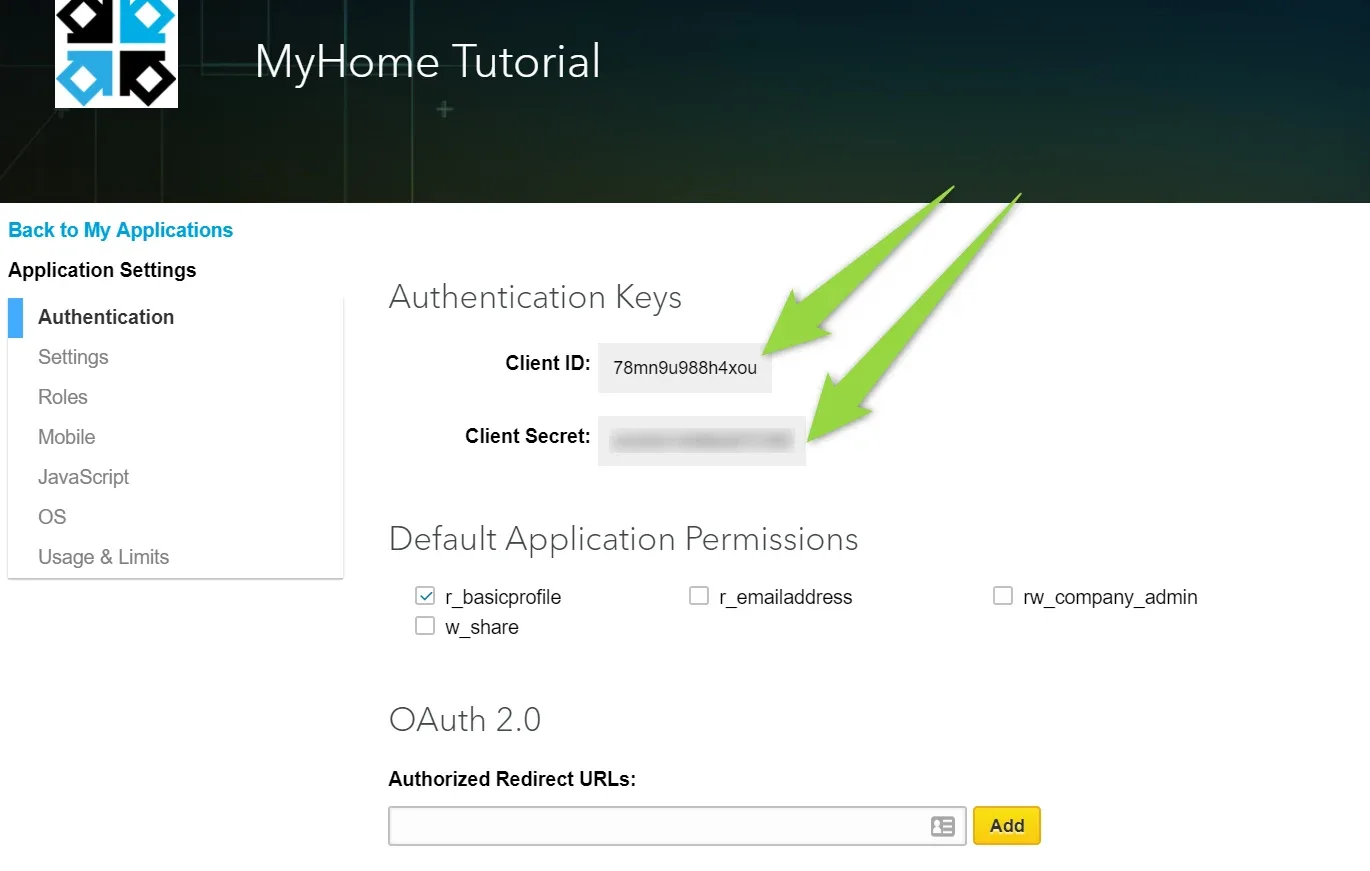
5
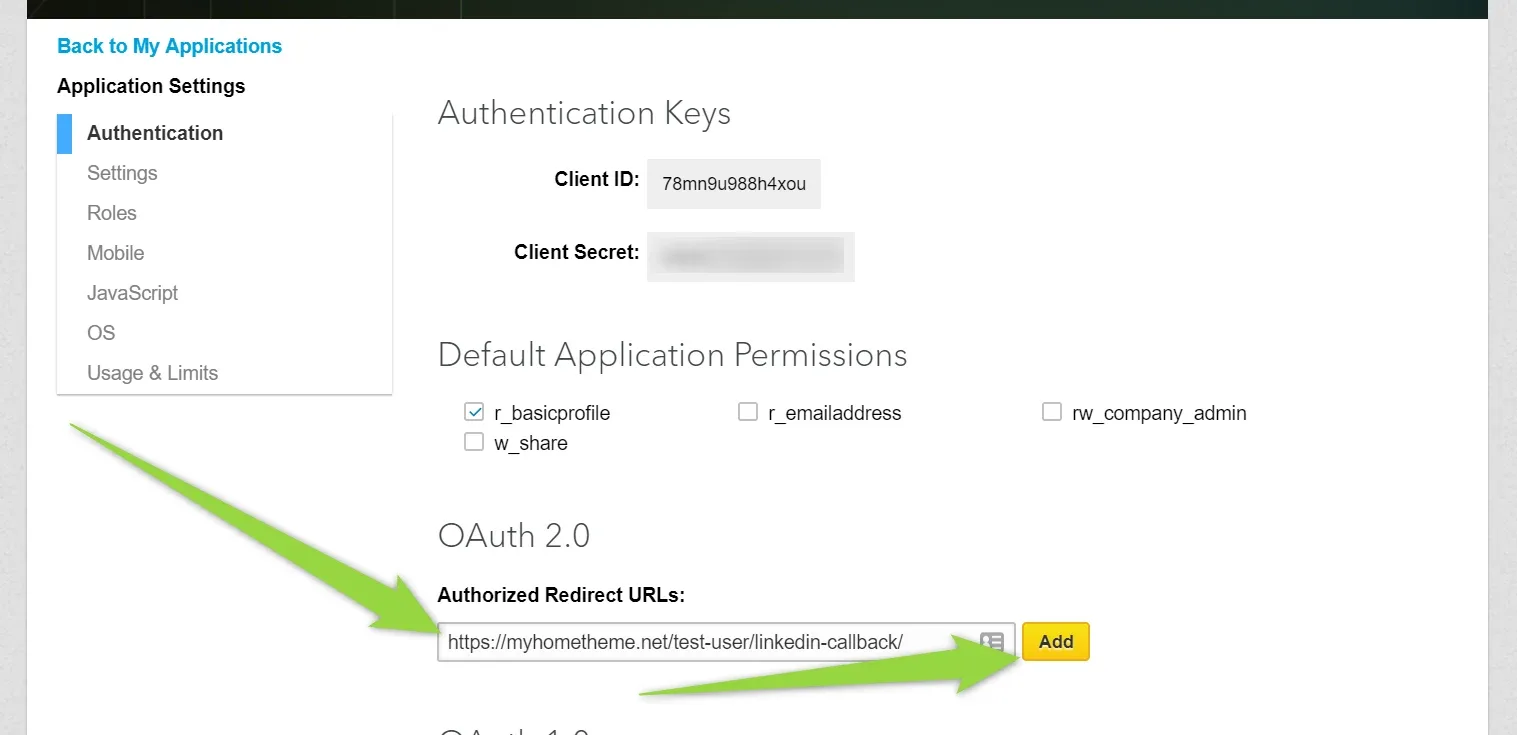
Copy Client ID and Client Secret into your MyHome Theme
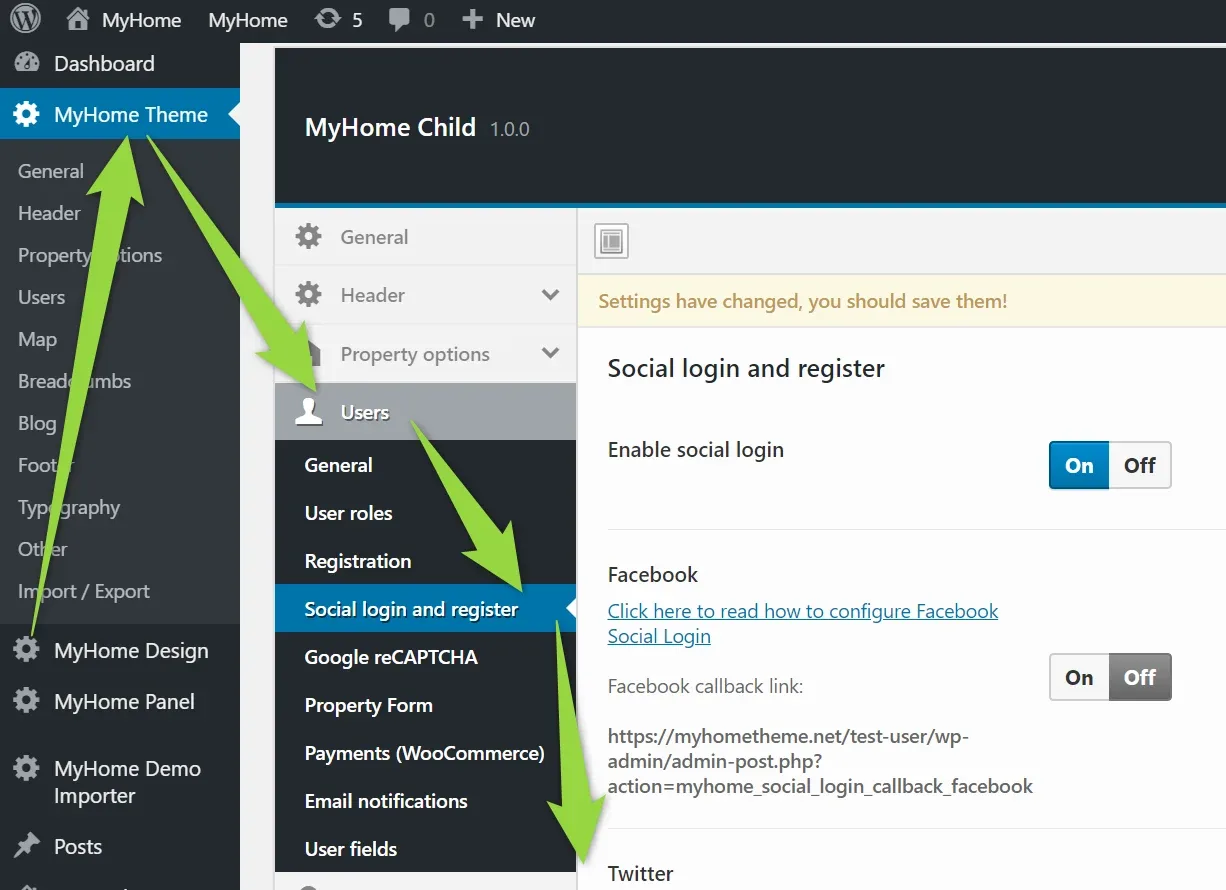
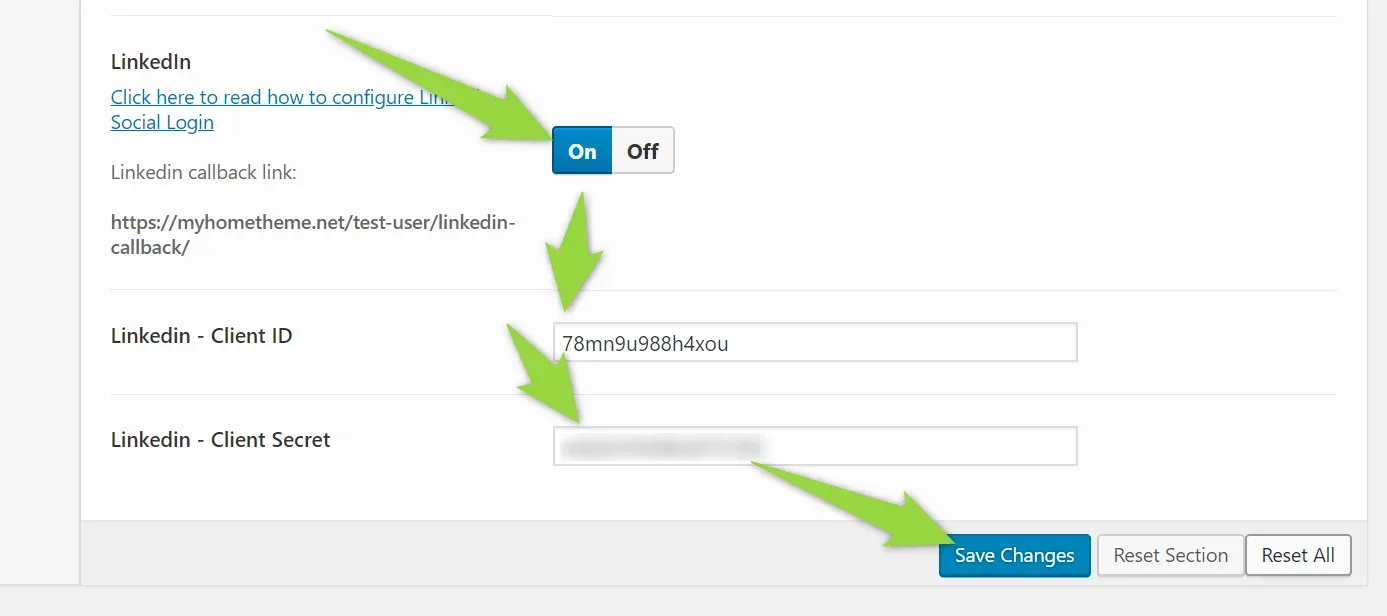
6. Click MyHome Theme - "Save Changes"
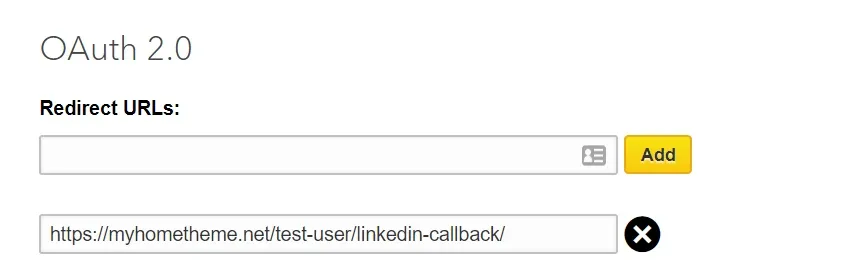
7. Copy Linkedin Callback url
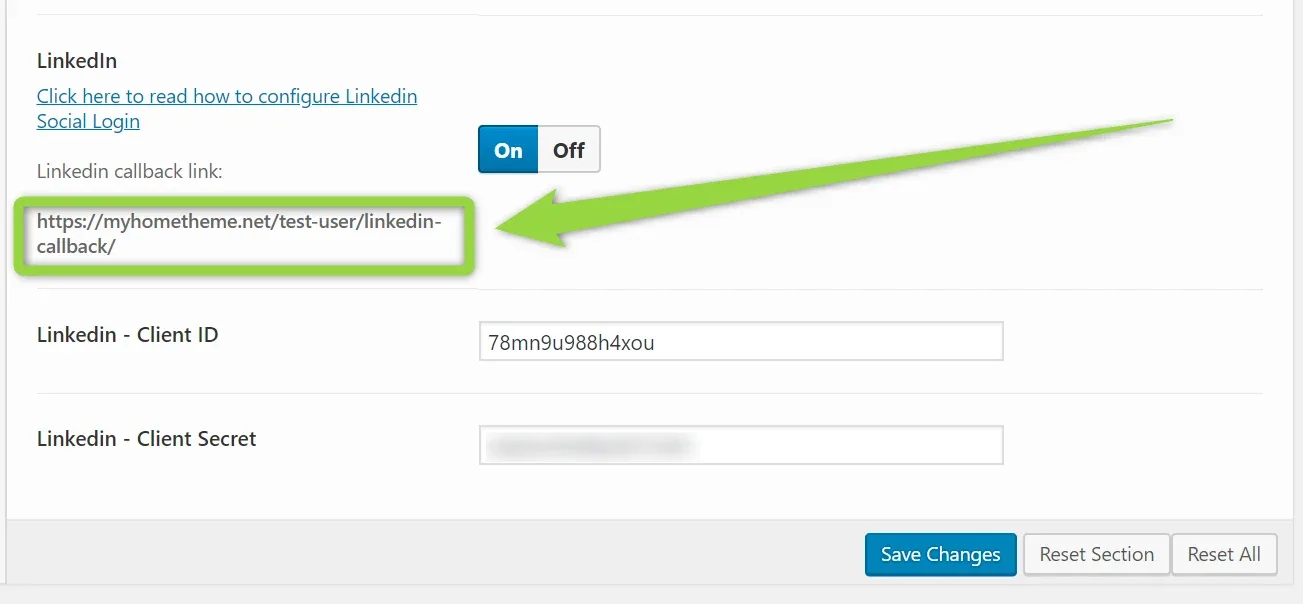
8. Paste it into app and click ADD
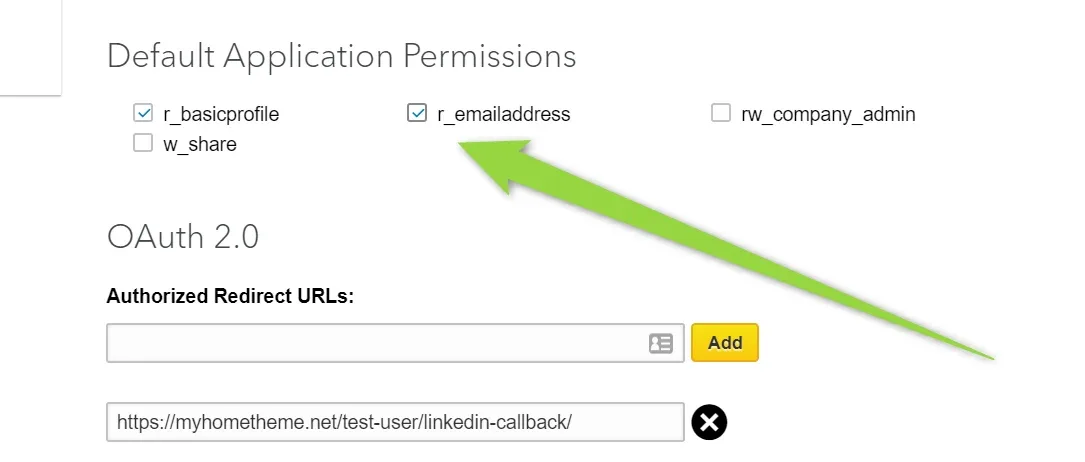
9. Check "r_emailaddress"
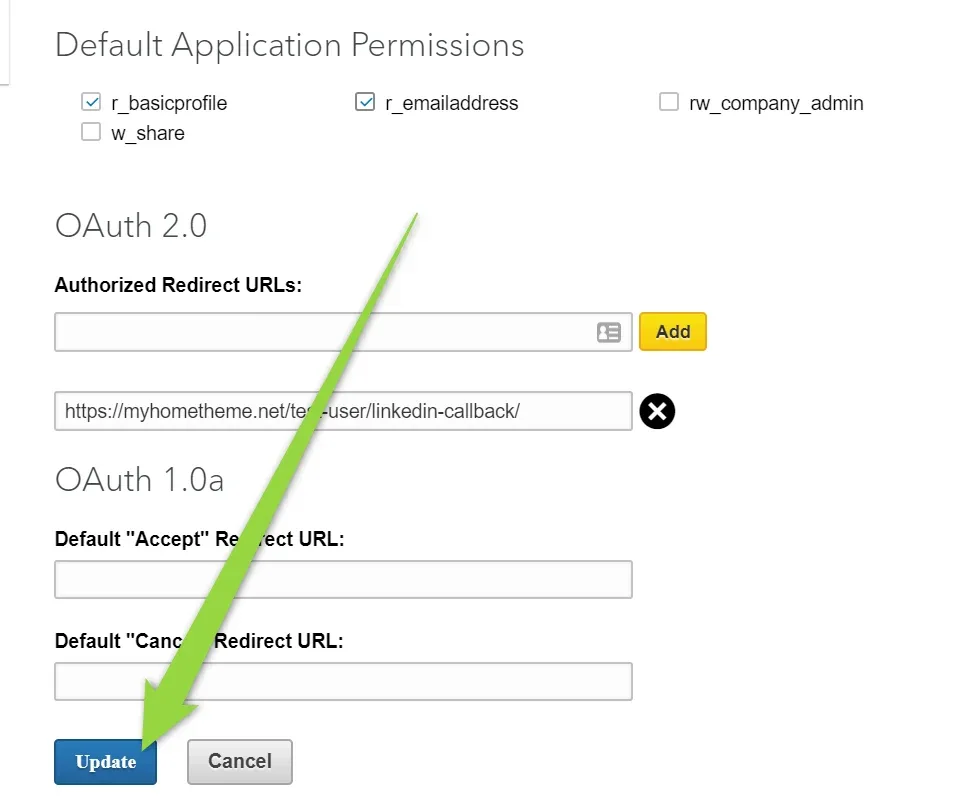
10. Click "Update"
Copy LinkedIn Call back url
11. Add LinkedIn "Redirect URLs" that can be found in your MyHome Theme >> Users >> Social Login and Register
Ask the people who build MyHome WPBakery
We answer by email from support@tangiblewp.com. With Premium Support, we also fix your site when something breaks.
We can also run your site for you, or build a new one.
Was this guide helpful?