How to create Button with dynamic link (e.g. VIN)
Register a small Elementor widget that prints a button whose link ends with the value of one of your custom fields, so every vehicle links to a different address — a VIN lookup, for example.
1 minute read
Add this code to your child theme functions.php file — you can read more about child themes here.
add_filter('vehica/widgets', function ($widgets) {
    class CustomButtonSingleCarWidget extends \Vehica\Widgets\Car\Single\SingleCarWidget
    {
        const NAME = 'vehica_custom_button_single_car_widget';

        /**
         * @return string
         */
        public function get_title()
        {
            return 'Custom Button (VIN)';
        }

        protected function render()
        {
            parent::render();

            $car = $this->getCar();
            if (!$car) {
                return;
            }

            $field = vehicaApp('car_fields')->find(function ($field) {
                /* @var \Vehica\Model\Post\Field\Field */
                return $field->getId() === 6671;
            });

            if (!$field) {
                return;
            }

            $value = $field->getValue($car);
            if (empty($value)) {
                return;
            }

            ?>
            <a class="vehica-button" href="https://anydomain.com/?vin=<?php echo esc_attr( $value); ?>">Button TEXT</a>
            <?php
        }
    }

    $widgets[\Vehica\Widgets\WidgetCategory::CAR_SINGLE][] = CustomButtonSingleCarWidget::class;

    return $widgets;
});
Customize the code
Three things in the snippet are placeholders:
Custom Button (VIN)— the name of the widget in the Elementor sidebar.Button TEXT— the text on the button.https://anydomain.com/?vin=— the address the button points to; the field value is added at the end.6671— the ID of the text field whose value you want to use.
6671 is the ID on the site in the screenshots. Look up the ID of your own field before you paste the code, otherwise the widget finds no field and prints nothing.You can check the ID of a text field in Vehica Panel > Custom Fields: open the field for editing and read the number in the browser address bar.
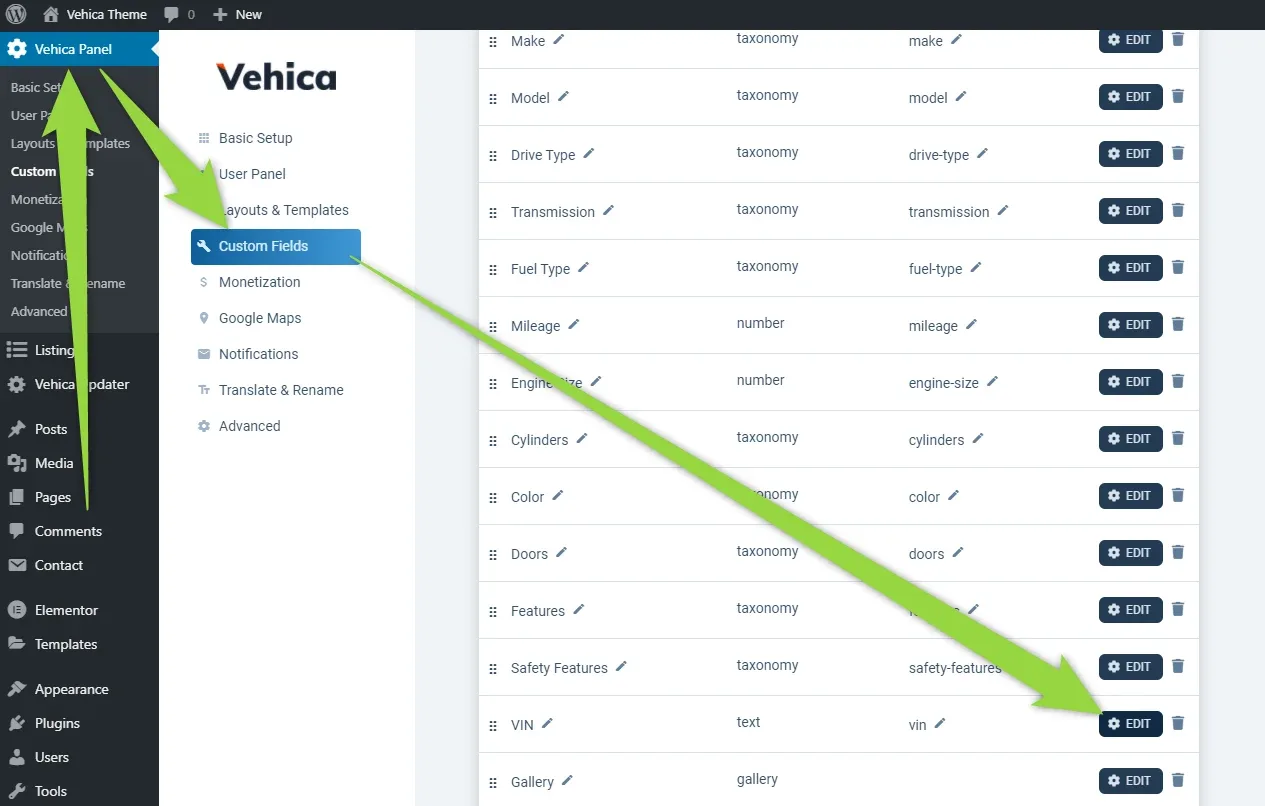
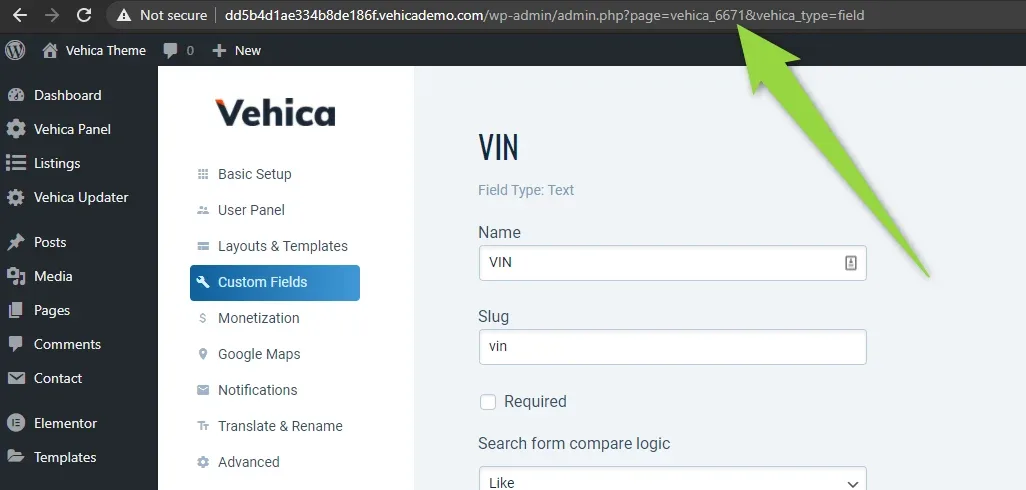
vehica_ in the address bar is the field ID.
Add the button to the single listing template
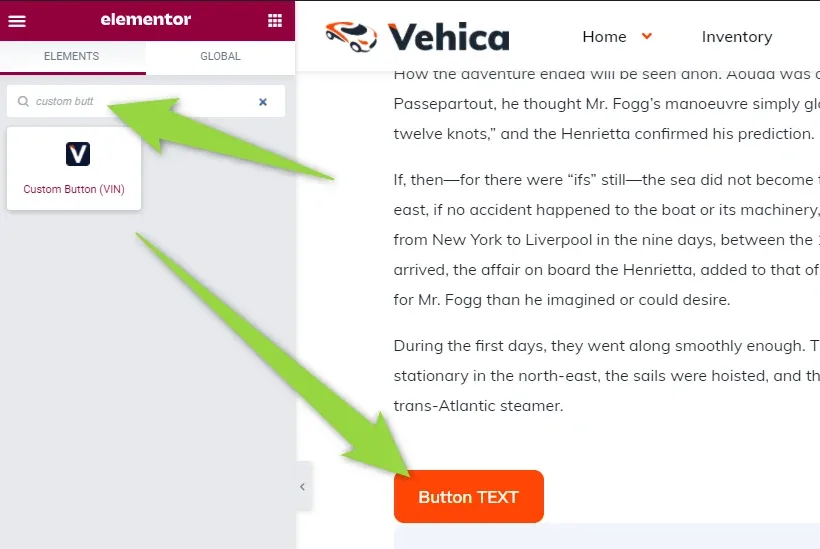
Once the code is in place, the widget appears in Elementor under the name you gave it. Edit your single listing template and drop it where the button should show up.
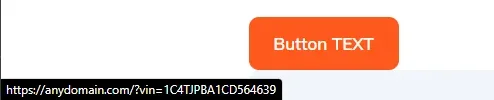
The rendered button carries the value of the field in its link, so each listing points somewhere different.
Ask the people who build Vehica
We answer by email from support@tangiblewp.com. With Premium Support, we also fix your site when something breaks.
We can also run your site for you, or build a new one.
Was this guide helpful?